Getting Started
Download & Install
Install iPhone Transfer on your Windows PC or Mac. Once the setup is finished, open the program to begin.
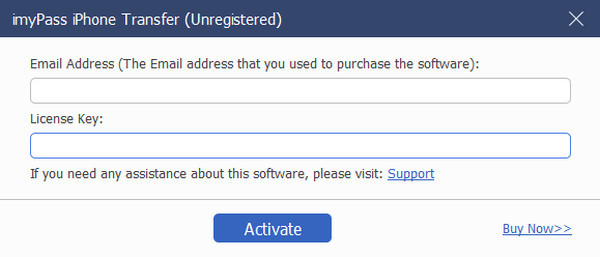
Register
After purchase, imyPass will send you a registration code by email. Enter your email address and paste the code into the registration box. When the code is accepted, the software will be activated, and you’ll have full access to all features.
Update Software
To update imyPass iPhone Transfer, you can go to the Menu at the top of the interface and click Check Update…, then it will detect if the current version is the latest. If not, follow the prompts to update. You can also download the newest release directly from the imyPass website.
imyPass Support
imyPass provides you with technical support via an online help guide. You can also contact our support team via support@imypass.com.
Tips
1. Starting from iOS 13, Apple has added stronger data protection. When you connect your device and run a scan, a pop-up will ask for your iPhone passcode. You’ll need to enter it to continue. During the scan, the system may ask you to confirm the passcode twice on your device.

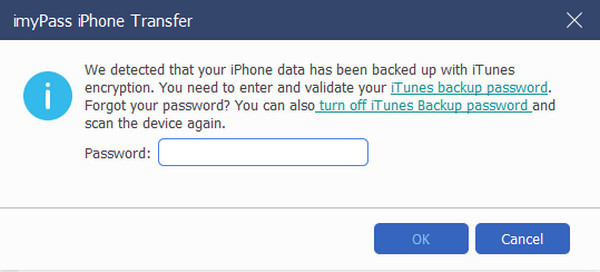
2. If your iOS backup in iTunes is encrypted, the software will request the encryption password. At the same time, you’ll also need to enter your iPhone passcode on the device to complete the verification.
3. If you are using a Windows computer, please ensure it has iTunes installed.
4. This iPhone Transfer is also an on-laptop iPhone file manager. You can manage your iPhone files, like bulk moving contacts to groups on a bigger screen.
Import Files to iDevice
With these steps, you can move music, photos, movies, TV shows, and other media between your computer and device. You can also sort music into playlists and place photos into albums for better organization. All the data will be sorted into different groups, just like on your iPhone, on the left side for easy browsing.
We will take importing photos to an iPhone as an example.
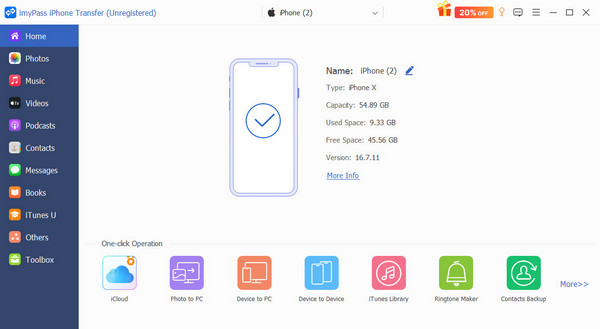
Step 1 Launch iPhone Transfer. Connect your iPhone, iPad, or iPod to your computer using a USB cable.
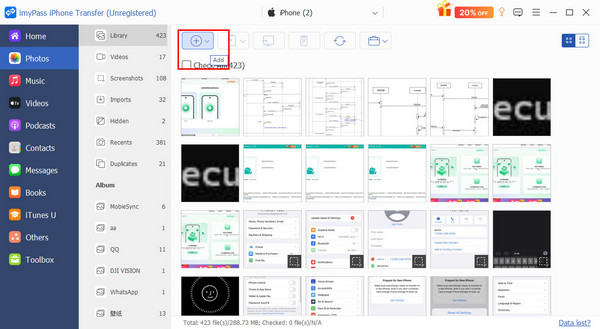
Step 2 Click Photos on the left panel. After a short wait, all photos on your device will appear in the program.
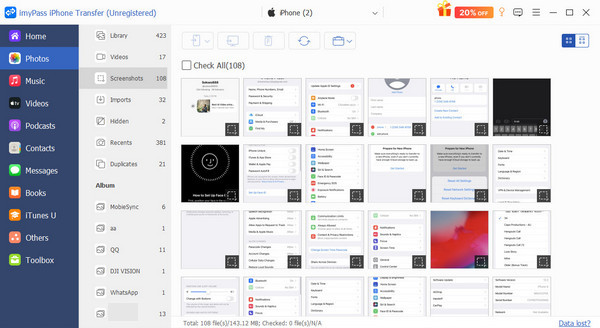
Step 3 To import files, press the Add button and choose the ones you want. Tick the file and click Open. (Note: due to iOS restrictions, you can’t add pictures directly to Camera Roll. Images can only be imported into the Photo Library.)
General File Transfer
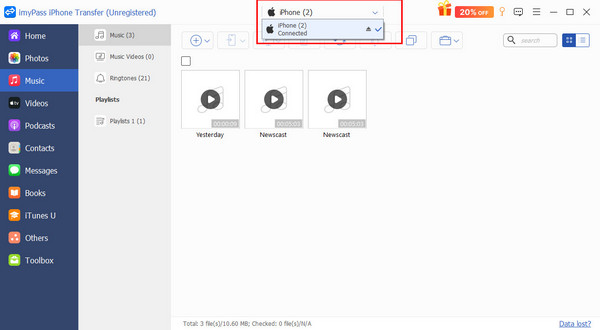
Step 1 On the main screen, click the name of the device you want to export from. Then select a file type from the menu on the left.
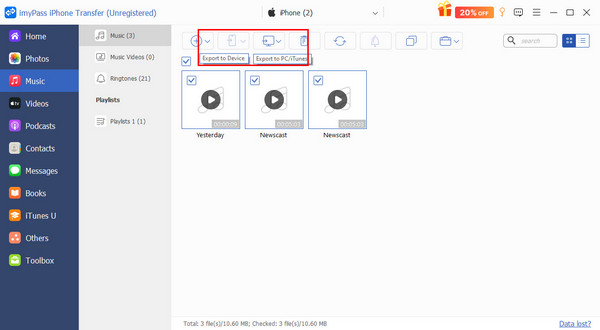
Step 2 After you pick a category, all files of that type will appear on the right. Select one or more items, then click the Export button at the top. (For contacts, use the Import/Export button instead.) By the way, if you want to export files to another iDevice, please make sure you have at least two iDevices connected.
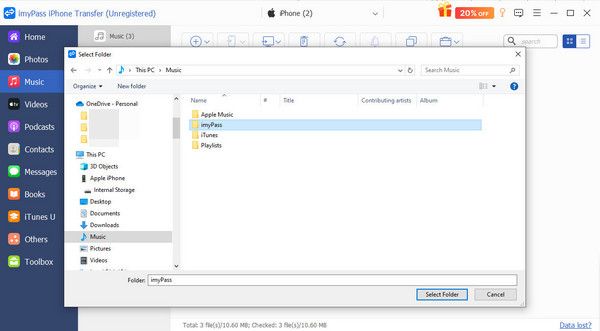
Step 3 Choose where you’d like to save the files and confirm the folder. After a short wait, the export will be complete.
One Click File Transfer
Step 1 Click Toolbox on the left bar and choose Device to Device or Device to PC.
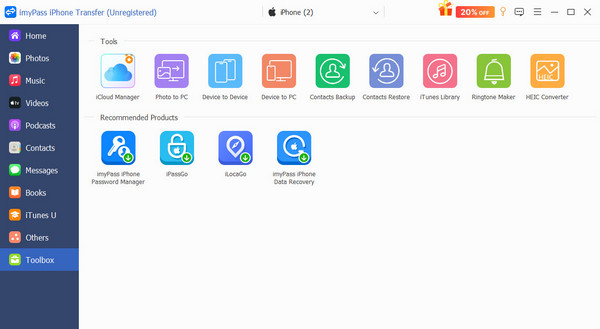
Step 2 Files like Photos, Music, Videos, Contacts, SMS, and Books will all be selected. You can move them all to a new iPhone device ot export to a laptop.
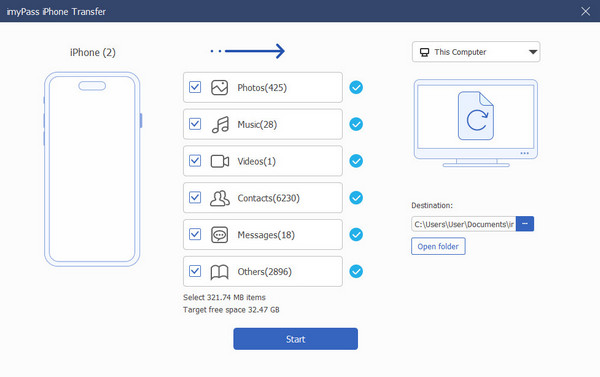
Step 3 Choose the destination on your laptop if you choose Device to PC.
Step 4 Click the Start button to move all these files.
Backup and Restore Contacts
You can click Contacts on the left and manage your iPhone contacts on your computer directly. This part will show you how to one-click to back up and restore contacts.
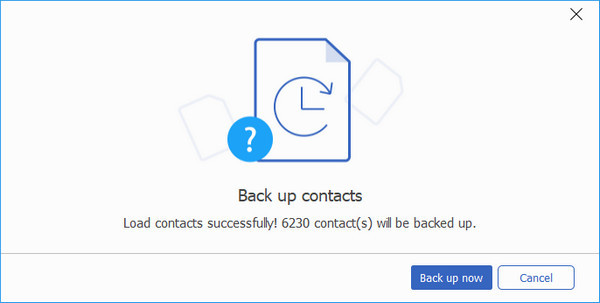
Step 1 Connect the iDevice(s) to the computer. Click Toolbox on the left.
Step 2 Click the Contacts Backup button at the top. Then, click Back up now. All contacts will be stored on your computer.
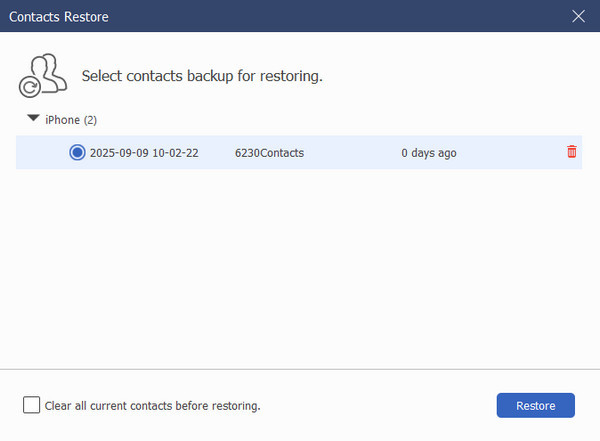
Step 3 Click the Contact Restore button to easily restore all contacts on another iPhone.
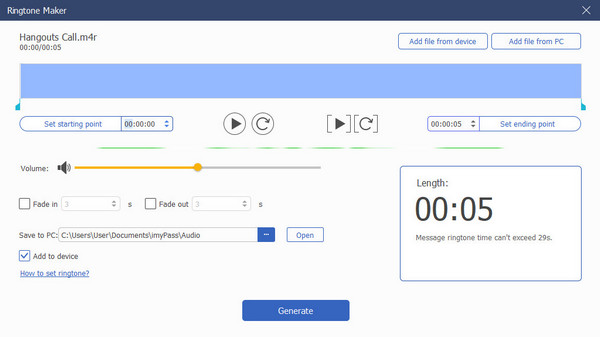
Make Ringtone
Step 1 Connect the iDevice(s) to the computer. Click Toolbox on the left.
Step 2 Click the Ringtone Maker button at the top. Then select an audio file from your iPhone or computer.

Step 3 Trim it and set the fade in/out and other effects. And follow the on-screen guide in the corner to set it as your iPhone ringtone.
Sync iTunes Music Without iTunes
Step 1 Connect the iDevice(s) to the computer. Click Toolbox on the left.
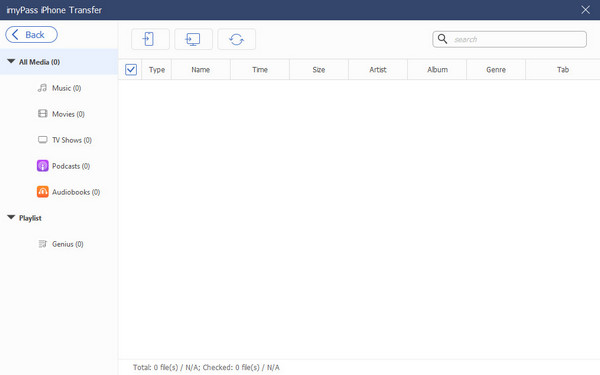
Step 2 Click the iTunes Library button at the top. You can choose from Sync Device to iTunes, Sync iTunes to Device, and View iTunes Library.
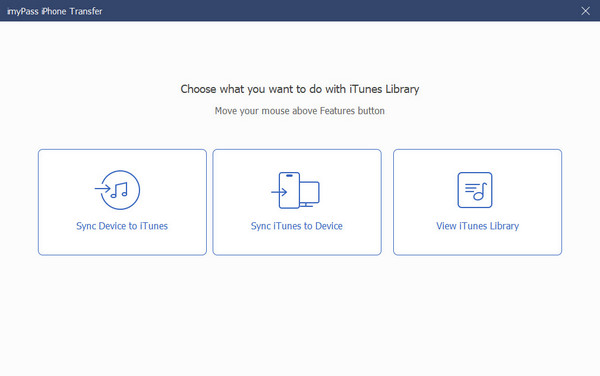
Step 3 All three functions won’t bulk sync your music. You can just select files and sync them.
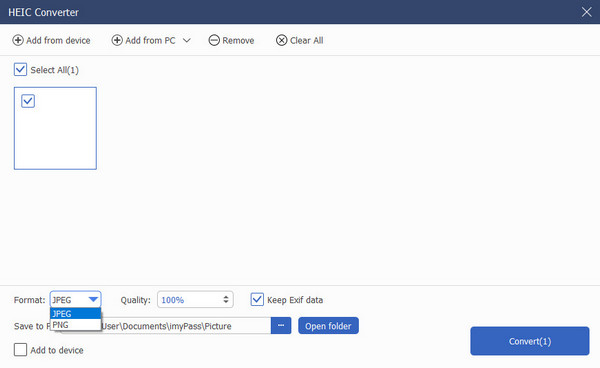
View and Convert HEIC
Step 1 Connect the iDevice(s) to the computer. Click Toolbox on the left.
Step 2 Click the HEIC Converter button at the top. And select the HEIC file.

Step 3 Choose the output format and quality, then click Convert.
 Windows Password Reset
 iPassGo
 iPassBye
 iPhone Password Manager
 AnyPassGo
 iLocaGo
 iPhone Data Recovery
 iPhone Transfer