A Concrete Tutorial to Share a Photo Album on iPhone
![]() Clara Prescott Published on December 25, 2025Transfer Data3-min reading
Clara Prescott Published on December 25, 2025Transfer Data3-min reading
Sharing a photo album on iPhone is a common way for people to connect and send memories with friends and family. Suppose you took a lot of photos at your child's birthday party, you can share all the photos in the album at one time with your family. The advanced design of iOS enables you to share multiple photos effortlessly, even if your friends and family don't have iOS devices.

In this article:
Part 1: What Is a Shared Album on iPhone
As its name indicates, shared albums allow you to share photos and videos with someone else. Since only people with the album link can see the media files, it enhances secure and private.
Moreover, the shared albums can be accessed not only on another Apple device but also on Android or Windows platforms.
According to Apple, you can put up to 5,000 photos and videos in a shared album. Plus, the maximum share size is 1GB. Unlike iCloud Photo Library or Photo Stream, the shared albums won't take up your iCloud storage. The photo formats supported by iOS can be saved in shared albums, like HEIF, JPG, PNG, GIF, TIFF, and RAW.
Part 2: How to Share a Photo Album on iPhone
By default, the Shared Albums feature is disabled. You need to turn it on manually. Then, you can create a shared album or share an exist album on your device for sharing an iPhone photo album.
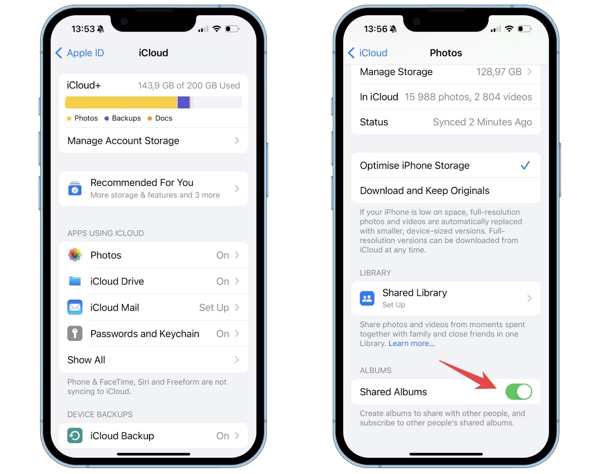
How to Turn on Shared Album on iPhone
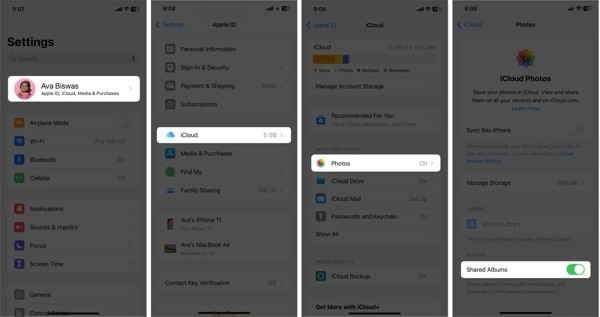
Run the Settings app on your iPhone.
Tap on your profile and choose iCloud.
Pick Photos and toggle on Shared Albums.
Note:
Or you can go to Settings, Photos, and toggle on Shared Albums.
How to Create a Shared Album on iPhone
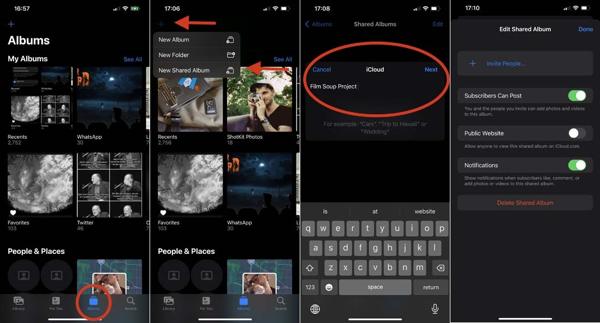
Open your Photos app.
Go to the Albums tab at the bottom.
Tap the Add button and choose New Shared Album.
Leave a name and tap Next.
Add a recipient's contact or ignore it, and tap Create.
Finally, hit Post to confirm sharing iPhone photos.
How to Share an Existing Album on iPhone
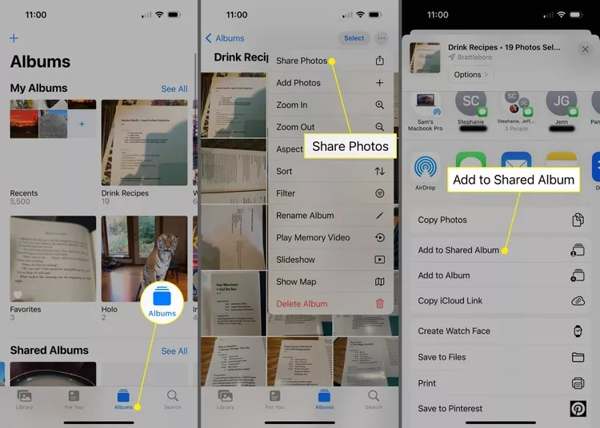
Long-press the album you want to share in your Photos app.
Choose Share Photos and tap Add to Shared Album.
Next, tap Shared Album and choose New Shared Album.
If you already have a shared album, select it to add them.
Type a name and tap Next.
Input a recipient's contact or keep the field empty, tap Next, and hit Post.
How to Add Photos to a Shared Album
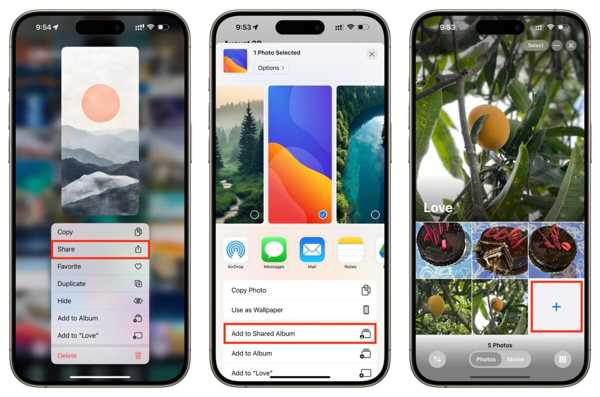
If you want to add more photos to the shared album, enter the Library album in your Photos app.
Select all photos you want to share and tap the Share button.
Choose Add to Shared Album and select the desired album, and tap Post to share photos on your iPhone.
Note:
Or enter the shared album, tap the Add button, and select the photos you wish to share.
How to Invite Friends and Family to Accept a Shared Album
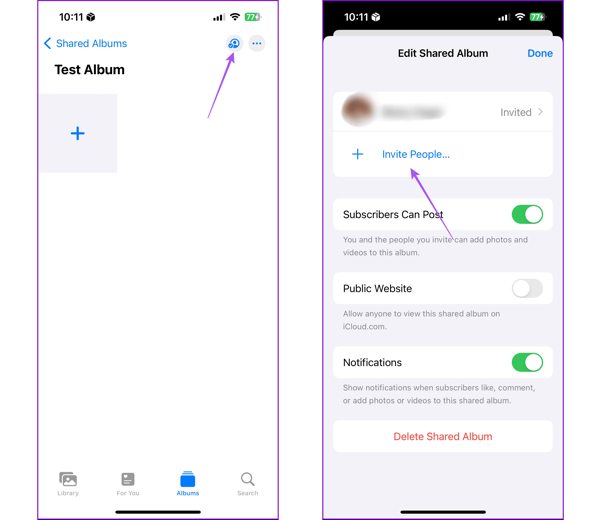
Go to the Shared Albums tab in the Photos app.
Choose the desired shared album.
Tap the People button at the top right corner.
Hit Invite People and add the contact number or email address.
Tap the Add button and hit Done.
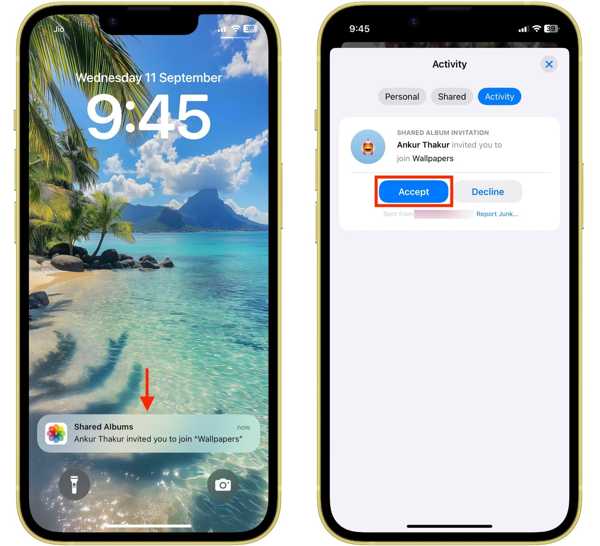
Turn to the recipient's device, tap the Shared Albums notification, and hit Accept.
Note:
If the recipients are using Android or Windows, toggle on Public Website on the Edit Share Album screen, and tap Share Link. Then, send the link via WhatsApp or other messaging apps.
How to Stop Sharing Photos on iPhone
Go to Settings on your iPhone.
Tap on your profile and choose iCloud.
Pick Photos and toggle off Shared Albums.
Part 3: What to Do If Unable to Share iPhone Photos
If you're unable to share iPhone photos, check your internet connection first. Moreover, you must turn on Shared Albums in your Settings app. Since Shared Albums work through iCloud, you must set up an iCloud account on your iPhone.
If you still cannot share photos, try an alternative solution, like imyPass iPhone Transfer. It enables you to share photos on an iPhone to a mobile device, PC, or Mac through a wired connection. Moreover, the intuitive interface simplifies the workflow.

4,000,000+ Downloads
Share iPhone photos to iPhone, PC, Mac, and other devices.
Work through a physical connection quickly.
Preview iPhone photos before sharing.
Support the latest versions of iOS and iPadOS.
How to Share iPhone Photos with a Cable
Connect to your iPhone
Start the best photo sharing software for iPhone after installing it on your PC. There is another version for Mac. Plug your iPhone into your PC with a Lightning cable. Once the software detects your device, it will scan all data on your iPhone.
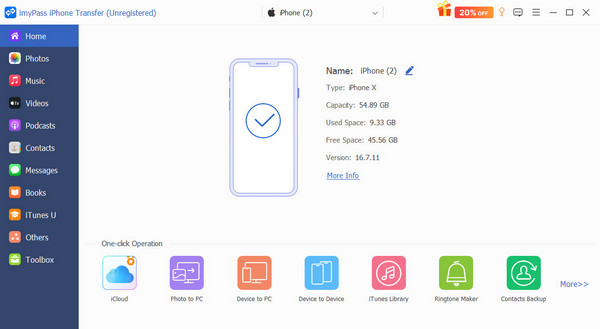
If you want to share iPhone photos with another mobile device, connect it to your computer with a compatible cable, too.
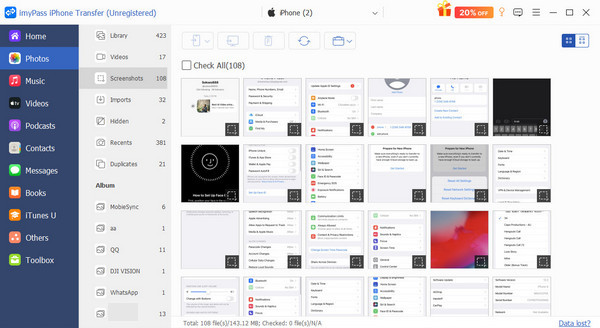
Preview photos
Next, go to the Photos tab on the sidebar and view all photos on your iPhone. You can organize them in albums. You can also select contacts to share contacts on iPhone.
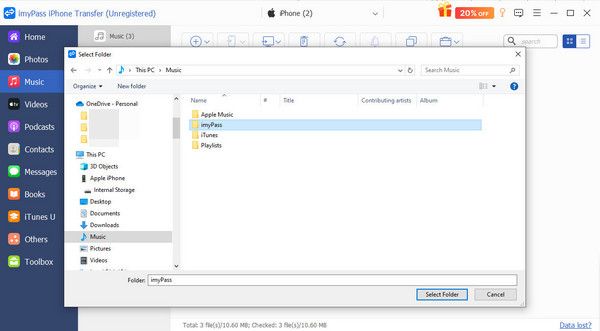
Share iPhone photos
Select the photos you want to share, click the PC button on the top ribbon, and choose Export to PC. Set an output folder and confirm the sharing. To share iPhone photos with another mobile device, click the Phone button instead and select the recipient phone.
Conclusion
This guide explained how to share an iPhone photo album with another iOS device, an Android phone, a Windows or Mac computer. The built-in Shared Albums feature enables you to complete the job wirelessly. If the Shared Albums feature is unavailable, you'd better try an alternative solution, like imyPass iPhone Transfer. It simplifies the workflow of photo sharing on iOS devices.

Clara is an editor from imyPass. She specializes in data recovery. You can find professional tutorials and solutions for recovering lost data from any device. Many users reported that his tutorial is easy and useful.
Hot Solutions
-
Transfer Data
-
Recover Data
-
Unlock iOS
-
iOS Tips
