How to Copy iPhone Voice Memos to PC in Minutes Easily
![]() Clara Prescott Published on November 14, 2025Transfer Data3-min reading
Clara Prescott Published on November 14, 2025Transfer Data3-min reading
Voice Memos is one of the most underrated features on the iPhone. It can help you capture inspiration, save meeting content, and even replace text messages to make communication more natural. However, after recording, many people get stuck at the step of how to send a voice memo on iPhone. In fact, whether you want to send it to friends, colleagues, or transfer it to your computer for storage, there are more efficient ways. This article will introduce several practical and convenient methods for sending, allowing you to share and transfer your recordings anytime, anywhere.

In this article:
Part 1. How to Record and Send a Voice Message on Your iPhone
The convenience of voice messages lies in their ability to convey tone and emotion more directly than text. Whether leaving a message for a friend or recording meeting notes, mastering the skills of recording and sending voice messages on an iPhone can make communication more efficient.
Open the Messages app on your iPhone and go to the conversation where you want to send a voice message.
Press the plus button on the left side of the input box, select Audio, and get ready to start recording.
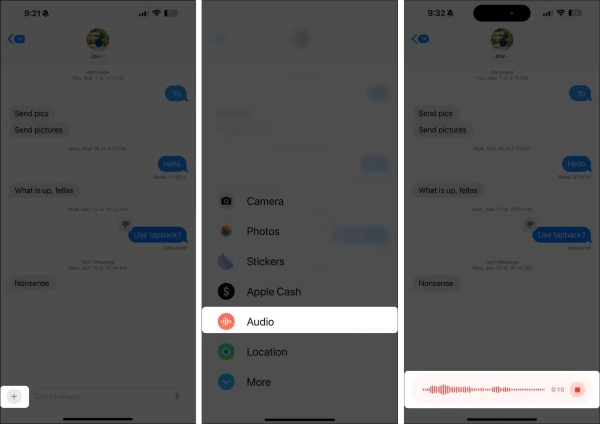
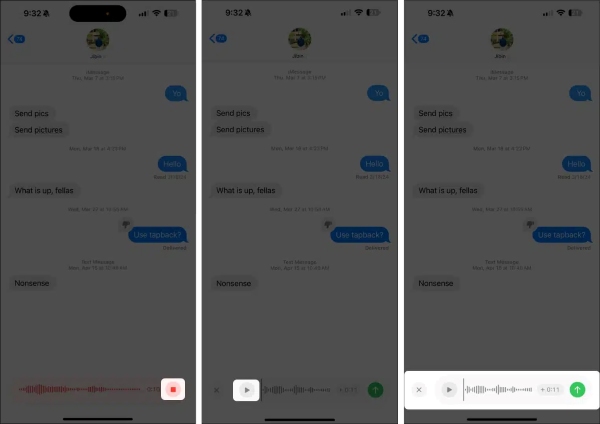
After recording, tap the red button on the right again to stop. You can also tap the play button on the left to listen to the recording.
Once everything is confirmed, tap the green send button to send the voice message directly to the recipient.
With this method, you can quickly complete the operation of how to send a voice memo on an iPhone without extra apps or complicated settings.
• Check the volume and microphone direction before recording to ensure clear audio.
• If you want to share the same voice memo with multiple contacts, you can first send it to yourself and then forward it.
Part 2. How to Listen and Reply to a Voice Message on Your iPhone
After receiving a voice message, mastering the methods for quickly listening and replying can make communication smoother. The built-in Messages feature on the iPhone allows you to perform these actions without any additional apps easily.
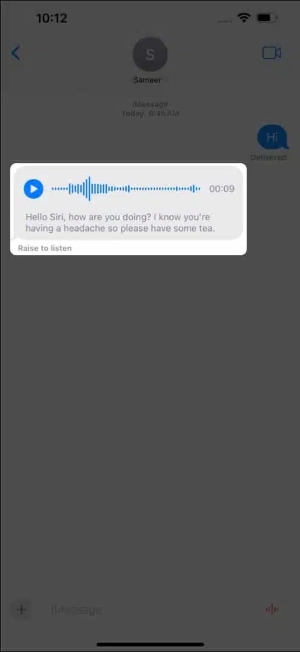
Open the Messages app and go to the conversation containing the voice message. Tap the play button on the voice bubble to listen. To jump to specific content, you can drag the playback progress bar to navigate quickly.
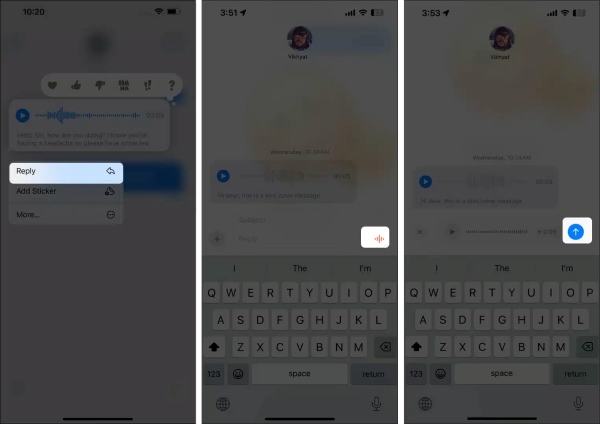
If you want to continue replying to this message with a voice message after listening, long-press this voice message and select Reply from the pop-up.
Then press and keep holding the Record button to record your voice reply. Release the button, and the recording will automatically appear in the conversation.
Click the Send button and send the voice message to the other party immediately.
Long-press the voice message bubble to save it to the voice memo, which is convenient for future organization or backup. If any information is accidentally deleted, you can also easily recover the deleted voice memos.
Part 3. How to Transfer Voice Memos from Your iPhone to Computer
After recording voice memos, many users want to save the files to their computer for backup or editing. If you are also looking for efficient ways on how to transfer voice memos from iPhone to computer, then the following methods are available for you to choose from.
Best Third-Party Tool
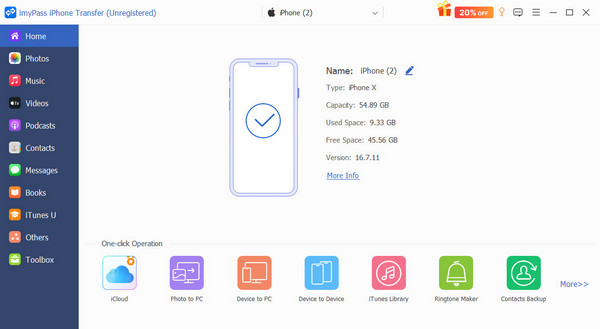
Using professional tools is undoubtedly the most time- and effort-saving choice. imyPass iPhone Transfer is a comprehensive data transfer tool that allows you to freely transfer voice memos, photos, videos, music, and various other data formats between your iPhone and computer.

4,000,000+ Downloads
Supports one-click export of voice memos to Windows or Mac without iTunes.
Preserves the original audio quality without compression or damage.
Allows batch management of voice memos, contacts, messages, and other files.
100% data security guaranteed, with no risk of leaks.
After opening the software on your computer, connect the iPhone containing the voice information to the computer. The system will automatically recognize your device information.
After confirming that everything is correct, select the Messages section in the left category bar. You can then choose all the voice messages you want to export.
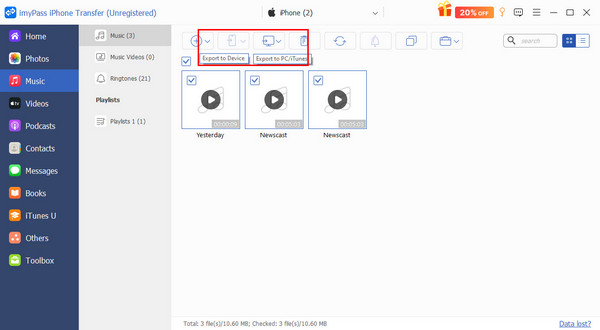
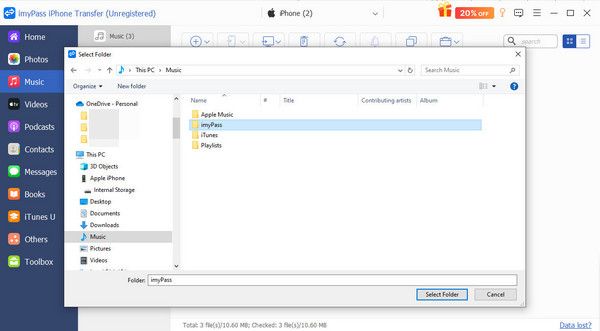
Once you have made your selection, click the Export to PC option at the top of the page. Choose the storage path you need, and then click again to complete the process.
iTunes
If you prefer to use the official method, you can also sync voice memos to your computer via iTunes.
After connecting your device to the computer, open iTunes.
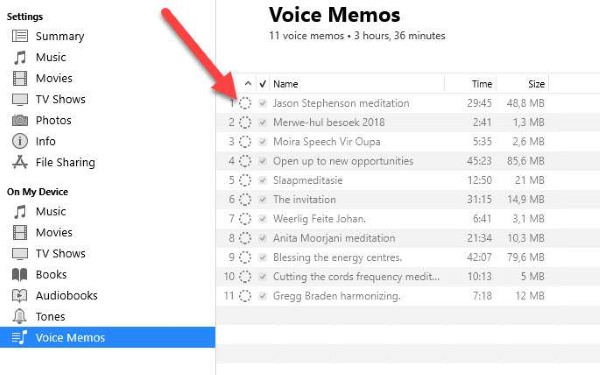
Click the Device button and select Voice Memos from the left-hand menu.
Check the voice memos you want to transfer, then click Apply.
Once completed, the corresponding recordings can be found in your computer's music folder.
This method is suitable for users who need long-term backups, but it requires syncing each time, and you also need to remember your iTunes backup password, making the process relatively cumbersome.
iCloud
If you want to transfer voice memos wirelessly, you can use iCloud to sync them automatically. The steps are as follows:
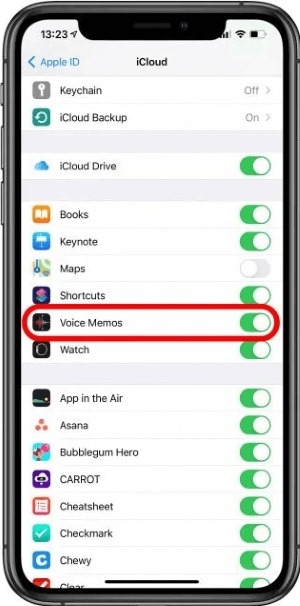
On your iPhone, go to Settings > Apple ID > iCloud.
Turn on the Voice Memos sync switch.
You can view the recordings by logging in to iCloud.com or through iCloud Drive on your computer.
If you only need to transfer a small number of voice memos, you can send them directly via email.
Go to the Voice Memos app and select the recording you want to share.
Tap Share > Mail. Please enter the recipient's email address and send it.
Open your email on the computer to download the recording file.
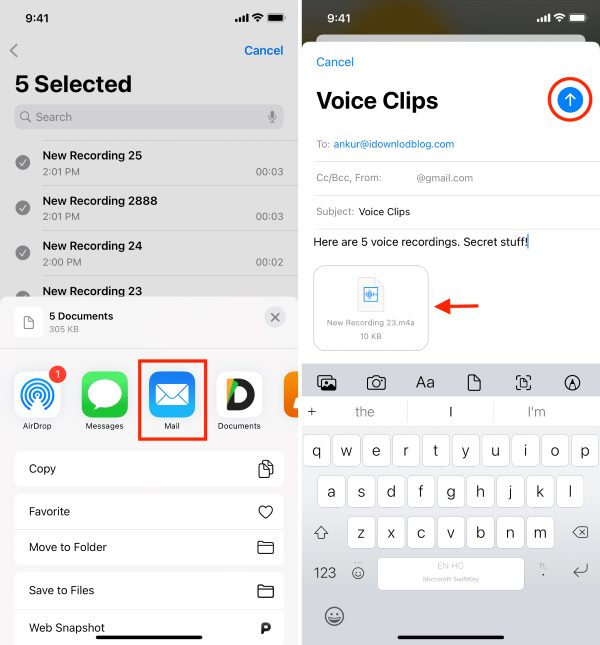
This is the simplest way to download a voice memo from an iPhone to a PC, but if the file is too large, it may be limited by the email attachment size.
The above methods can all help you solve the problem of getting a voice memo off an iPhone. If you value transfer speed and data integrity, imyPass iPhone Transfer is the most recommended choice.
Conclusion
Whether you want to quickly send voice messages on iPhone or are looking for an efficient solution on how to copy voice memos to PC, the key is to find a method that is both safe and stable. Compared to traditional iTunes or iCloud, imyPass iPhone Transfer, with its faster synchronization and simpler operation, undoubtedly better meets everyday needs. Download and start using it now to make managing your voice files smarter and more efficient.

Clara is an editor from imyPass. She specializes in data recovery. You can find professional tutorials and solutions for recovering lost data from any device. Many users reported that his tutorial is easy and useful.
Hot Solutions
-
Transfer Data
-
Recover Data
-
Unlock iOS
-
iOS Tips
