Transfer Files Between iPhone and Computer - Complete Guide for 2026
![]() Clara Prescott Published on October 23, 2025Transfer Data3-min reading
Clara Prescott Published on October 23, 2025Transfer Data3-min reading
Wondering how to transfer files from iPhone to PC without the usual hassles? Many users struggle when trying to move documents, PDFs, videos, and more, not just photos, because iTunes can feel restrictive, and cloud storage often has limitations. Whether you need to back up important work files, share large videos, or simply free up storage, finding the right method makes all the difference. In this guide, we will walk you through the best solutions, from dedicated software like imyPass iPhone Transfer to traditional USB connections, local network sharing, and cloud services, so that you can move every file type effortlessly.

In this article:
Part 1. Best Way to Transfer Files Between iPhone & Computer
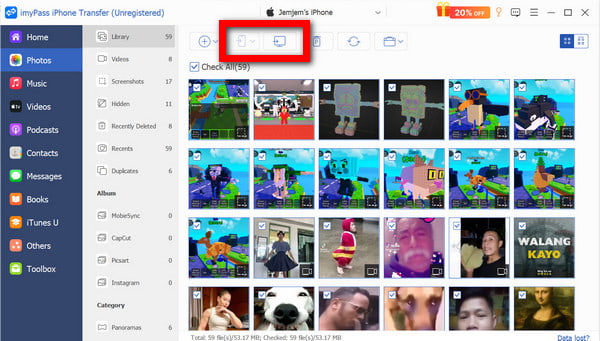
To transfer data between your computer and your iPhone, imyPass iPhone Transfer is a good choice for seamless and efficient transfers. This iOS data management tool is a viable substitute for iTunes as it allows you to freely transfer, sync, and organize files on your iPhone. The software allows you to manage your photos, music, contacts, messages, videos, notes and more, all without restrictions. Its comprehensive features, combined with a user-friendly interface, make it easy to manage your files.

4,000,000+ Downloads
Transfer files between your iPhone and computer with ease.
Move photos, videos, music, contacts, messages, notes, calendars, and call logs.
Fast, secure transfers without data loss.
Manage photos, contacts, and music on PC with easy edits and organization.
Convert HEIC to JPG/PNG, set ringtones, and sync iTunes without iTunes.
Install imyPass iPhone Transfer, then launch the program. You can download it for free on the imyPass website.
Connect your iPhone, iPad, or iPod to your computer via USB cable. The tool will recognize and automatically open your iOS device.

Select the file type you wish to transfer, which can include Photos, Videos, Music, Contacts, or others.
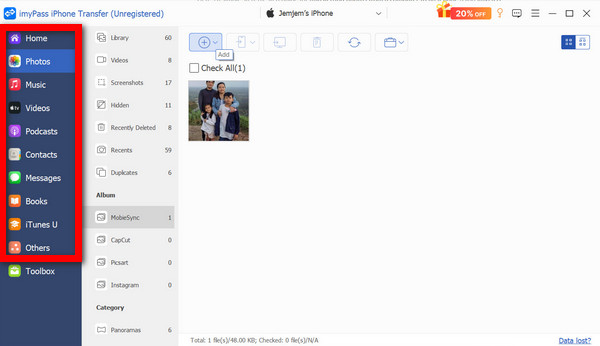
Optionally, you can select files to transfer from your computer to your iPhone or click Export to PC to send files to your computer.
Part 2. How to Transfer Files Using a USB Cable
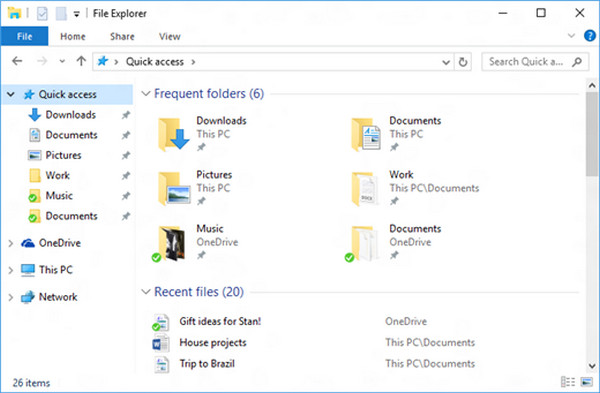
1. Via Windows File Explorer
While USB-connected iPhones will have their photos ready for a quick upload and are recognized by Windows as a digital camera, you will find this method to be limited. You will also not be able to transfer other file types, such as music, documents, or app data.
Use a USB cable to connect your iPhone to your Windows PC.
Unlock your iPhone. If a message appears about trusting the computer, accept it.
On your PC, open File Explorer. Your iPhone will show under This PC as a portable device.
Double-click your iPhone, then go to Internal Storage. Then go to DCIM.
Copy and paste the photos or videos you wish to transfer to your computer.
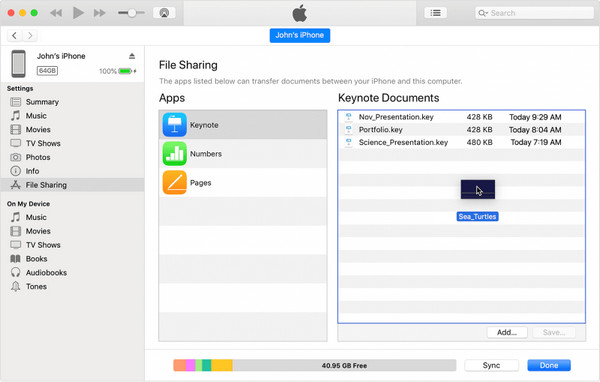
2. Using iTunes
iTunes is more flexible than File Explorer. Apart from photos and videos, you can also sync music, documents, and installed app files. You can sync using USB or Wi-Fi.
Download and install the latest version of iTunes on your PC.
Connect your iPhone to the computer and open iTunes.
Click the Device button and choose File Sharing.
Select an app that supports file sharing and click Add to choose files from your PC.
The files will be in the selected app on your iPhone.
Part 3. How to Transfer Files Using a Local Network
1. LocalSend (Open-Source Software)
LocalSend is a tool for cross-platform file sharing over a local network. It can transfer files quickly as it does not use external servers. LocalSend is open-source and free software.

Download LocalSend on your iPhone and computer. For your iPhone, download from the App Store.
Ensure both devices are on the same Wi-Fi.
Open LocalSend on both devices. Your computer and iPhone should instantly recognize one another.
On your computer, select the target files and choose your iPhone as the receiver.
On your iPhone, approve the transfer to receive the files.
2. Microsoft Phone Link
Using the Phone Link app together with Link to Windows on your iPhone, one can share files and receive notifications from an iPhone on a Windows PC.
Make sure Phone Link is on your Windows 10/11 PC, or download it from the Microsoft Store.
On your iPhone, download Link to Windows from the App Store.
Sign in using the same Microsoft account on both devices.
Your iPhone can be linked to your PC by a QR code or a pairing code.
On your PC, right-click a file > Share > Phone Link.
Part 4. How to Transfer Files Using Cloud Services
1. iCloud Drive
iCloud Drive is an Apple brand cloud service, allowing cross-platform syncing with iOS, iPadOS, macOS, and Windows. It lets you store documents, photos, and videos on iCloud Drive, where you can share, access, or even download iCloud Photos anytime across your devices.
Install the iCloud Windows app on your computer and sign in with your Apple ID.
To enable the iCloud Drive, tick the check box next to it in the control panel.
On your Windows computer, open This PC to find the iCloud Drive folder.
You can then copy files from your computer to this folder.
To access the files on your iPhone, open the Files app and go to Browse > iCloud Drive.
2. Third-Party Services
Easy access and cross-device file control are made possible with services like Google Drive, OneDrive, and Dropbox. Beyond storage, features such as Google location tracking show how seamlessly Google integrates tools, letting you upload documents, photos, videos, and more from your PC to the cloud and access them anytime on your iPhone.
Install the cloud app (Google Drive, Dropbox, or OneDrive) on your PC and iPhone.
Use the same account to sign in on both devices.
Upload files to the cloud app from your PC.
To access and download the files you uploaded, open the appropriate app on your iPhone.
Conclusion
All in all, learning how to get files from an iPhone to a computer does not have to be complicated. From quick USB transfers and iTunes syncing to wireless local network tools and cloud services, there is a method suited for every need. For the fastest and most flexible option, imyPass iPhone Transfer is highly recommended, but whichever method you choose, you’ll be able to manage and access your files with ease.

Clara is an editor from imyPass. She specializes in data recovery. You can find professional tutorials and solutions for recovering lost data from any device. Many users reported that his tutorial is easy and useful.
Hot Solutions
-
Transfer Data
-
Recover Data
-
Unlock iOS
-
iOS Tips
