Best Ways on How to Transfer Pics from iPhone to iPhone Fast
![]() Clara Prescott Published on November 14, 2025Transfer Data3-min reading
Clara Prescott Published on November 14, 2025Transfer Data3-min reading
When you get a new iPhone, the next question is how to keep your photo memories from the old one. Whether you want to move all pictures or just a few favorites, this guide will show you how to transfer photos from iPhone to iPhone quickly and efficiently, so you can start enjoying your new device right away.

In this article:
Method 1. Using Quick Start
If you just got a new iPhone and want to transfer the photos, settings, and data from your old phone right when you turn it on, Quick Start is the ideal solution. It establishes a secure connection via Bluetooth and automatically guides the entire transfer process during the new device's activation, requiring almost no manual operation.
Turn on the new iPhone and bring it close to the old device, ensuring that Bluetooth is enabled on both phones.
A prompt will appear on the old iPhone's screen; select Set Up New iPhone.
Use the old device to scan the animation on the new iPhone to complete identity verification.
Follow the on-screen instructions and choose Transfer Data from iPhone.
Keep both devices close together and wait for the transfer to complete.

Quick Start is Apple's official tool specifically designed for device migration. It can transfer all photos from iPhone to iPhone at once. Its advantages are security, efficiency, and no need for additional devices, making it one of the best ways to transfer photos from iPhone to iPhone currently.
Method 2. Using the Best Third-Party Tool
Although Apple offers various official transfer methods, many users still hope for a more flexible, controllable, and unrestricted solution. At this point, using professional third-party tools can be a more efficient choice. imyPass iPhone Transfer is a multifunctional transfer software rather than just an iPhone-to-iPhone photo transfer. Whether you want to sync your entire photo album or only select specific photos, it can complete the operation within minutes.

4,000,000+ Downloads
Intuitive interface, easy to use without technical experience.
Supports offline transfer, no need for Wi-Fi or iCloud login.
Does not compress images after transfer, maintaining original clarity.
Supports multiple types, and can also sync music, contacts, videos, and other data.
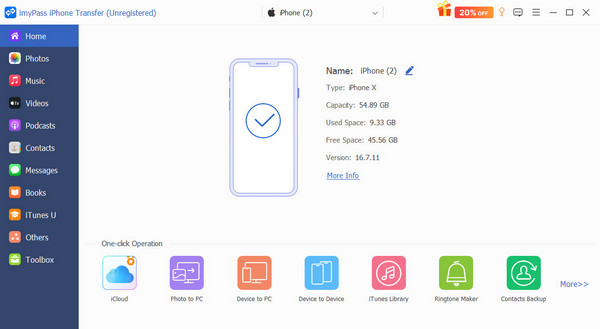
After opening the latest version of imyPass iPhone Transfer, connect two iPhones using a data cable. The program will automatically recognize the devices.
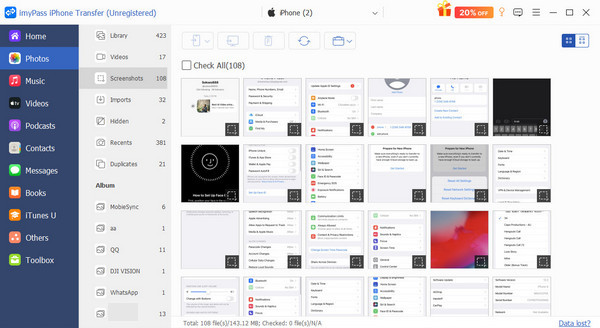
On the left side of the interface, select Photos to preview all album contents.
Check the pictures you want to transfer, and click the Export to Device button at the top.
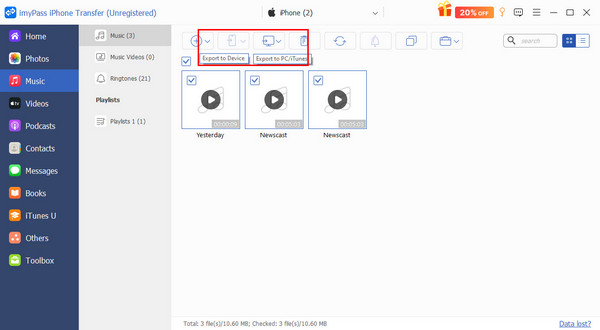
Wait for the system to complete the transfer, and then you can view all the pictures on the target iPhone.
If you are looking for the fastest way on how to transfer pictures from iPhone to iPhone, this tool makes the entire process more flexible, stable, and efficient. For users who need to transfer a large number of files at once, it is undoubtedly one of the most reliable solutions.
Method 3. Using AirDrop
If you want to know how to transfer photos from iPhone to iPhone quickly, AirDrop is undoubtedly the most convenient choice. It uses Bluetooth and Wi-Fi to establish a direct peer-to-peer connection, allowing instant transfer without any cables or third-party apps. Whether it's a few travel photos or an entire album, the transfer can be completed in seconds, making it ideal for users who want to share temporarily or migrate certain pictures.
Open the Control Center on both iPhones to ensure that Bluetooth and Wi-Fi are enabled.

Open the Photos app and select the pictures you want to transfer.
Tap the Share button, then choose AirDrop.
Confirm the transfer request on the receiving device, and the system will automatically receive and save the photos.
AirDrop is compatible with almost all newer iPhone models and is a method for transferring photos from iPhone to iPhone without using a data cable. It is secure and fast, and retrieving AirDrop files later is very convenient. This feature is an ideal solution designed by Apple for close-range sharing.
Method 4. Using iCloud Photos
If you want to automatically sync all your photos after switching devices without having to do it manually, iCloud Photos is the most reliable choice. It stores your photos in the cloud, ensuring that every photo is updated across different devices in real time. This makes it ideal for users who want to know how to transfer photos to a new iPhone, perform a complete backup, or switch to a new iPhone.
On your old iPhone, open Settings, tap your Apple ID, and then select iCloud.
Enable the Photos option and turn on Sync this iPhone. The system will automatically upload your photos to iCloud.
On your new iPhone, log in with the same Apple ID and also enable iCloud Photos.
Once connected to Wi-Fi, all photos will automatically sync and download to the new device.

However, it should be noted that iCloud only offers 5GB of free storage, and if there are many photos, you may need to upgrade your storage capacity.
Method 5. Using iTunes
For users who prefer traditional methods, iTunes remains a reliable choice. By backing up photos to a computer and then importing them, transfers can be completed without an internet connection, making it ideal for situations with unstable network conditions or insufficient iCloud storage.
Check that you're using the latest version of iTunes. Open it on your computer, and link your old iPhone with a data cable.
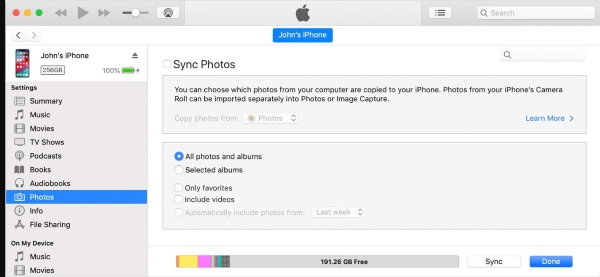
Click the Device button in the top left corner and select the Photos option.
Check Sync, and wait for iTunes to complete the backup.
Unplug your old device, then connect your new iPhone.
In iTunes, select Restore from Backup to sync the photos to the new device.
Although the steps are slightly more numerous, it can transfer the entire set of photos to the new device at once without relying on cloud synchronization, making it a more controllable iPhone-to-iPhone photo transfer solution.
Method 6. Using Email
When you only want to share photos from iPhone to iPhone in a small number, or when using AirDrop or iCloud is inconvenient due to network conditions, sending them via email is also a feasible method. Although it may be slower than other methods, it does not require installing additional software, and restoring emails on iPhone is very easy, making it suitable for temporary sharing or backing up important photos.
Open the Photos app on your old iPhone and select the pictures you want to send.
Hit the Share button, and from the options, pick Mail.
Enter the recipient device's email address and fill in the subject and content of the email (optional).
Tap Send, then open the email on the new iPhone and download the pictures.

Although each email transmission involves a limited amount of data, it does not require the two devices to be close to each other and does not rely on cloud services, making it a backup solution in special circumstances.
Conclusion
Whether you have just gotten a new phone or want to back up the precious memories from your old device, there are now multiple ways to easily fulfill the need on how to transfer pics from iPhone to iPhone. For users seeking efficiency and flexibility, imyPass iPhone Transfer is undoubtedly the most time-saving and reliable choice, ensuring that every photo smoothly follows you to your new device.

Clara is an editor from imyPass. She specializes in data recovery. You can find professional tutorials and solutions for recovering lost data from any device. Many users reported that his tutorial is easy and useful.
Hot Solutions
-
Transfer Data
-
Recover Data
-
Unlock iOS
-
iOS Tips
