4 Ways to Transfer Music from iTunes to iPhone Easily
Have you added new songs to your iTunes library only to find out that it doesn't appear on your iPHone? Well, you are not alone! The process of moving music from a computer to an IPhone device might seem unintuitive, especially with the shift to cloud-based services. The good part here is that there is nothing to worry about. In this article, we will teach you how to move your music from iTunes to your iPhone for an effective and smooth listening experience. You will also learn the new iTunes for Mac. Without anything else, check this guidepost and discover how to move music from iTunes to iPhone perfectly.

In this article:
Part 1. Automatic Sync Your Music Library from iTunes to iPhone
Are you looking for an excellent way to move your music from iTunes to your iPhone? Well, it is a possible task, as long as you have the right tools and materials. In this section, we will teach you how to transfer your music to your iPhone using a USB cable and excellent tools. So, to begin the transferring process, see all the steps below.
Method 1: Send Music from iTunes to iPhone with a Cable
If you want to learn how to get music from iTunes to your iPhone, you can use a USB cable. With this cable, you can effectively connect your desktop to your iPhone. The good part here is that the process of transferring your music is simple, making it suitable for all users. What's more, you can even decide if you want to transfer and sync all the music or selected files. So, if you want to start the process, check the steps below.
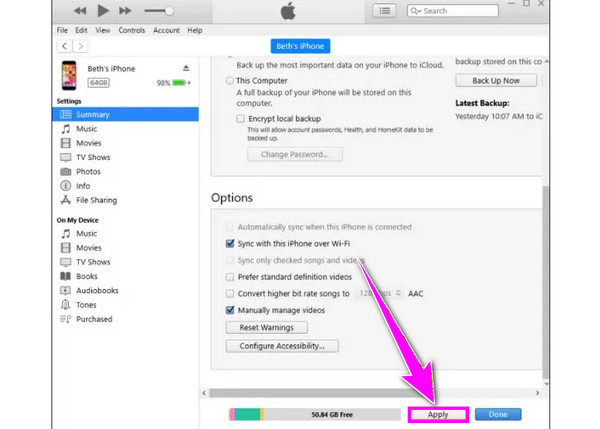
The first thing to do is to connect your PC to your iPhone using the USB cable. Then, open iTunes on your desktop to start the process.
When your iPhone already appears on your iTunes, select it and click on the Music section. Once done, check the Sync Music box.
You can choose the Entire Music Library on your screen. Then, tap the Apply button below. With that, you can now listen to the music on your iPhone.
Method 2: Move Music from iTunes to iPhone Wirelessly
Want to learn how to copy music from iTunes to an iPhone wirelessly? In that case, the best tool you can use is Dropbox. All you can do is create an account and save it to your iPhone and computer. With that, you can sync your files effectively. What we like about this process is that you can even transfer files between an iPhone and a Mac. Thus, if you want to transfer and sync more files from your computer to your iPhone and vice versa, using Dropbox is recommended. You can follow and use the steps below to learn the process.
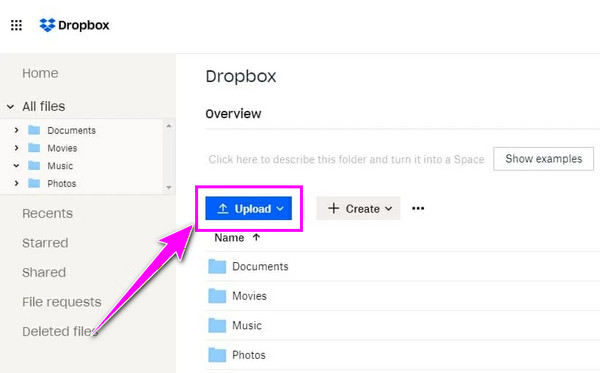
Download Dropbox both on your iPhone and desktop. Then, create an account. Ensure that you log in to the same account for them to sync.
Then, after you launch the Dropbox software, you can start clicking the Upload button to add all the music from your device.
With that, you can open your Dropbox app on your iPhone and start listening to your desired music.
Part 2. Move Music from iTunes to iPhone Without Syncing the Entire Library
On iTunes, you can also sync the selected music playlist, albums, and other content. With this process, you can ensure that you can save more space on your iPhone. The good part here is that you can also have a smooth audio playback since the process of transferring is simple. You can even sync various data, such as voice memos, videos, and more. Thus, if you want to learn how to transfer music to an iPhone via iTunes, use the instructions below.
Use a cable and connect your computer to your iPhone. After that, run iTunes and wait for the software to read your iPhone.
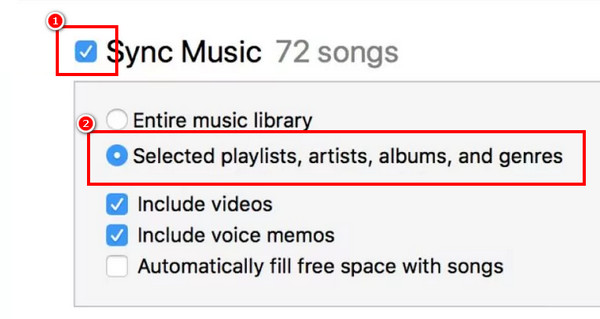
Then, proceed to the Music section from the left interface and check the Music Sync option.
Once done, click the Selected playlist, artists, albums, and genres option. Then, start choosing the music you want to play and hit the Apply function below.
Part 3. Transfer Music from Desktop to iPhone Without iTunes
Do you want to transfer your music from your computer to your iPhone, but don't have iTunes? Well, that is not a problem! For an effective music transferring process. We suggest using imyPass iPhone Transfer. With this software, you can share all your music from your computer to your iPhone. What makes it powerful is that it offers a hassle-free method, allowing you to achieve your desired results after the procedure. In addition to that, there is more data you can transfer. You can send photos, messages, documents, and more. Therefore, if you want an amazing music and data transferring program as a replacement for iTunes, there is no doubt that imyPass iPhone Transfer is the best choice. You can use the methods below and start transferring your music from your computer to your iPhone.
You have to access imyPass iPhone Transfer on your computer by tapping the Download button below.
After that, launch the program and tap the Music section. Then, you need to use a cable to connect your computer to your iPhone.
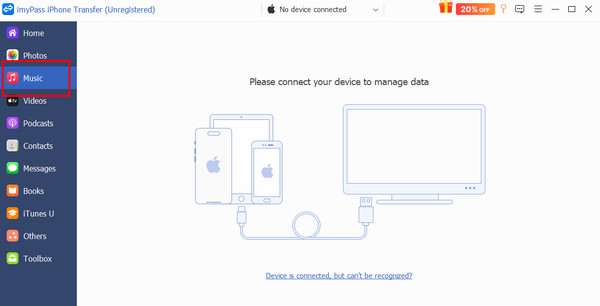
You can now start selecting the music from your computer and transfer it to your iPhone.
With this process, you can ensure that you get all your favorite music without any problem. What makes the program ideal is that it can do a lot of things. You can use this tool to share contacts on iPhone, share various files, and more.
Part 4. What is iTunes on Mac
In the modern Mac, the new iTunes is the Finder. With this tool, you can use its AirDrop feature to move music from Finder to your iPhone effectively. What we like here is that the process is simple and smooth. You can use the steps below for an instant music sharing process.
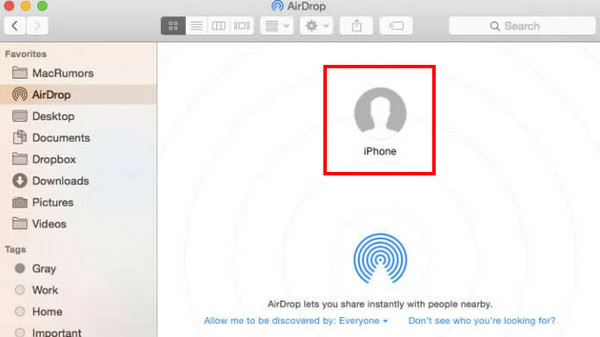
On your Mac, navigate to the Finder > AirDrop section.
After that, you can now start browsing your music and tap the Share option to detect the AirDrop from your iPhone device.
Note: Ensure that the AirDrop and Bluetooth of your iPhone and Mac are turned on for a smooth process.
Conclusion
Thanks to this guidepost, you have learned how to transfer music from iTunes to an iPhone perfectly. So, if you want to achieve your desired output in terms of sharing music, you can use all the methods from this tutorial. Plus, if you can't use iTunes for sharing music, you can use imyPass iPhone Transfer. This program is ideal if you want to share your music from your computer to your iPhone instantly. It is even capable of transferring more data, such as images, documents, videos, and more, making it a reliable software.
Hot Solutions
-
Transfer Data
-
Recover Data
-
Unlock iOS
-
iOS Tips

