How to Back up Photos to iCloud on Your iPhone or Mac
![]() Clara Prescott Published on December 26, 2025Transfer Data3-min reading
Clara Prescott Published on December 26, 2025Transfer Data3-min reading
iCloud Photos was designed for syncing photos across devices and platforms. It stores your photos on Apple's cloud storage. However, some users found that their photos were lost after they free up space, even if they had set up iCloud Photos on their devices. Plus, the majority of users are confused about iCloud Photos and iCloud Backup. This article explains how to back up photos in iCloud on your iPhone or iPad.

In this article:
Part 1: Does iCloud Backup Include Photos
Does iCloud backup include photos? The answer is different, depending on your settings. Let's learn two concepts first: syncing and backup. They are the two main ways iCloud keeps your data.
According to Apple, iCloud backup does include photos, videos, and more. However, any data on your device that isn't regularly synced is stored in your iCloud Backup. In other words, if you have synced photos to iCloud Photos, your iCloud Backup won't include them.
Part 2: Back up Photos to iCloud
Does iCloud save deleted photos? If you have set up iCloud Photos on your iPhone or iPad, all your photos will be synced to your iCloud account. When you delete photos, the changes will be synced to iCloud, too. iCloud Backup, on the other hand, saves all your photos whether you delete them or not on your iPhone. Here are the steps to back up your photos on your iPhone or iPad:
Run the Settings app on your home screen, and connect to a Wi-Fi network.
Tap on your profile, choose iCloud, and tap Photos.
Toggle off Sync this iPhone.
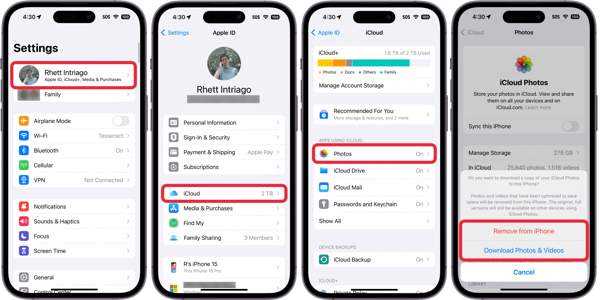
When prompted, choose Download Photos & Videos to confirm disabling iCloud Photos.
Go back to the iCloud screen and tap iCloud Backup.
Toggle on Back Up This iPhone.

Finally, tap the Back Up Now button to begin backing up photos in iCloud.
When it is done, you will see the success message and date under the Back Up Now button.
Note: How to make sure photos are backed up on iCloud? The only way is to restore the backup to your iPhone or iPad. Before that, you need to factory reset your iPhone.
Part 3: Back up iCloud Photos on Mac and PC
If you sync your iPhone photos to iCloud, you'd better back up iCloud Photos on your Mac or PC. Even if you accidentally delete your photos, you can get them back from iCloud Photos backup.
On Mac
Open the Photos app on your Mac.
Click the Photos menu and choose Settings.
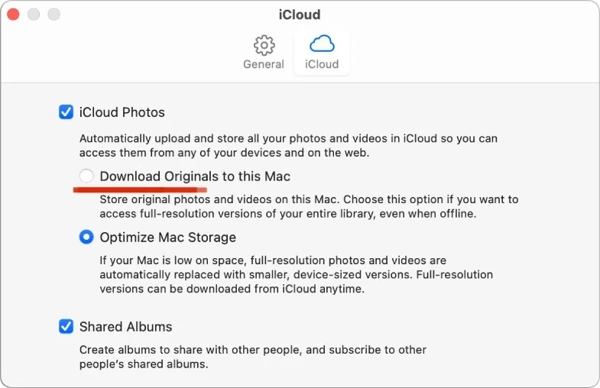
Go to the iCloud tab and check iCloud Photos.
Select Download Originals to this Mac to download iCloud Photos to your Mac.
If you want to back up iCloud photos to an external drive, insert it into your Mac.
Select all iCloud photos.

Click the File menu, choose Export, and pick Export Unmodified Originals For N Items.
Navigate to the external drive or proper location, and back up iCloud photos on Mac.
On PC
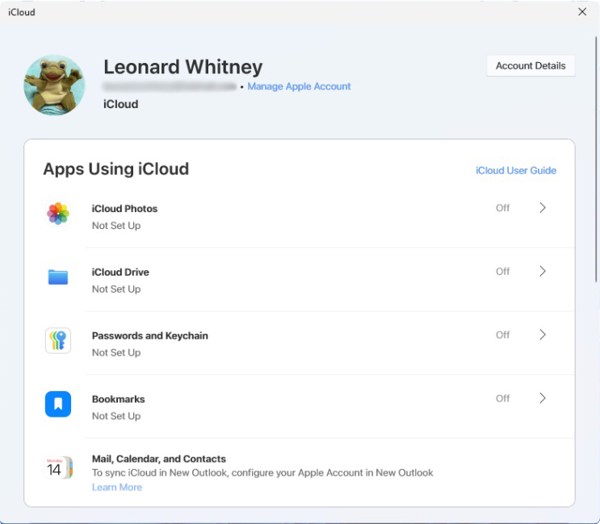
Install iCloud for PC on your machine and open it.
Log in to your Apple ID and password.
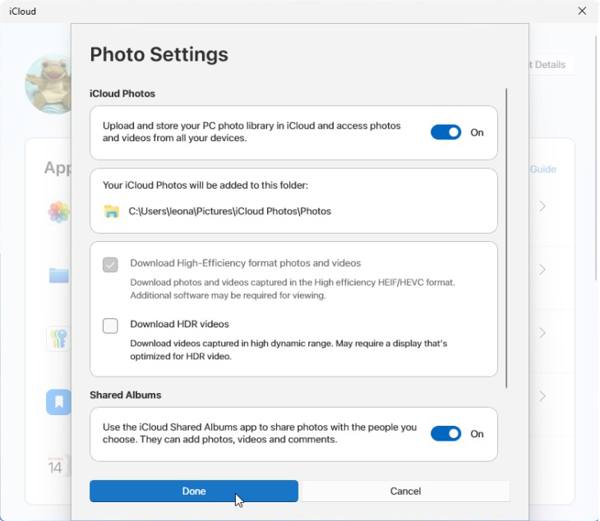
Click iCloud Photos, and turn on iCloud Photos.
Click Done to back up iCloud Photos to PC.
Find iCloud Photos on your PC:
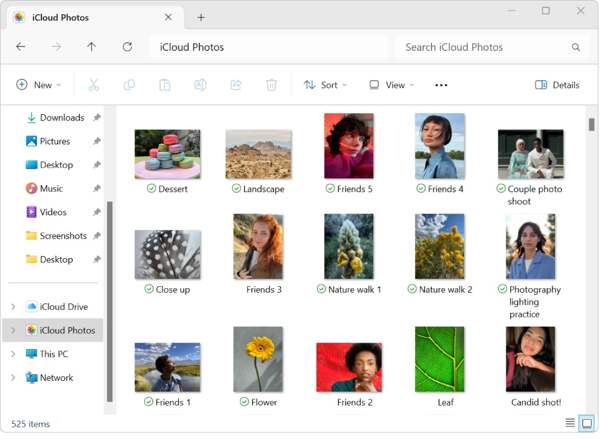
In File Explorer
Navigate to C:UsersamePicturesiCloud PhotosPhotos.
In the Photos app
Choose iCloud Photos on the sidebar.
Select all the photos you want to back up, and press Ctrl + C keys on your keyboard to copy them.
Go to the folder or external backup drive, and press Ctrl and V to paste them.
On Web

Go to www.icloud.com/photos in a browser and sign in with your Apple ID credentials.
Enter the Library tab.
Select all photos you want to back up, click the Download button, and choose Download N Items.
Then, set the destination folder and back up iCloud photos to the hard drive.
Part 4: Back up iPhone Photos Without iCloud
If you don't have a Wi-Fi network, you cannot back up photos in iCloud. Alternatively, imyPass iPhone Transfer allows you to back up photos from your iPhone to a computer through a physical connection. More importantly, it can restore your photos at any time without erasing your device.

4,000,000+ Downloads
Back up iPhone photos to a computer.
Work through a USB cable.
Preview photos for backup of all or specific items.
Support a wide range of file types, like photos, videos, and more.
Available to the latest versions of iOS and iPadOS.
How to Back up iPhone Photos Without iCloud
Connect to your iPhone
Start the best photo backup software after you install it on your computer. It is compatible with Windows 11/10/8/7 and macOS 10.12 or above. Link your iPhone to your PC with a Lightning cable. For iOS 13 or above, type your iPhone passcode to authorize the connection.

Preview iPhone photos
Once the software recognizes your device, it will scan all data automatically. Then, go to the Photos tab on the sidebar and preview photos on your iPhone.
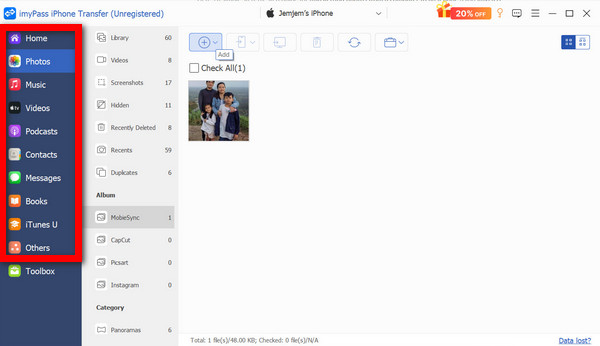
Back up iPhone photos
When you are ready, select all the photos you want to back up, and click the Monitor button on the top ribbon. Choose Export to PC, navigate to the desired location, and confirm photo backup. You can also share contacts on iPhone to your PC.

Conclusion
This guide shared how to back up photos in iCloud. On an iPhone or iPad, you can disable iCloud Photos and make an iCloud backup, which includes photos automatically. Furthermore, we demonstrated how to back up your photos in iCloud on a Mac computer or PC. If iCloud is unavailable, imyPass iPhone Transfer is the best way to back up your iPhone photos to a computer. It is easy to use and works fast.

Clara is an editor from imyPass. She specializes in data recovery. You can find professional tutorials and solutions for recovering lost data from any device. Many users reported that his tutorial is easy and useful.
Hot Solutions
-
Transfer Data
-
Recover Data
-
Unlock iOS
-
iOS Tips
