Transfer Music from iPod to Computer Fast Without Losing Sound Quality
![]() Clara Prescott Published on November 11, 2025Transfer Data3-min reading
Clara Prescott Published on November 11, 2025Transfer Data3-min reading
Transfer music from iPod to computer effortlessly and rediscover the joy of keeping your favorite tracks safe, organized, and ready to play anytime. Many iPod users still rely on their classic music collections, but syncing through iTunes can be restrictive and outdated. With modern tools like imyPass iPhone Transfer, you can now move songs, albums, and playlists freely between devices, with no syncing limits, no lost data. This guide will show you the smartest ways to back up and manage your iPod music on any computer with ease.

In this article:
Part 1. Transfer Music from iPod to Computer Without iTunes
With imyPass iPhone Transfer, it has never been easier to transfer songs, albums, and playlists from your iPod to your computer without iTunes. iTunes does not allow you to transfer albums and playlists. One of the many uses of imyPass iPhone Transfer is that it helps you transfer, organize, and back up your media files in just a few clicks. It helps you back up your iPod and helps to clear off space on your iPod. It helps to back up your music on your laptop, and helps to clear off space on your iPod.

4,000,000+ Downloads
Transfer songs, albums, and playlists from iPod to PC or Mac without iTunes.
Move music fast while keeping sound quality and details.
Edit tags, create playlists, delete tracks, or play songs on your computer.
Auto-convert unsupported formats for smooth playback.
Works with iPod, iPhone, and iPad.
Download and install the Tool
Download the software that is compatible with your operating system (Windows or Mac). Open the software that you downloaded, and open the installer to guide you in the installation process.
Launch the Program and Connect Your iPod
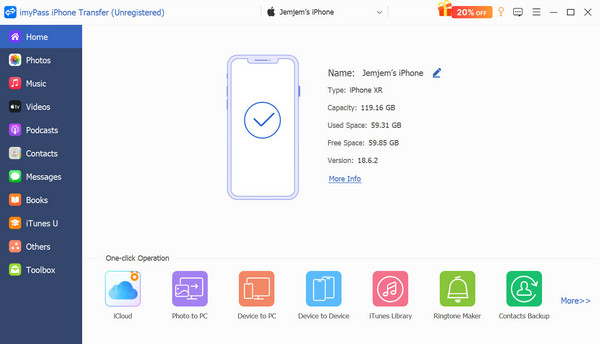
Start the imyPass iPhone Transfer on your computer. The iPod should be connected to the computer with a USB cable. Once connected, you will be able to see the information about the iPod in the main interface.
Access the Music Section
On the sidebar, click Music to display the songs, playlists, and audio files saved on your iPod. You can listen to the songs, review the information such as size and length, and arrange them before moving them.
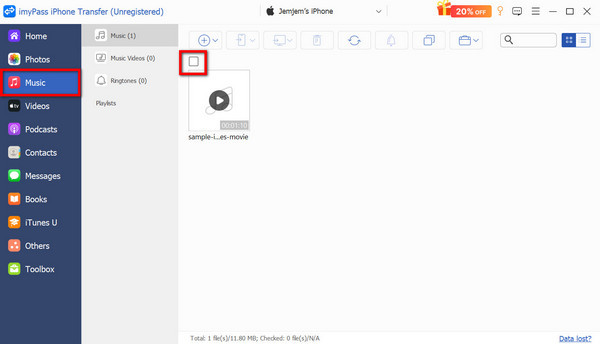
Select the Songs You Want to Move
Check the boxes next to the songs or playlists you want to transfer. If you want to move several files, you can select them for a batch transfer to speed up the process.
Music Transfer to Computer
Depending on your device, click either the Export to PC button. Select the folder on your computer for the exported music files. The transfer will start immediately, and all the music files you selected will transfer from your iPod to your computer without the help of iTunes.

Part 2. Transfer Songs from iPod to Computer with iTunes
iTunes is still the official way to sync and manage your iPod music. iTunes lets you technically copy the music collection to your computer by syncing the songs on your iPod to the iTunes library. All the music will still be stored, organized, and accessed on your PC or Mac through the iTunes interface, but for direct access, you will need to copy files to the computer manually.
Connect your iPod to the computer using a USB cable. If you own an iPod Touch, you will need to tap Trust This Computer to allow access. iTunes will begin to detect your iPod.
In iTunes, hit the Device button at the top. From the sidebar, go to Music. Select your entire library or just certain playlists, albums, or artists. After that, hit Apply, and iTunes will take some time to sync your music, which can take several minutes depending on the size of your library.
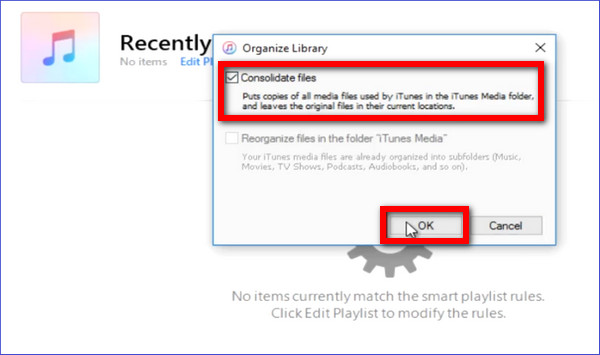
You can listen to it, set up playlists, and back up the whole library. You can also go to File > Library > Organize Library, and check Consolidate Files to make an extra copy and save it locally on your computer.
Pros
- The most secure solution provided by Apple.
- iPod music is sync to your iTunes library.
- You can do future transfers to iPhones, iPads, or new computers, or even AirDrop songs on an iPad for quick wireless sharing.
Cons
- Music files cannot be directly exported into folders.
- iTunes needs to be installed and set up.
- It can be slower with larger libraries.
Part 3. Specific Method for Older Devices
Some older iPod versions, like the iPod Classic, Nano, or early iPod Touch, will show up as a removable drive when connected to a computer. You can also access your iPod Classic or iPod Touch to copy your music directly to your computer by unlocking the system folders.
Connect your iPod to your computer and open iTunes. Select your iPod device and under the Summary tab, find the option Disk Use and check if it is available. This will allow your iPod to show as a drive on Windows File Explorer or Finder on your Mac.
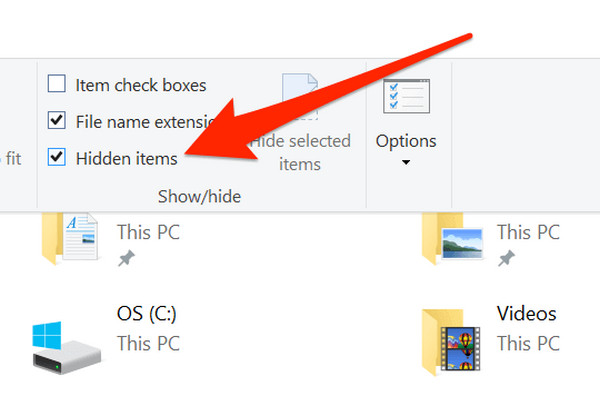
Your music will be in hidden folders, so you need to access settings to allow your device to view hidden items:
• On Windows, open File Explorer, then View, then Show, and check Hidden items.
• On Mac, open Finder and then Command + Shift +. (period) to show hidden files.
Go to This PC on your Windows computer or Finder on your Mac and open your iPod drive. Find the folders on the drive and open:
• Windows: iPod_Control > Music
• Mac: iPod/iPod_Control/Music

Inside, you will find several folders named like F00, F01, etc. These contain your actual song files, though their names might appear random.
Select all folders and copy them to a location on your computer. You now have a backup of your iPod music.
Once the system names the files, you will need to import the copied folders to iTunes or any music management software to retrieve the readable names and album details. Open iTunes, and then click File > Add File to Library to import the folder copied from the iPod.
Pros
- Works without iTunes syncing.
- Older iPods can be recovered and backed up, even if you forgot the iPod password, letting you access and save your songs securely..
- Works on Windows and macOS.
Cons
- Until imported to iTunes, the file names are jumbled.
- Manual copying and hidden file access will be needed.
Conclusion
In this post, you learned how to move music from an iPod to a computer using both modern and traditional methods. In any case, you can choose what you think is the easiest option, like imyPass iPhone Transfer, or you can go with the official syncing method, iTunes, as both will ensure your music is safe and accessible. You can retrieve your tracks, rearrange your playlists and have uninterrupted playback on all your devices.

Clara is an editor from imyPass. She specializes in data recovery. You can find professional tutorials and solutions for recovering lost data from any device. Many users reported that his tutorial is easy and useful.
Hot Solutions
-
Transfer Data
-
Recover Data
-
Unlock iOS
-
iOS Tips
