How to Easily Transfer Music from iPod to iPhone: Step-by-Step Guide
![]() Clara Prescott Published on November 11, 2025Transfer Data3-min reading
Clara Prescott Published on November 11, 2025Transfer Data3-min reading
You have just upgraded to a new iPhone, but your favorite playlists are still living on your old iPod. Figuring out how to transfer music from an iPod to iPhone can feel tricky, especially with Apple syncing limits. Do not worry, there are reliable ways to bring those classic tracks onto your iPhone. This guide walks you through practical methods to keep your music collection alive across devices.

In this article:
The Reality Check: Why You Cannot Transfer Directly
The reason you cannot transfer music from an iPod to an iPhone is that Apple devices only sync in one direction. One iPod is almost always connected to an iPhone with iTunes or Finder. The iPod plays music from the iPhone and syncs with iCloud. There is no way to transfer songs from an iPhone to an iPod.
Another reason is DRM, or digital rights management. iTunes songs can be downloaded to an iPhone or any other Apple product using the same Apple ID. However, songs that are ripped from CDs and added to the iTunes library are not considered iTunes songs. Apple is forcing the use of a hub.
Method 1: Using Third-Party Software (Most Effective Way)
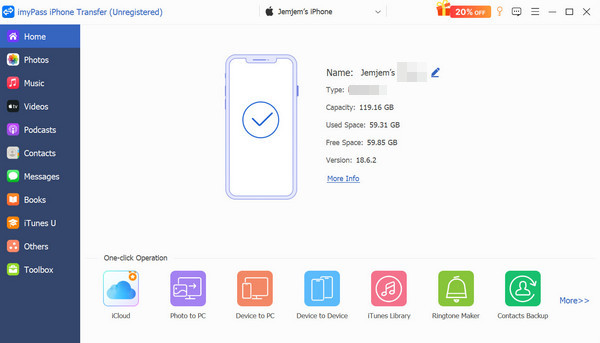
imyPass iPhone Transfer is a professional data management application that will make transferring files to and from an iOS device like an iPhone and a computer easy and fast. Unlike iTunes and iCloud, this application will bypass one-way transfer and allow you to make two-way transfers of your music, songs, and other data between all your iOS devices.

4,000,000+ Downloads
Transfer music between iPod, iPhone, computer, and iTunes without limits.
Convert unsupported music formats to make them compatible with iOS.
Manage playlists, delete songs, and edit ID3 tags, including cover art, artist, and genre.
Support multiple data types: photos, videos, contacts, messages, eBooks, and more.
Download the Software and Install it
Head to the official imyPass webpage to download the iPhone Transfer installer. After downloading, follow the setup guide for your Windows or Mac and run the software when it is ready.
Connect Devices to Your Computer
After that step, it is time to grab the USB cable. Connect your iPod and iPhone, and the system should recognize both devices. Please remember to unlock the devices, as you will receive an error message otherwise. When it says Trust, tap it.
Choose the Source Device (iPod)
Now, for the third step, it is time to set your iPod as the source device. This enables you to view and access all the music stored on your iPod.
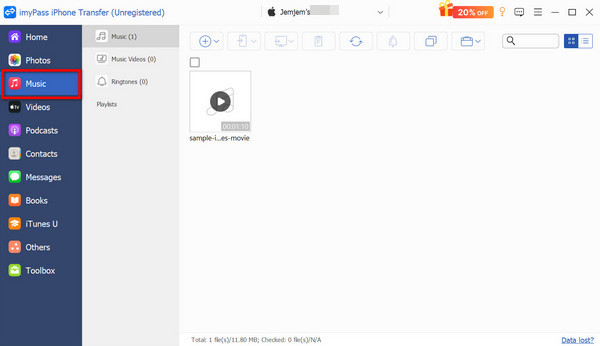
Browse and Select Music Files
Go to Music located in the sidebar. In this step, you will select the music you wish to transfer from your iPod. You can choose one song or select multiple songs at the same time.
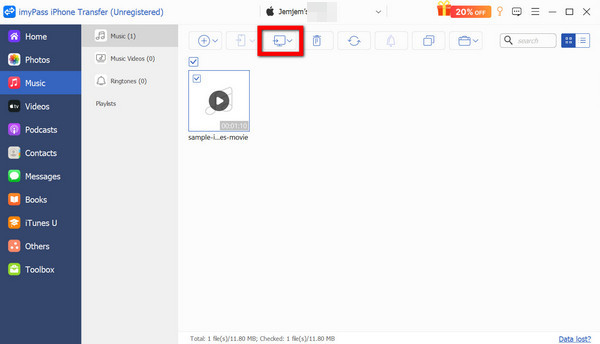
Export Music to iPhone
Now, you are ready to select the Export to Device option, with the iPhone as the target destination. Your songs will transfer to your iPhone library.
Method 2: Using iTunes or Finder
For Windows and older macOS, you can use iTunes after you complete your Apple iTunes login. It will allow you to manage your iPod and iPhone music. You will have to use Finder on macOS Catalina and later. It allows you to set music on your devices, but you must sync them to transfer music to and from each other.

Connect the iPod using the USB cable. When you launch iTunes or Finder, your device will show up on the side.
In iTunes/Finder, select your iPod and open the Music section. Choose the tracks you want and transfer them to your computer library.
Disconnect the iPod, then plug in your iPhone. It will appear in the sidebar.
Go to the Music tab under your iPhone settings. Select the songs, albums, or playlists you want to sync from your computer. Click Apply/Sync to copy them to your iPhone.
Pros
- Official Apple method, fully supported and reliable.
- Keeps music organised and synced with your Apple ecosystem.
Cons
- Requires a computer as the middleman - no direct iPod-to-iPhone transfer.
- Syncing can overwrite existing music on your iPhone if not managed carefully.
- Limited to supported formats; incompatible files must be converted manually.
Method 3: Using File Access
If you want to move non-purchased music files manually, file access can help. By extracting songs stored on your iPod like a USB drive, you can copy and move them to your iPhone via a computer. This method requires some navigation, but it works well for MP3s and DRM-free tracks.
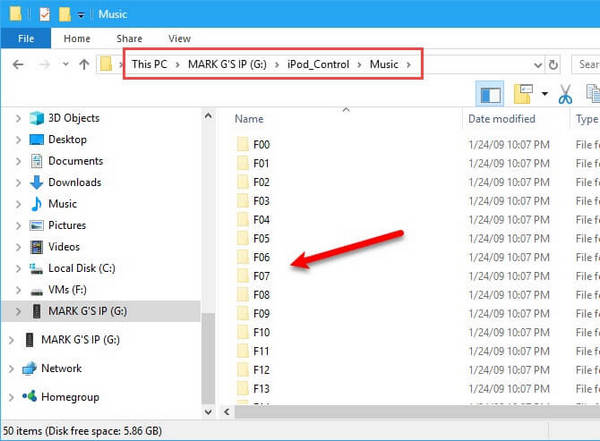
Plug your iPod into your computer. On Windows, open File Explorer; on Mac, use Finder.
If necessary, activate the Enable Disk Use feature in iTunes. Navigate through the directories of iPod, typically concealed under iPod_Control > Music.
Choose the music files you want and copy them into a folder on your computer. You can rename files since they are saved under random codes.
Import those files into your iTunes or Finder music library.
Your iPhone can be connected to your computer again, and the newly added music can be synced to your iPhone just as in Method 2.
Pros
- Works well for DRM-free music files, such as MP3s.
- Gives you more control by allowing you to copy and rename files manually.
Cons
- Hidden folders and unusual file names can be confusing for beginners.
- Regaining access to iTunes or Finder to import files requires a few additional steps.
- You also cannot transfer DRM-protected purchased music from the iTunes Store.
Method 4: Using Sync Library with Apple Music
For Apple Music or iTunes Match subscribers, having Sync Library turned on will enable you to access your music collection from any of your devices, with the collection seamlessly. Songs from your iPod or computer will automatically transfer to your iPhone.
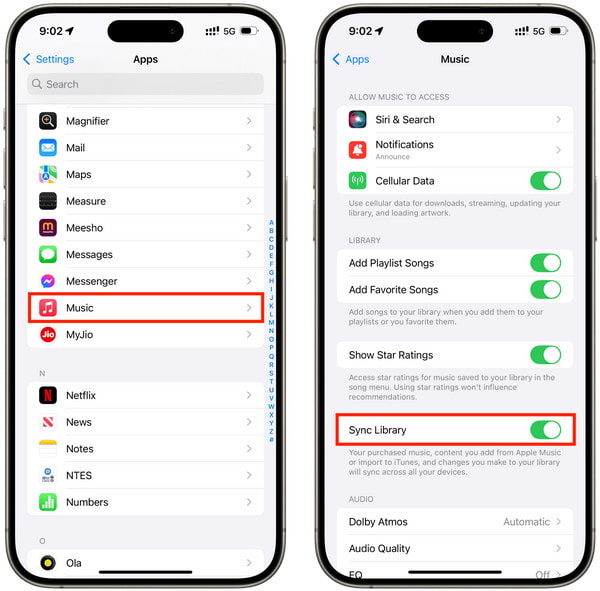
Confirm your Apple ID with one of the subscriptions.
Launch iTunes or the Apple Music app on your computer. Go to Preferences, then General, and enable the Sync Library option. Your songs will now be uploaded to iCloud.
Open the Settings app, then Music, and turn on Sync Library.
Open the Music app on your iPhone. Within moments, your library from the computer (and iPod, if synced) will appear automatically.
Pros
- Automatic syncing across all devices with the same Apple ID.
- No cables or manual transfers required, everything is cloud-based.
Cons
- Requires a paid Apple Music or iTunes Match subscription.
- Relies on internet connection and iCloud storage availability.
- Not suitable for users with large libraries they do not want uploaded to iCloud, especially if you also forgot iPod password and need recovery options.
Conclusion
Figuring out how to transfer songs from an iPod to iPhone may seem challenging at first, but the proper method makes it simple. From using iTunes to third-party tools or Sync Library, you can easily transfer your playlists and continue enjoying your treasured tracks on your new device.

Clara is an editor from imyPass. She specializes in data recovery. You can find professional tutorials and solutions for recovering lost data from any device. Many users reported that his tutorial is easy and useful.
Hot Solutions
-
Transfer Data
-
Recover Data
-
Unlock iOS
-
iOS Tips
