Transfer iTunes Library to a New Computer with 3 Provided Ways
![]() Clara Prescott Published on November 19, 2025Transfer Data3-min reading
Clara Prescott Published on November 19, 2025Transfer Data3-min reading
Transferring your iTunes library to a new computer is a crucial skill these days. After all, devices are constantly changing, and your iTunes library often contains years of carefully curated music, playlists, and media files. Therefore, transferring it to a new computer requires a reliable method to continue listening to your carefully curated collection without losing any of your iTunes library.
This article will introduce three practical methods for safely transferring your iTunes library to a new computer. All three methods provide a seamless way to preserve your iTunes playlists and help you easily enjoy your favorite music on your new computer.

In this article:
[All Platform] Transfer iTunes Library to a New Computer Efficiently
If you want to quickly and securely transfer your iTunes library to a new computer, imyPass iPhone Transfer is the perfect solution. Instead of manual, time-consuming steps that risk losing files, imyPass iPhone Transfer lets you transfer data automatically. Simply select the iTunes library content you want to transfer between your device and computer. Whether it's music, playlists, videos, or other media, it can help you quickly complete the transfer process without any data loss.
Download imyPass iPhone Transfer from the official website. After downloading, set up the file to install it. imyPass iPhone Transfer will be launched automatically.
Connect your device to the computer with a USB cable. Click Toolbox to choose from the Device to Device or Device to PC.
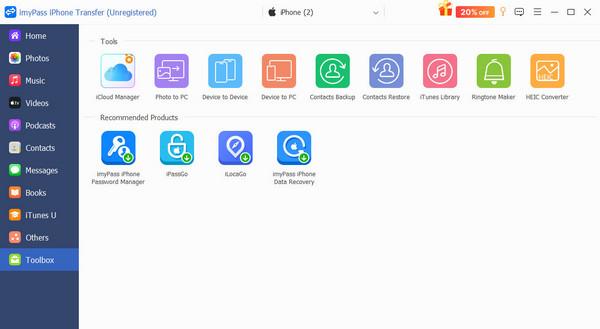
Click to select the data type you want to transfer, including Photos, Music, Videos, Contacts, Messages, and so on.

If you chose Device to PC before, click Destination to select a folder where you want to save the data. After you click Start, the data transfer will start automatically with this iTunes recovery software.
[Windows] Transfer iTunes Library to a New Computer via Backup
If you prefer a more traditional approach, transferring your iTunes library to your new computer via iTunes backup is a reliable method. Although being an Apple-built-in software, iTunes also provides a Windows version. With iTunes Backup, you can create a backup of your library and preserve all the data within, including ratings, play counts, playlists, and so on. This method is handy for users who want to maintain the exact structure of their library. The following section will introduce how to use iTunes backup effectively for a smooth and secure transfer to your new computer.
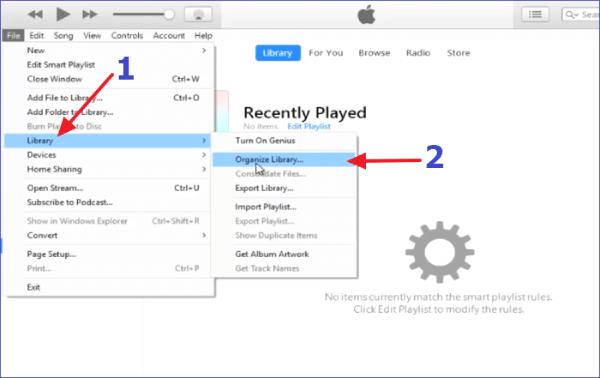
To transfer your iTunes library to a new computer, you need to consolidate your iTunes folder. Launch iTunes on your computer and click Library under the File tab. Then, click Organize Library.
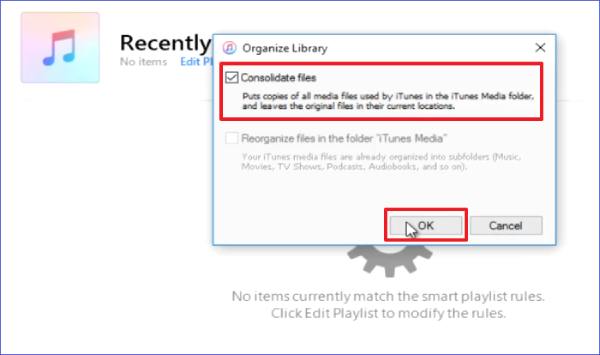
Then a pop-up window will appear, click Consolidate Files and then OK to consolidate your files for data transfer. A backup will be created.
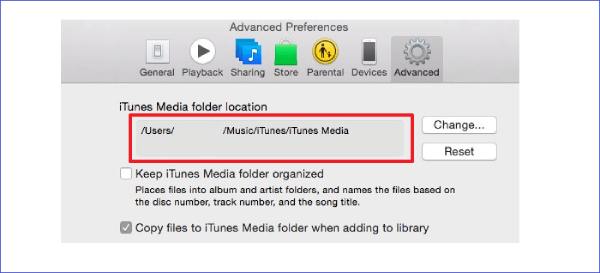
To determine the folder of iTunes backup, click Preferences under the Edit tab. Then, you can check the location under the Advanced tab.
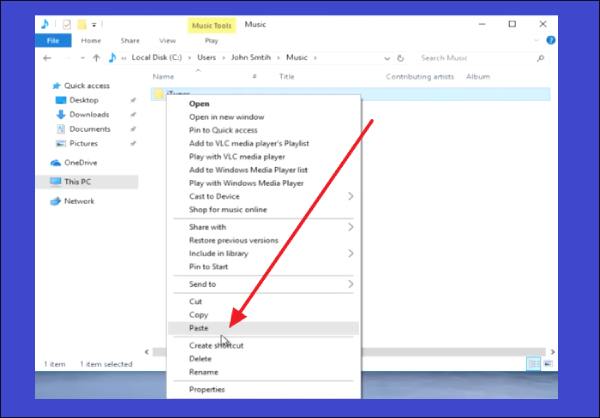
Now, open the folder on your computer and copy all the content to your external drive. Connect the external drive to the new computer. Navigate to iTunes Folder under the Music tab, paste the backup of iTunes library to transfer it to the new computer, and restore music from iTunes.
Launch iTunes on your new computer, long-press Shift or Command to select an iTunes library on the Choose iTunes Library window. Then, click the Choose Library button to select the new library pasted on your new computer.
[Mac] Transfer iTunes Library to a New Computer Using Migration
If you're migrating your iTunes library to a new Mac, Mac Migration Assistant is one of the most efficient and reliable tools available. As Apple's built-in data transfer method for its ecosystem, it not only transfers your music and playlists, but also other data, including applications and settings, from your old Mac to your new one. Furthermore, thanks to the consistency of Apple's operating system, the basic structure of your iTunes library is preserved after transferring it to the new computer without Apple iTunes login, meaning you can keep your original playlists and metadata without having to copy them one by one manually.
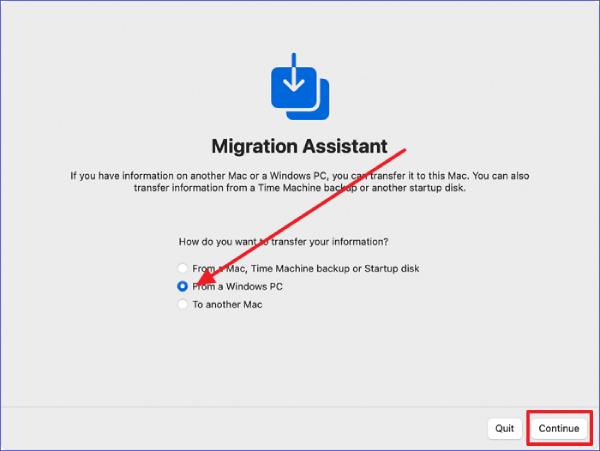
Navigate to the utility folder of your new Mac to launch Migration Assistant. Then, do the same on your old Mac to open Migration Assistant. On the Migration window, click To a Mac, Time Machine backup, or startup disk under the How do you want to transfer your information tab. Click to select your old device.
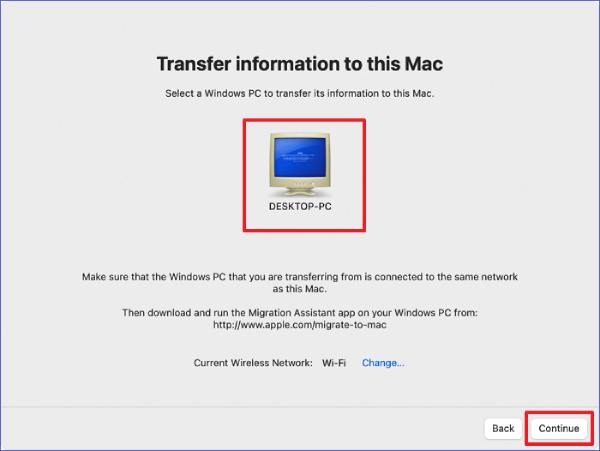
Click to select your device from the options listed. Then, click Continue after you connect the old device to your new Mac.
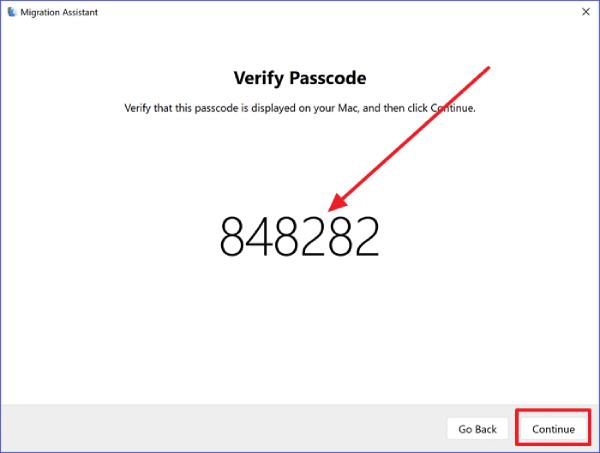
Enter the six-digit passcode displayed on both devices and click Continue on your old device.
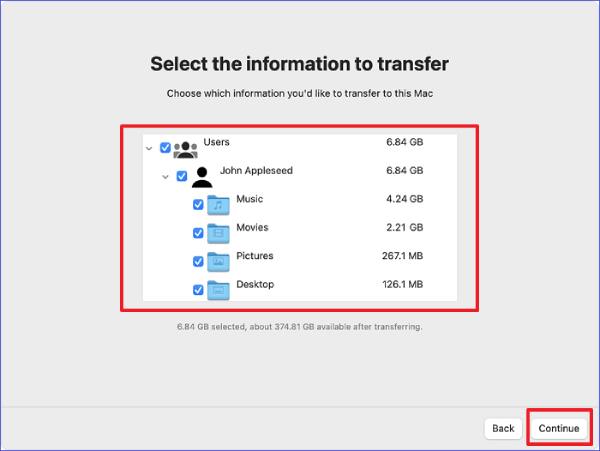
Under the Select the information to transfer tab, click to select the file types you want to transfer to your new device. And the iTunes library you want to transfer to a new computer is included in the Music folder. Click Continue to transfer the iTunes library to your new computer automatically.
Conclusion
In short, transferring your iTunes library to a new PC doesn't have to be complicated. Whether on Windows or Mac, Apple provides official methods for transferring data. If you'd like a faster and more secure data transfer, you can opt for a more professional tool. imyPass iPhone Transfer can help you quickly transfer your iTunes library, keeping your playlists and metadata intact.

Clara is an editor from imyPass. She specializes in data recovery. You can find professional tutorials and solutions for recovering lost data from any device. Many users reported that his tutorial is easy and useful.
Hot Solutions
-
Transfer Data
-
Recover Data
-
Unlock iOS
-
iOS Tips
