How to Save Audio Messages on iPhone and Computer [2025]
![]() Clara Prescott Published on October 30, 2025Transfer Data3-min reading
Clara Prescott Published on October 30, 2025Transfer Data3-min reading
In the world of texting, a voice message can feel like a gift. It is a burst of genuine emotion and personality in a sea of text. However, Apple's design for these audio messages prioritizes saving storage space. It means that they are set to automatically delete after 2 minutes or in 30 days, depending on your settings. If you've ever frantically searched for a voice note only to find it gone, you know the frustration. Fortunately, you don't have to rely on Apple's expiration timer. By taking a few quick actions, you can secure those messages forever. So, to keep the voice message forever, the best thing to do is to save it. See this guidepost and learn how to save an iPhone voice message effectively.

In this article:
Part 1. How to Save Audio Messages from iMessage
There are times when the voice messages from your iMessage disappear. It is because the settings might put a limitation on your messages. With that, if you want to keep and save the messages on your iPhone, the best thing to do is to save them. With that, you can play the message anytime and anywhere. The good part here is that you can even share the audio message, making it more ideal for preservation purposes. Thus, if you want to learn how to save and download a voice message on an iPhone, you can check the steps below.
Save Voice Message on Voice Memos
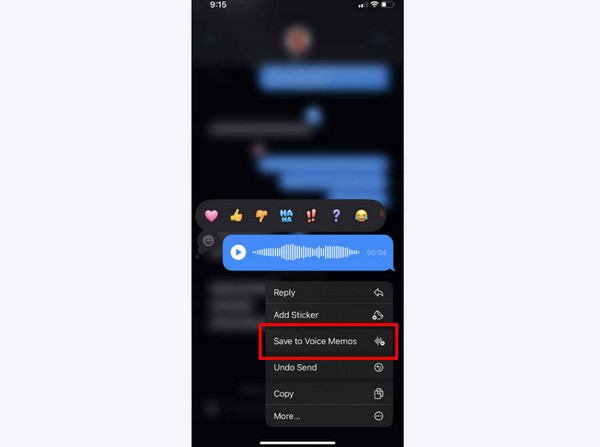
Open your iMessage app on your iPhone and proceed to the voice message you want to save.
After that, long-press the audio message and hit the Save to Voice Memos option.
Once done, you can now proceed to the Voice Memos app to see the downloaded voice message.
Save Voice Message Using Share Function
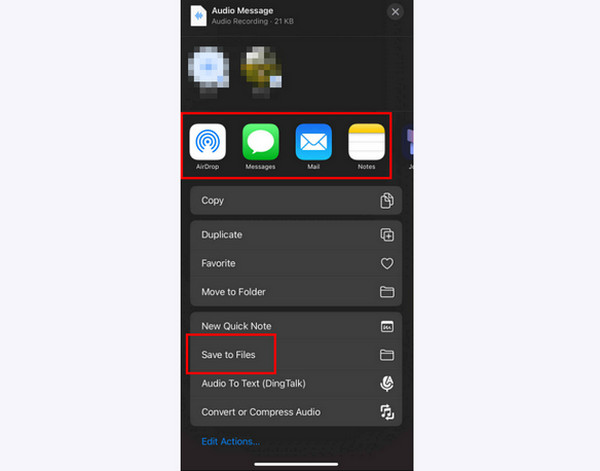
From your iMessage, you can long-press the voice message. Then, tap the Share function.
Various options will appear on your screen. You can share the message on Messages, Airdrop, and Email. You can even save the message by tapping the Save to files option.
With these methods, you don't have to recover iMessages when they get deleted. Saving them right away is the best thing to do.
Where are Audio Messages saved on iPhone?
The location of the saved messages depends on how you saved them. There are times when you can find the voice messages on the Voice Memos app. You can also save the messages in your desired file folder.
Part 2. How to Save Voicemail Messages from the Phone App
There are times when you want to save a voicemail from your iPhone. Well, if your loved ones send it, then it can be an important message for you. The good thing we like here is that saving voicemails is an easy task. Plus, there are various platforms where you can save voicemails. You can save the voicemail on Messages, Email, Voice Memos, and more. You can even share the voicemail via AirDrop. Thus, to learn how to save voicemails on an iPhone, check the instructions below.
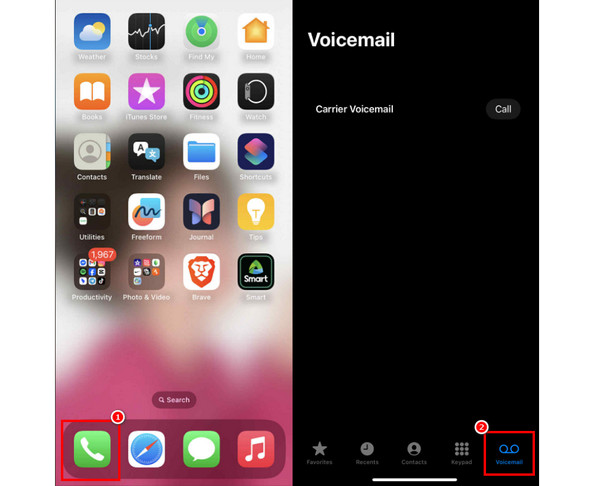
From your iPhone, open your Contacts and tap the VoiceMail section. Then, you will see all the voicemails from your phone.
After that, tap the voicemail you want to save. From the top screen, press the Share button.
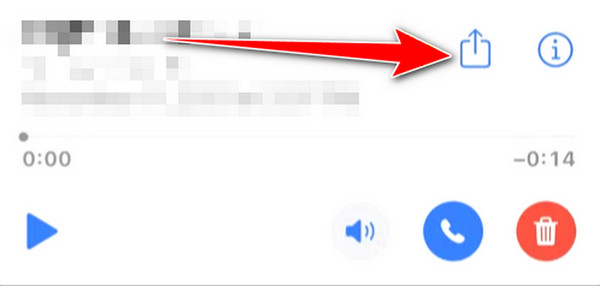
When the Share Sheet shows up, you can now save the voicemail to your preferred folder or destination.
Part 3. How to Save Voicemail Messages to Your Computer
Saving voice messages and voicemails to your iPhone is a better process. But if you want long-term preservation, it would be better to transfer the messages or voicemails to your computer. By transferring the files, you can do a lot of things, such as increasing their quality, editing them, converting to a more compatible format, and sharing them without restrictions.
If you want to learn how to save voice messages to a computer, we recommend using imyPass Phone Transfer. With this software, you can effectively share your voice messages and voicemails. The good thing here is that the process is simple, making it the best program for non-professional users. In addition to that, besides voice messages, there are more things you can share. You can also share your contacts, media files, notes, and more. With that, we can tell the program is perfect for sharing various files on your computer. Thus, if you are looking for exceptional software for transferring voice messages, voicemails, and other files, feel free to access imyPass Phone Transfer.
To begin saving messages on your computer, use the detailed instructions below.
The first thing to do is to download imyPass Phone Transfer program on your computer. After that, proceed to the installation procedure.
Then, you have to connect your iPhone to the computer. You can use a USB cable and wait for the computer to detect the device.
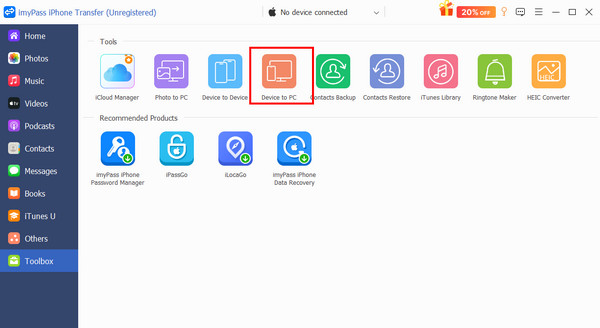
After you launch the program, proceed to the Toolbox section and click the Device to PC option. Then, you will see all the data from your phone.
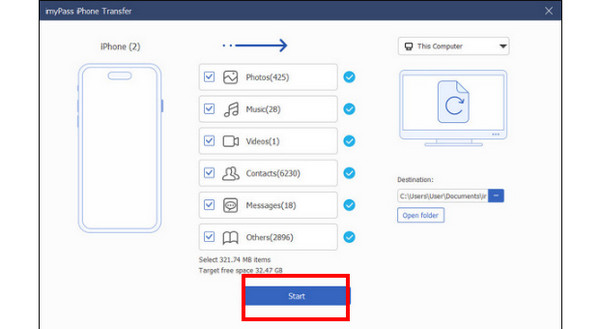
You can now locate the saved voice message on your iPhone. Select all the messages you want to save to your computer. You can also share various files from your device. Once done, hit the Start button to begin the file transferring process.
Part 4. How to Prevent Audio Messages from Expiring
Is it possible to prevent audio messages from expiring? The good news here is that it is possible. Audio messages disappear from your iMessage because it is set up in your Settings. With that, the best thing you can do is to modify the settings to give you the result you need. With this method, you don't have to recover the deleted voice messages. To begin the process, rely on the instructions we have provided below.
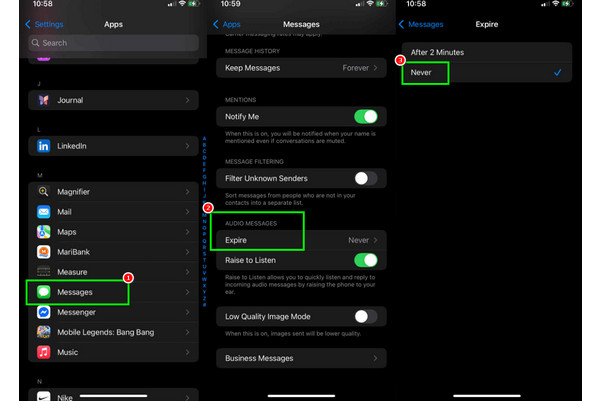
From your iPhone, open the Settings app. After that, proceed to the Apps section and press the Message app.
After that, scroll down and hit the Audio Messages section. Press the Expire option, and you will see another interface.
Select the Never option. With that, any voice messages on your iMessage won't get deleted.
Conclusion
With these methods, you have discovered how to save audio messages on your iPhone. The procedures you have explored are perfect if you want to preserve the messages and keep them permanently. In addition to that, if you prefer saving the audio message to your personal computer, it would be best to use imyPass Phone Transfer. This program is ideal since it can easily and effectively transfer all kinds of files to your computer, making it an ideal program for all users.

Clara is an editor from imyPass. She specializes in data recovery. You can find professional tutorials and solutions for recovering lost data from any device. Many users reported that his tutorial is easy and useful.
Hot Solutions
-
Transfer Data
-
Recover Data
-
Unlock iOS
-
iOS Tips
