How to Share Notes on iPhone and Transfer to New iPhone Step Guide
![]() Clara Prescott Published on October 30, 2025Transfer Data3-min reading
Clara Prescott Published on October 30, 2025Transfer Data3-min reading
If you want to work with others in real-time or transfer key data between different devices, knowing how to share notes on an iPhone is an important skill to have. The Notes application provides users the option to invite collaborators to view or edit a note, which is handy for groups needing to make simultaneous updates via iCloud. Apart from needing to work collaboratively, there are scenarios when you will want to transfer notes, perhaps when you are getting a new iPhone or when you are saving notes for a backup.

In this article:
Part 1. How to Share a Note for Collaboration
1. Share for Collaboration (Using iCloud)
The Notes application allows you to invite other people to join you on a note you can work on simultaneously and share real-time updates. Notes work with iCloud, and updates will sync across devices within a group.
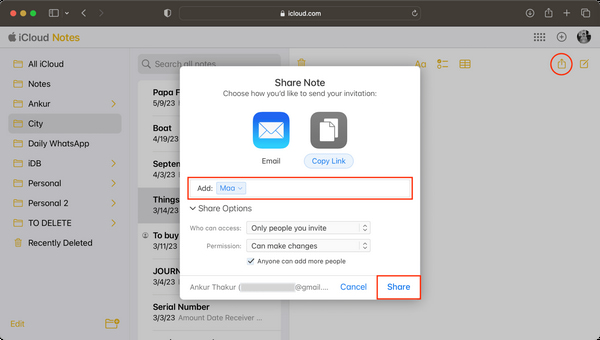
Select the note you want to share and access the Notes application.
Then, choose the Share option.
Select Collaborate as your sharing option instead of Send Copy.
Pick your sharing option and select the permissions: can others edit the note, or is it view only?
Send the sharing option. The person can access and edit the note with you.
2. AirDrop a Copy of a Note
In the case you just want to share a single note and not collaborate, AirDrop is a great option.

Access the note you want to share.
Select the share option.
Pick Send Copy to share the note.
Select AirDrop and pick a nearby Apple device.
The note will be sent as a copy, and any edits will not be synced.
Tips: How to Accept a Shared Note
When someone sends you a shared note invite:
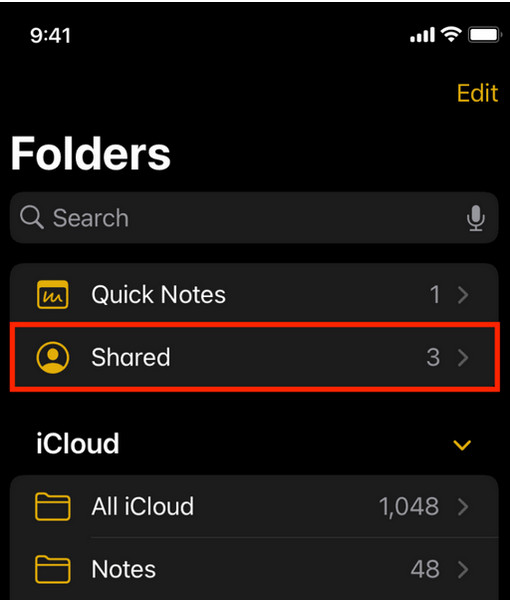
To access a shared note, open the link that was sent via Messages, Mail or other applications.
Ensure that you are logged in to your Apple ID and have enabled iCloud Notes.
Tap the link to join the collaboration.
The Shared note will appear in your Notes app under iCloud.
Part 2. How to Transfer Notes to a New iPhone
1. imyPass iPhone Transfer
Moving content from one iPhone to another can be inefficient and time-consuming; however, imyPass iPhone Transfer saves you time and improves the efficiency of the data transfer process. Its simple interface and ease of use are considerable advantages over iCloud and iTunes, because you can choose which data to transfer and how to avoid overwriting data on the new device.

4,000,000+ Downloads
Direct iPhone-to-iPhone transfer without relying on iCloud.
Selective transfer: choose specific notes instead of all data.
Works with various file types, including notes, photos, music, and contacts.
Fast and stable transfer through USB, no internet required.
Compatible with the latest iOS versions and iPhone models.
Download and Install the Tool
On any browser, access the imyPass website to download the program. Please select the appropriate installer for your Windows/Mac, then install it on your computer.
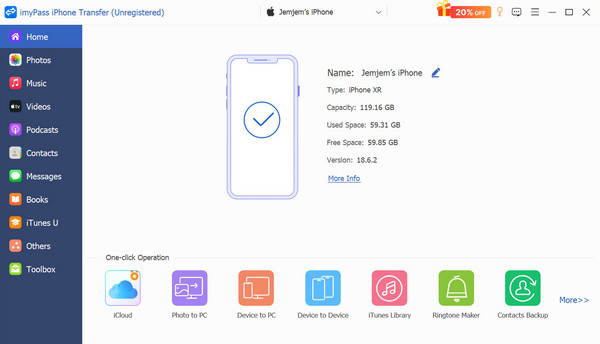
Connect iPhone
And from there, use each USB cable to connect the first iPhone to your computer. You can unlock the devices and trust your computer to authorize the data transfer.
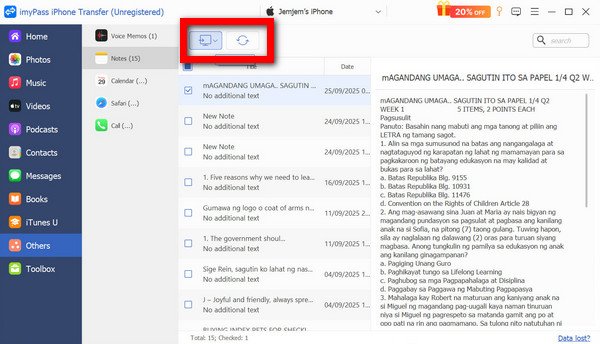
Back Up Notes from the Source iPhone
Access the Others tab, and you can back up your notes to ensure that any data you will need later on will be saved. Once the backup is finished, you can proceed to the next step.
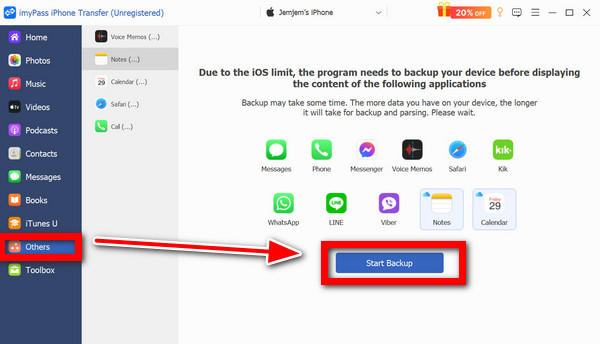
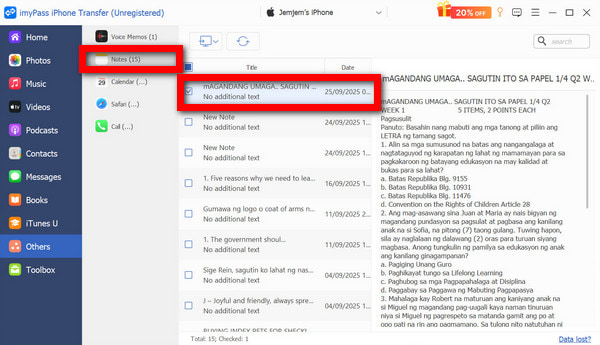
Select Notes to Transfer
Out of all the options, select Notes. You can then check the notes that you would like to transfer by previewing them.
Start the Transfer
To begin, click Export and choose your new iPhone. Then, wait for the process to complete. Finally, check the Notes app on your new iPhone to confirm the transfer has been completed.
2. iCloud Sync
iCloud is an automated cloud service function of Apple that syncs all the notes saved on devices associated with the same Apple ID. In the case that both your old and new iPhones are connected to Wi-Fi, this is the easiest method, but if you ever see a syncing in iCloud paused message, ensure your device is connected to stable Wi-Fi and signed in properly.
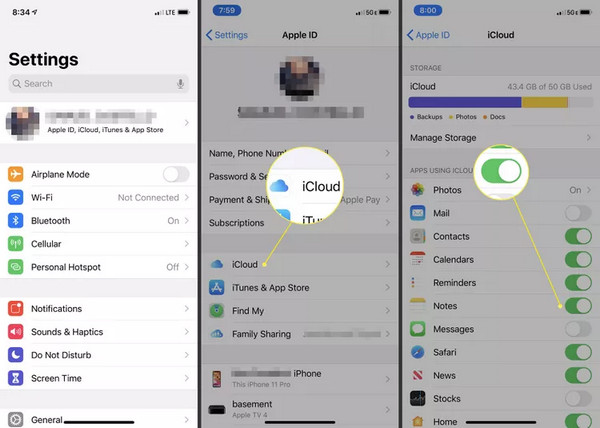
On your old iPhone, go to Settings > [your name] > iCloud.
Switch Notes on to allow for syncing.
Connect the device to Wi-Fi, and give some time for the notes to upload.
On your new iPhone, sign in to the same Apple ID and enable Notes in the iCloud settings.
Open the Notes app, and your synced notes will automatically show.
3. Quick Start (During Setup)
New iPhones come with the Quick Start feature. Quick Start lets you transfer all data, notes included, from an old iPhone to a new one. This is the ideal method to use if you have just unboxed your new iPhone.
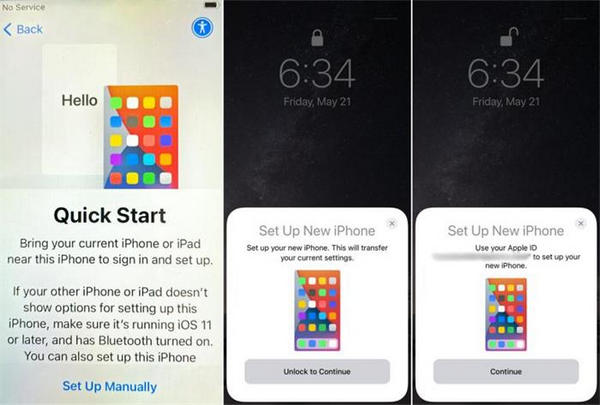
Switch on your new iPhone and position it near your old one.
The Quick Start screen will show up on your old iPhone and offer to set up the new device.
Use your old iPhone to scan the animation that appears on the new iPhone.
Decide how you want to move your data: through a cable connection or a wireless connection.
Use the provided directions to take care of transferring apps, settings, data, and your notes.
Once the entire process is done, go to your new device and open the Notes app to check if everything is as it should be.
Part 3. Share Notes on iPhone Not Working
The inability to share notes is usually a result of settings, software, lock notes, or account problems. You can check these:
Confirm your device is connected to a reliable Wi-Fi or cellular data connection. You need the internet to share.
Open Settings > [your name] > iCloud and switch on Notes.
In Notes, look at the folder set. Only the notes stored in iCloud can be shared. You cannot share those stored on your iPhone or from your email accounts.
Update your iPhone to the newest iOS version. You can check this under Settings > General > Software Update.
Restart your iPhone. This can help to remove temporary glitches.
Make sure you select the correct option to share. Tap Share > Collaborate.
Go to Settings > your name > iCloud and sign out, then sign back in.
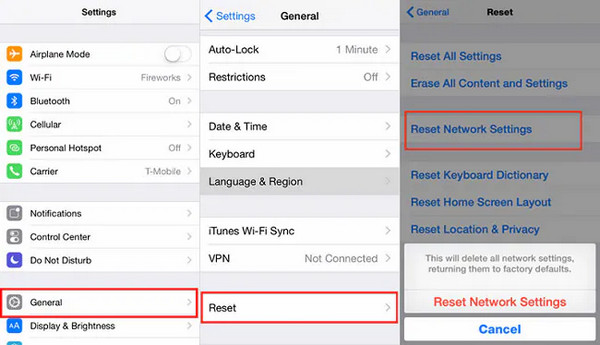
If necessary, reset your network settings: Go to Settings > General > Transfer or Reset iPhone > Reset > Reset Network Settings.
Conclusion
A common question users ask is, Do notes transfer to the new iPhone automatically? The answer is, it depends on which method you use. If you have iCloud set up, your notes will automatically sync as Quick Start will seamlessly manage this during the initial setup. For selective transfers, imyPass iPhone Transfer will give you the most options. Importing notes from iCloud and sharing them with others will let you collaborate in real time with friends, family, or work colleagues.

Clara is an editor from imyPass. She specializes in data recovery. You can find professional tutorials and solutions for recovering lost data from any device. Many users reported that his tutorial is easy and useful.
Hot Solutions
-
Transfer Data
-
Recover Data
-
Unlock iOS
-
iOS Tips
