Best Solution When iTunes Could Not Restore the iPhone Error Occurred
![]() Penny Warren Published on May 21, 2025Unlock iOS3-min reading
Penny Warren Published on May 21, 2025Unlock iOS3-min reading
It's a moment of panic every iPhone user dreads - when iTunes could not restore the iPhone because an error occurred, and you're suddenly stuck, staring at a screen instead of getting your data back. The cryptic message disrupts what should have been an easy backup after a factory reset or recovery from unexpected crashes. Users can breathe easier because the unclear error contains several fixable reasons. We will analyze the underlying issues, explain why iTunes displays this error, and present all the needed steps to bring your device back into operation while omitting the anxiety.

In this article:
Part 1. iTunes Could Not Restore the iPhone Because an Error Occurred
iTunes could not restore the iPhone error display, which created a frustrating situation that became worse because users did not know what caused it. The mysterious error occurs because of problems that affect the iPhone hardware, backups, or the link that your iPhone shares with your computer if you are stuck wondering why iTunes do not recognize your iPhone in restore mode, or why the process keeps failing altogether, here are the most common causes and how to fix them.
1. Outdated Software or iTunes Version
Upgrade your iTunes program and your iPhone firmware whenever possible because these outdated versions tend to cause restore failure. If your iPhone is not appearing in iTunes or the restore process crashes midway, double-check for updates. Users should obtain the newest version of iTunes while also confirming their iPhone operates under the latest iOS version. Incompatible software versions create problems that prevent device and computer communication from executing the restore procedure.
2. Corrupted or Incompatible Backup File
The attempt for iTunes to load a backup file becomes strenuous or unsuccessful because of file damage or incomplete file integrity. You might see a generic alert, such as iTunes could not restore the iPhone because an error occurred. The internal drive provides the safest location for backup storage because external storage can lead to file errors.
3. Not Enough Free Space on Your Computer
Running low on disk space? That might be why your iPhone is not found in iTunes when attempting to restore. The restoration process for such a big backup requires sufficient storage space for it to expand and reinstall. A lack of adequate storage space in your computer system can result in iTunes experiencing problems that prevent it from detecting your iPhone. First, remove unneeded files and move data to an external storage, then retry the restore procedure.
4. USB Cable or Port Problems
A shaky or damaged USB cable can be all it takes for your iPhone not showing up in iTunes. The ability of your device to charge does not typically prove that it can establish a secure data connection. A certified lightning cable, together with different USB ports and no USB hubs, should be used. The ideal way to connect your iPhone is through the main USB port of your computer while both you and the iPhone are restarted for an uncluttered connection.
5. Antivirus or Firewall Blocking iTunes
Sometimes, overprotective antivirus programs or firewalls will block iTunes from accessing your iPhone, leading to errors like iTunes not detecting your iPhone. Such security programs might consider the restore procedure suspicious whenever it involves accessing low-level system operations. The temporary disablement of your antivirus, along with the addition of iTunes through your firewall exceptions, offers a solution. Reopen iTunes following the restart and attempt the process once more.
6. iPhone is Locked or Disabled
The restore process becomes incomplete whenever your device gets stuck in recovery mode and remains locked. Such issues occur because the device was disconnected from the system during past updates or restore sessions. Start the iPhone recovery operation from the Recovery Mode or DFU, known as Device Firmware Update mode, then connect it to iTunes. Users should follow the prompts that appear on the screen in order to finish the process effectively.
Part 2. Fix This Error and Restore iPhone with iTunes
1. Check the USB Cable and Ports
A faulty connection is among the primary causes of iTunes rejecting iPhone restore mode. Keep away from using damaged or plagiarized cables because original Apple Lightning cables offer the best chance of success through restore procedures.
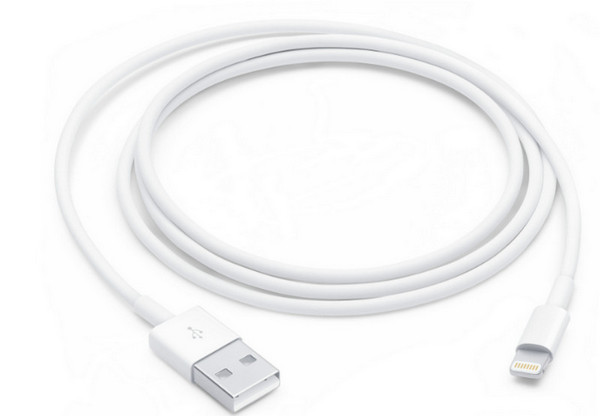
For better connectivity during restore processes, connect your cable directly to your computer's USB port, which should bypass using USB hubs or extension cords. Using back-panel USB ports on desktop computers provides a more reliable connection than the front ports when attempting to restore the device through iTunes.
2. Turn Off the Firewall or Antivirus
A failure to detect your iPhone in iTunes may stem from either firewall or antivirus program interference. The protective features of these tools may prevent your iPhone from establishing a connection with iTunes.
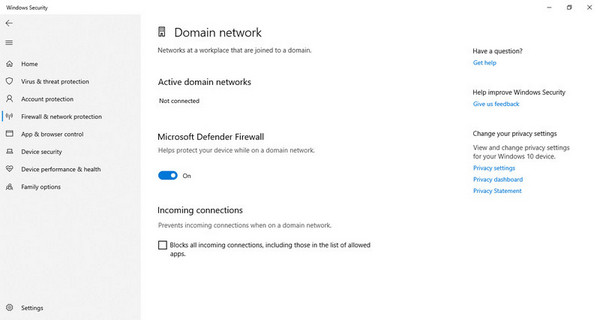
The restorative operation should start only after you temporarily turn off all your firewalls and antivirus software. From the program menu, locate either the Disable or Pause Protection button, then confirm it to let your iPhone attempt another connection.
3. Updated Apple Mobile Device USB Driver
The ability of Windows to detect your Apple devices depends heavily on the condition of your Apple USB drivers. Outdated and corrupted drivers could be the reason why iTunes fails to recognize your iPhone device.
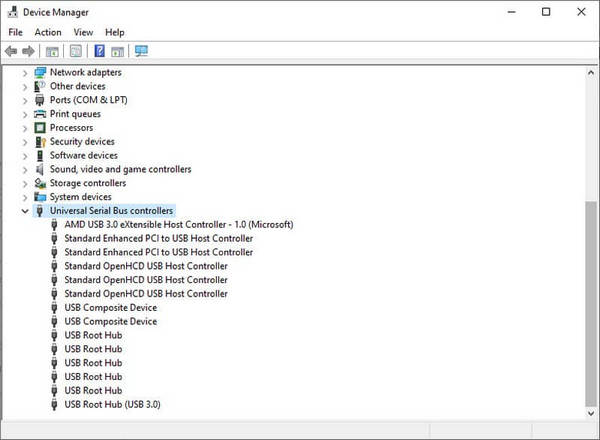
To fix it, press Windows + R, type devmgmt.msc, and hit Enter. Open Universal Serial Bus controllers, then right-click Apple Mobile Device USB Drive, followed by selecting Update driver. Update your computer, followed by a restart, while the system applies changes for a fresh connection test.
Part 3. Remove iTunes Backup Encryption and Try Again
If you are dealing with an iPhone that is not visible in iTunes, there is an excellent chance that it is due to the encrypted backup blocking its connection. Thankfully, imyPass iPassGo offers a quick fix to it. Here is how you can do it.
Download the app now by clicking the button that we have here, and complete the installation process before you can use it properly.
After launching, tick the Remove iTunes Backup Password from the interface and connect your iOS to the PC before you click the Start button. Before you proceed, you need to turn off the Find My option on your device.
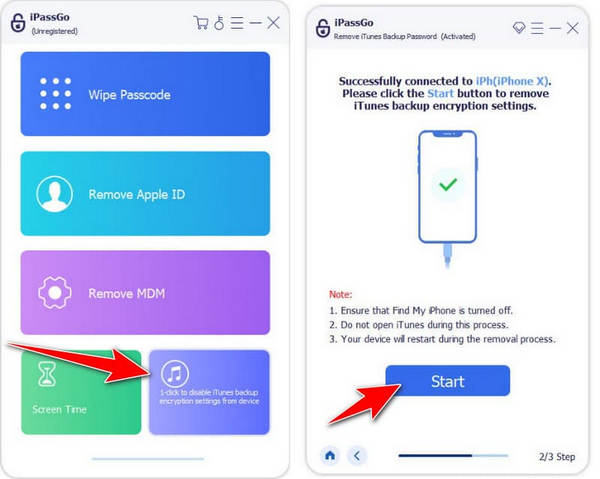
After you click the Start button, the process of removing the iTunes Backup Password will start. Wait until the device is fully restarted.

Part 4. Restore iTunes Backup Using an Alternative Program
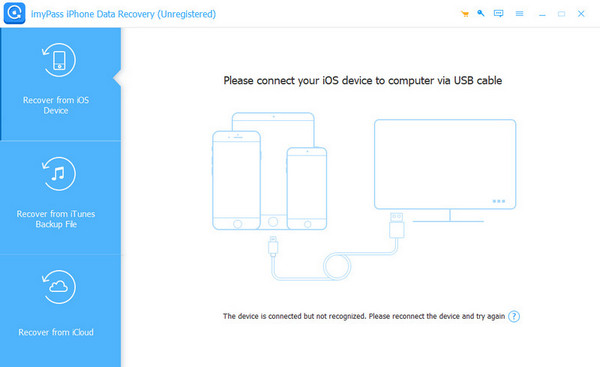
After fixing the solution we have here regarding iTunes not reading iPhone, surely your files stored on the device are not fully backed up. If you want to retrieve your lost file, then use the imyPass iPhone Data Recovery to handle this trouble for you quickly.
Conclusion
Finally, you can now solve the issue when the iPhone is not appearing on iTunes using the tutorial we have here. Surely, you will get the best result when you use the tips that we have mentioned here. But if you want to solve the problem effectively, we suggest that you use the top imyPass products here.

Penny is a senior editor from imyPass. She has focused on discovering perfect GPS location solutions in all scenarios, and also has experience in fixing computers.
Hot Solutions
-
Unlock iOS
- Review of the Free iCloud Unlock Services
- Bypass iCloud Activation With IMEI
- Remove Mosyle MDM from iPhone & iPad
- Remove support.apple.com/iphone/passcode
- Review of Checkra1n iCloud Bypass
- Bypass iPhone Lock Screen Passcode
- How to Jailbreak iPhone
- Unlock iPhone Without Computer
- Bypass iPhone Locked to Owner
- Factory Reset iPhone Without Apple ID Password
-
iOS Tips
-
Unlock Android
-
Windows Password
