How to Fix or Bypass Apple Pay Verification Without Apple ID Password
![]() Samuel Spenser Published on August 18, 2025Unlock iOS3-min reading
Samuel Spenser Published on August 18, 2025Unlock iOS3-min reading
Imagine needing to make a payment, but your iPhone suddenly asks for verification that you cannot complete. Knowing how to bypass Apple Pay verification becomes essential in these moments. Whether you are locked out of your Apple ID, using a second-hand device, or facing billing issues, this guide walks you through methods to fix or skip Apple Pay verification.

In this article:
When Is Apple Pay Verification Required
Like many modern payment systems, Apple Pay offers verification processes such as two-step authentication or QR codes to confirm ownership of a card or payment method. This process ensures fraud does not happen and protects users from losing their financial data. Below are normal cases where verification will be required:
1. Adding a New Card: Whenever a new credit or debit card is added, Apple Pay will check with the issuing bank. As with many other systems, verification codes are sent via SMS or email and must be entered to complete the process.
2. Making a High-Value Purchase: Apple Pay requires additional verification, like Face ID or Touch ID, for high-value payments so that the correct individual authorizes the payments.
3. Using a New or Reset Device: New devices or devices that have been reset will require verification to re-establish secure links to Apple Pay.
4. Expired or Changed Card Details: Updating information or an expired card will trigger the need for verification to be reconfirmed on the card, which Apple Pay does to keep active.
5. Unpaid or Pending Balance: Apple Pay will limit its functions until unpaid Apple ID charges are cleared.
Method 1. Update an Expired Payment Method
Changes or expired cards might initiate an Apple Pay verification process. Since updates are not always recognized, manually updating payment information prevents prompts from coming up repeatedly and helps in maintaining flow during transactions. You may also be asked for your Apple iTunes login to complete the update.
For iPhone and iPad:
Access Settings and tap on your Apple ID name, which is displayed at the top of the screen.
Click on Payment & Shipping. Verify using Face ID, Touch ID or passcode.
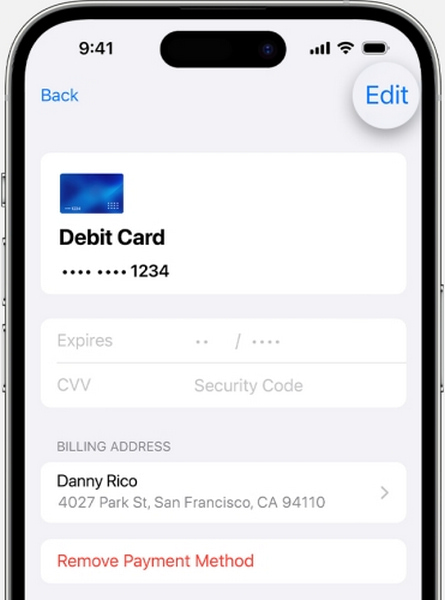
Choose the card or the method and tap on Edit.
Update the information with the correct expiration date, security code, or billing address.
Hit Done to save your changes.
For a Mac:
Launch the App Store and click on your Apple ID name placed on the bottom left.
Click on Account Settings and sign in.
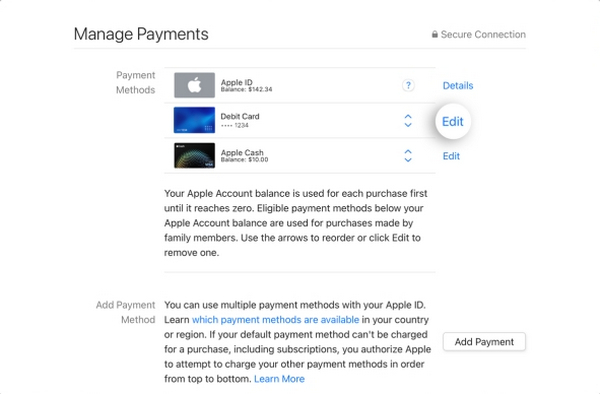
Under the Payment Information field, click on Manage Payments.
Click Edit right to the card you wish to modify.
Modify the information, then click Done.
For Windows PC (through iTunes):
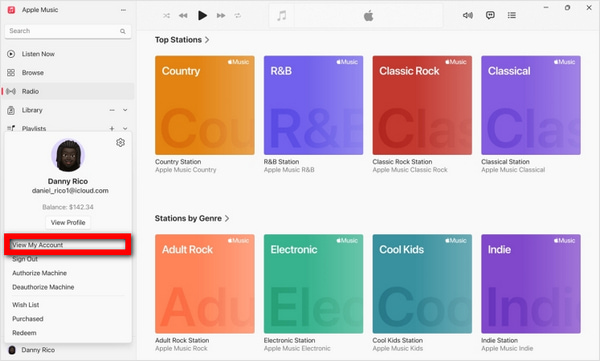
Launch iTunes and navigate to Account > View My Account.
If prompted, sign in.
Next to Payment Information, click on Manage Payments.
Press Edit, update your card.
Press Done when completed.
Method 2. Clear Out the Account Balance
Problems with Apple Pay verification usually come from unpaid Apple ID-related payments, payments on subscriptions, or other payments. Resolve all available payments first on Apple ID payment issues.
App Store Method:
Launch App Store on either iPhone or iPad.
Press the profile button located on the top right.
Click on the Purchase History to monitor the latest transactions.
In case payment is required, click on the item, pay, and confirm payment using a relevant method.
Settings Method:
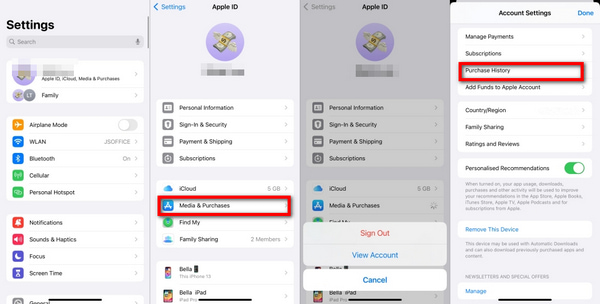
On Settings, click on your Apple ID and tap on your name.
Tap on Media and Purchases, view accounts, and confirm account details if required.
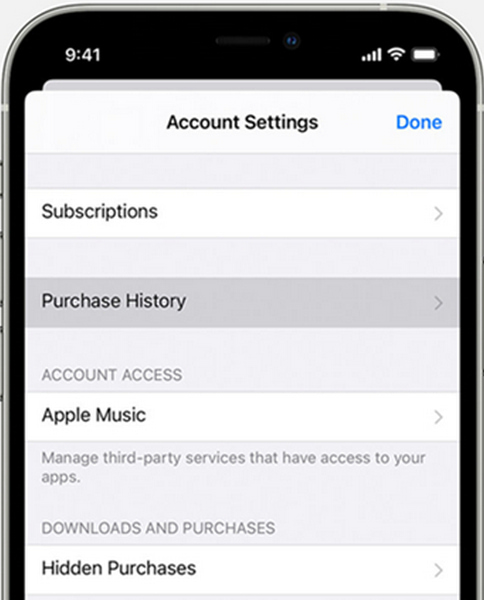
Tap on Purchase History to see all available transactions.
Settle all unpaid balances by confirming payment methods or changing to other payment methods.
Method 3. Enable Don’t Require Option for Purchases
Purchase verification: Apple Pay issues occur when iTunes and App Store purchasing settings are set to require payment. In other purchases, applying the opposite settings reduces pay prompts, allowing for fewer interruptions and smoother transactions. If you're still having issues, it may also help to change App Store country settings to match your payment method.
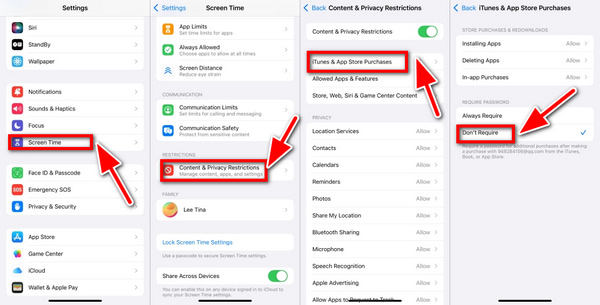
Open Settings, and go to screen time settings.
Click on Content and Privacy Restrictions (C&P). If the option is turned on, a screen time passcode will be needed.
Select iTunes & App Store Purchases.
For Apple Pay asking for a password repeatedly, choose Don’t Require under Require Password to stop this from happening.
After this, go back, select In-app Purchases, and set it to Allow.
Method 4. Sign out and Sign Back into Apple ID
Issues temporarily caused by bugs and syncing with the servers can lead to verification issues. Apple Pay issues are commonly resolved by signing out and back into your Apple ID, as this seems to refresh connections.
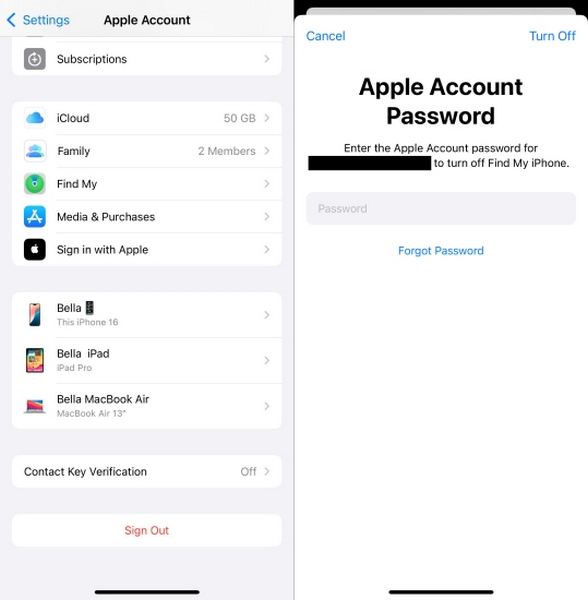
Launch the Settings app, and select your Apple ID name at the top of the screen.
Tap Sign Out and scroll to the bottom.
Confirm the sign out with the password. If Find My iPhone is on, it will ask you to disable it to proceed.
It is advisable to restart your device for better results.
Go to Settings, and tap Sign In to your iPhone after the reset.
Provide your Apple ID, and the system will re-authenticate your account.
Method 5. Bypass Apple Pay Verification Without Password
Problems with accessing Apple Pay verification can arise during a locked account, with a disabled phone, or even with software restrictions on a second-hand iPhone. In these scenarios, imyPass iPassGo serves as a powerful iOS Unlocker that helps users get past these obstacles.

4,000,000+ Downloads
Removes Apple ID from activated iPhones or iPads without a password.
Disables Screen Time without a passcode, no data loss or jailbreak.
Supports iOS 26 and all current iPhones, iPads, and iPods.
Bypasses passcodes, Touch ID, Face ID, and disabled screens.
Simple layout designed for easy use by all skill levels.
Download and install iPassGo
Visit imypass.com and download iPassGo for Windows or Mac. Install the software and launch the tool once the installation finishes.
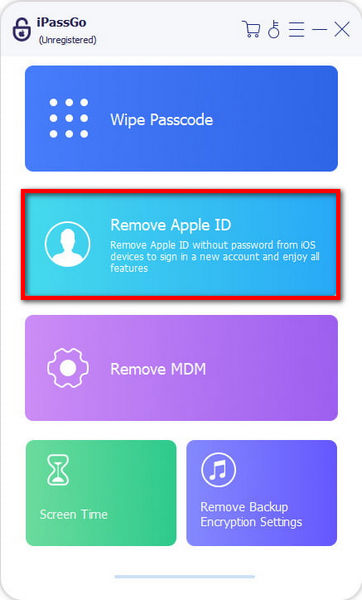
Connect iOS Device
Using a USB cable, attach your phone or tablet to the PC. In the interface of iPassGo, click on Remove Apple ID.
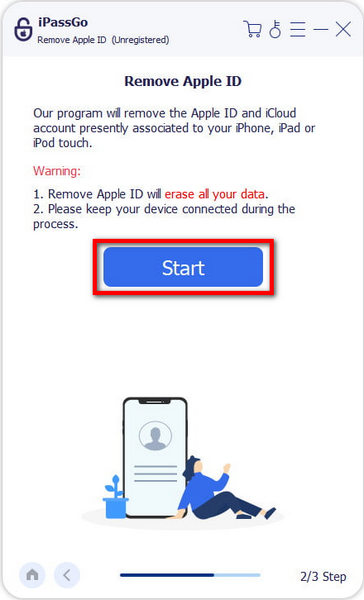
Apple ID Remove Process
Use the Start button to initiate the removal of the Apple ID. iPassGo will go through a set of processes to unlink the Apple ID related to your device while following the instructions on the screen.
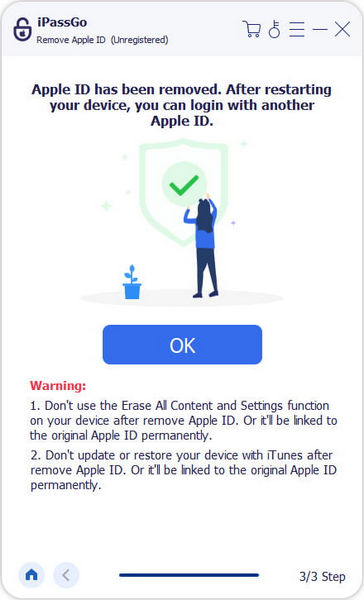
Removing Apple ID Completion
At this point, you will be able to set the device as new. The Apple Pay will be unlinked from the account and will not cause any verification issues moving forward.
Conclusion
How to bypass Apple Pay verification depends on the root cause, whether it is billing issues, outdated info, or Apple ID restrictions. With the right steps and tools, you can restore smooth payments and regain full access to Apple Pay features.

Samuel is a senior editor from imyPass. He is an expert on password unlocking. He has over five years of experience writing tutorials on phone unlocking.
Hot Solutions
-
Unlock iOS
- Review of the Free iCloud Unlock Services
- Bypass iCloud Activation With IMEI
- Remove Mosyle MDM from iPhone & iPad
- Remove support.apple.com/iphone/passcode
- Review of Checkra1n iCloud Bypass
- Bypass iPhone Lock Screen Passcode
- How to Jailbreak iPhone
- Unlock iPhone Without Computer
- Bypass iPhone Locked to Owner
- Factory Reset iPhone Without Apple ID Password
-
iOS Tips
-
Unlock Android
-
Windows Password
