Reset Microsoft Surface to Factory Settings: How to Prepare
![]() Penny Warren Published on May 09, 2026Windows Tips3-min reading
Penny Warren Published on May 09, 2026Windows Tips3-min reading
Having trouble with your Microsoft Surface and can't find a solution anywhere? Performing a factory reset is often the quickest way to get it back to normal. Contrary to common belief, a factory reset won't harm your device; instead, it can free up internal storage, improve performance, and keep your Surface running smoothly even after long-term use. In this guide, we'll show you step by step how to perform a Microsoft Surface factory reset without password.

In this article:
Part 1. Why Surface Pro Set a Recovery Key for Factory Reset
Before restoring Surface Pro to factory settings, the system asks for a recovery key. This is because the Surface Pro's hard drive is protected by BitLocker encryption. This key is used to recover encrypted Windows systems or files; essentially, it is a special code or file, so why does Surface Pro need to set this recovery key? This key serves two main purposes:
- Verify your identity: Ensures that only the legitimate user can reset the device, preventing unauthorized users or attackers from erasing the Surface.
- Protect your data: The recovery key helps protect your files by confirming that you really want to reset the device. A factory reset will permanently delete all your files, applications, and system settings, so this verification prevents accidental data loss.
Where to Find Your BitLocker Recovery Key
If your Surface prompts for a BitLocker recovery key, you can find it using the ways below.
1. From your Microsoft account
Go to the Microsoft Bitlocker recovery page, log in and find your recovery key associated with your device.
2. From a work/school account
If your Surface is managed by an organization, the recovery key may be stored in your Azure AD account. Visit the Azure AD recovery page, sign in and select Get BitLocker keys to view your recovery key.
3. From a printed or saved copy
If you previously printed your recovery key or saved it as a digital file, locate the document or file to find the key.
Part 2. How to Back Up Your Microsoft Surface Before Reset
Now you know that a factory reset will erase all your data, so you need to back up before you factory reset your Microsoft Surface. Windows users can use a cloud service like Google Drive to create local backups. Here's how to back up your files to Google Drive step by step:
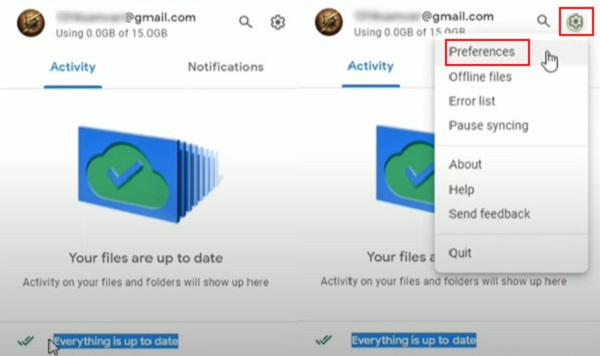
Download Google Drive and sign in to your Google account. Then, it will load your files automatically to ensure everything is up to date. Choose Settings > Preferences in the upper right corner of the small window.
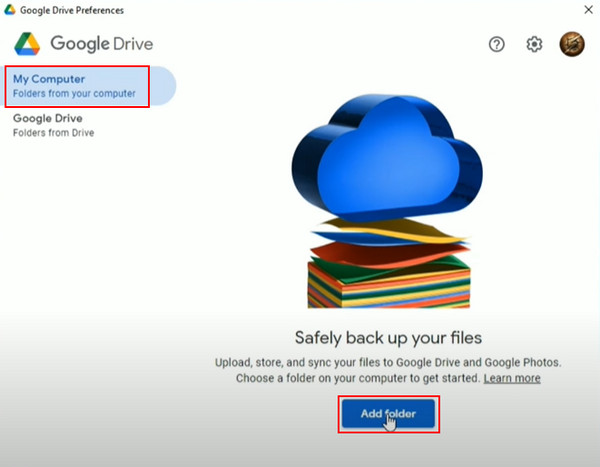
You can choose to back up folders from your computer or from Google Drive. Select My Computer, then click Add Folder to choose the folders you want to back up.
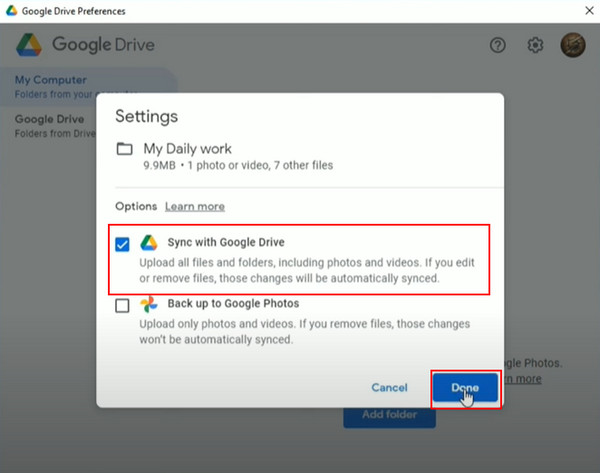
After selecting the files you wish to backup, check the box beside Sync with Google Drive to upload all data and click Done to start the process. Click Save to confirm next.
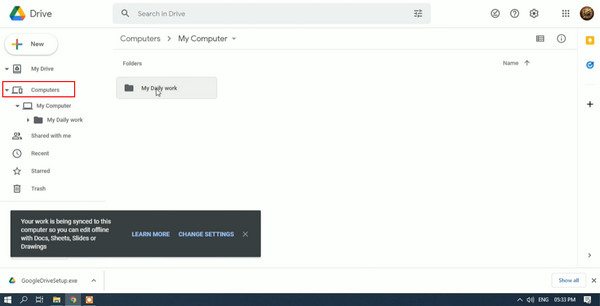
Finally, open the Google Drive website and log in. Under the Computers section, you will see all the folders and files you have backed up, ensuring everything is safely stored.
Part 3. How to Hard Reset Microsoft Surface
If your Microsoft Surface becomes unresponsive or fails to boot, you can perform a hard reset to restore it. Before proceeding, make sure all your important data has been backed up.
Method 1: Use Reset This PC Feature
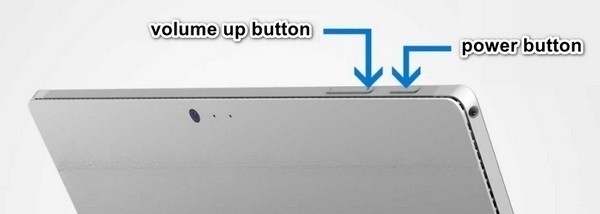
Ensure your Microsoft Surface is turned off, then press the volume up and power buttons simultaneously. This will take about 20 seconds. Then, release them when the Surface logo appears.
Then, press the volume down button to enter the Troubleshoot interface and use the power button to confirm it. Choose the Reset this PC option.
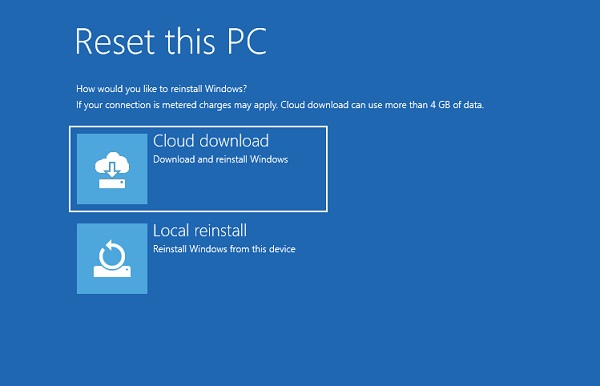
In the pop-up window, select either Keep my files or Remove everything. Then choose your reinstall method:
- Cloud download: Downloads the latest Windows version (requires stable internet).
- Local reinstall: Uses existing system files (faster but may not be the newest version).
Follow the on-screen instructions to complete the reset.
As all Windows systems are associated with this, you can also use this method to reset Lenovo to factory settings. Of course, there must be some minor differences. Follow the guide step by step, and you will not make any mistakes.
Method 2: Using a USB Recovery Drive
If you are not able to use the Windows reset feature, try creating a USB recovery drive to hard reset your Microsoft Surface.
On another Windows PC, go to the Surface Recovery Image Download page, select your Surface, then download the recovery image as a .zip file.
Insert a USB drive, search for Recovery Drive in Windows, and select Create a recovery drive. When prompted, choose Yes in the User Account Control box.
Uncheck Back up system files to the recovery drive, click Next, select your USB drive, and then click Create.
Extract the downloaded recovery image .zip file, copy all files to the USB drive, and replace any existing files if prompted.
Safely eject the USB from the PC and insert it into your Surface.
Press and hold Volume Down while pressing the Power button once. Release Volume Down when the Surface logo appears to boot from the USB recovery drive.
In the recovery environment, select Recover from a drive (or Troubleshoot > Recover from a drive). If asked for a recovery key, choose Skip this drive.
Select Recover from a drive or Troubleshoot > Recover from a drive. If prompted for a recovery key, select Skip this drive at the bottom of the screen.
Choose either Just remove my files or Fully clean the drive.
Click Recover. Your Surface will restart and display the Surface logo while the reset process completes.
If the Reset Fails:
- Device stuck or looping: Try booting again from the USB recovery drive and choose Cloud download if available.
- Recovery environment does not load: Test a different USB port or use another USB drive to create the recovery drive.
- Repeated failures: Run the Surface Diagnostic Toolkit or contact Microsoft Support for assistance.
Part 4. How to Reset Microsoft Surface Password Safely
If you have forgotten your Windows account password but don't want to risk losing any files, is there any way to remove Windows password without a factory reset? Yes! imyPass Windows Password Reset can help you regain access to your account safely without a password.
4,000,000+ Downloads
Reset or remove your Windows account password without logging in.
Reset any login password for admin/user/Microsoft accounts.
Create a new user account without admin permission.
Support Windows 7/8/10/11/XP/Vista and Windows Server 2003/2008.
Follow the detailed steps below to process the Microsoft Surface factory reset without password:
Download and install imyPass Windows Password Reset on another workable computer. Open it and choose your preferred method of creating a password reset disk, such as a CD/DVD or USB flash drive.
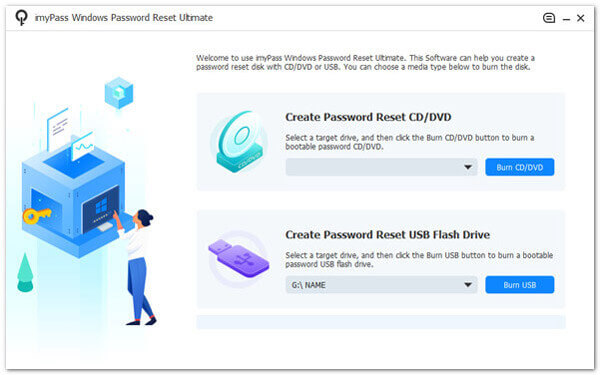
Prepare a blank CD/DVD or USB flash drive before hitting the corresponding button, then insert it into your spare computer. Follow the on-screen instructions and click OK when the burning process is done.
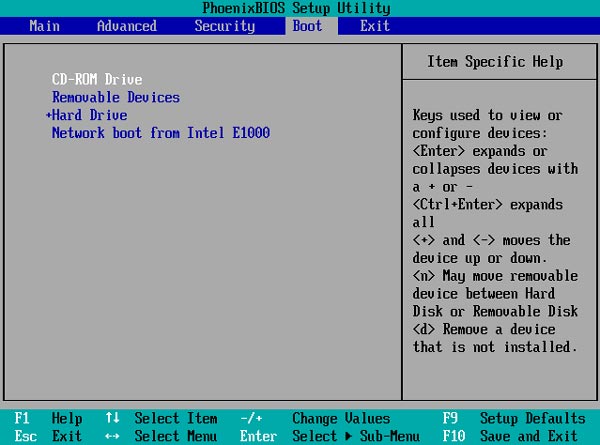
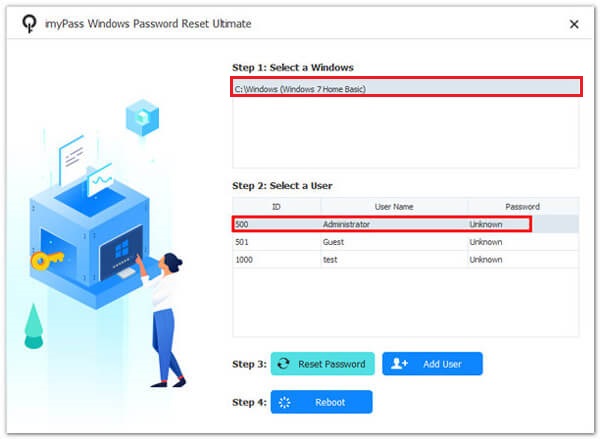
Then switch to your Microsoft Surface, remove the burned disk from the spare computer, and insert it into it. Power it on and wait for the imyPass Windows Password Reset window to open. Select the correct operating system and user account for the Microsoft Surface.
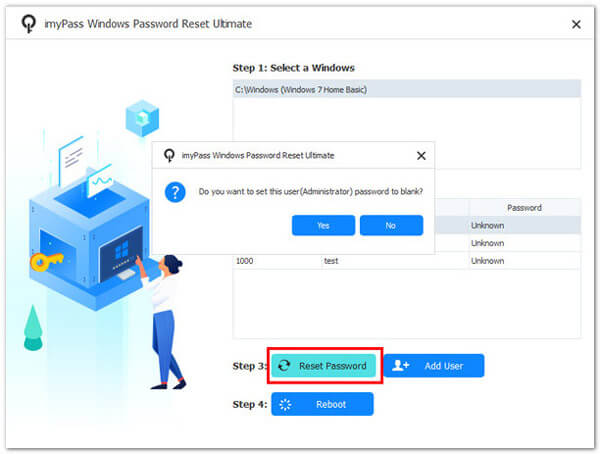
Click Reset Password > Yes to set the former user's password to blank. Then, you can choose to add a new account by pressing the Add User button, or skip this step to log in after the Microsoft Surface restart.
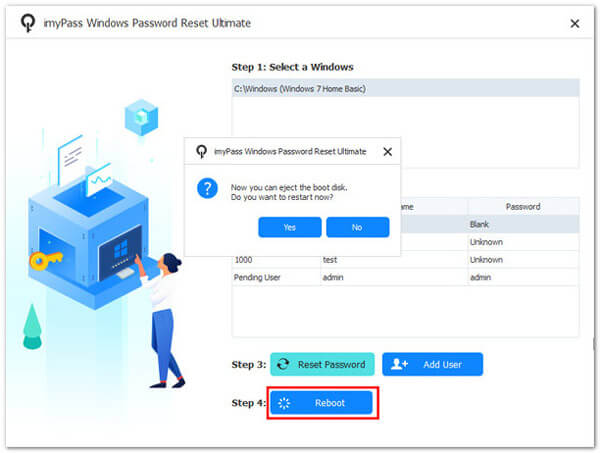
Finally, eject the burned disk from your Microsoft Surface and click Reboot to restart your computer. That's all. Enjoy your almost brand-new computer!
Conclusion
This guide is designed to teach you how to factory reset Microsoft Surface and backup operations before doing so. Whether you can log into your Windows account or not, you can easily reset it without losing your data. In addition, if you need to restore your Microsoft Surface to factory settings when you forget your password, imyPass Windows Password Reset can give you a helping hand without any data loss.

Penny focuses on GPS troubleshooting and Windows optimization. She formerly worked as a technical support engineer, helping clients solve location-based and system issues efficiently. Backed by IT support experience, she provides practical solutions that really work. In her free time, she likes hiking and geocaching, testing GPS tech in the real world.
Hot Solutions
-
Windows Tips
-
Windows Password
-
Fix Windows
-
Password Tips
