How to Change Apple ID Account Without Losing Everything
![]() Samuel Spenser Published on May 11, 2026Unlock iOS3-min reading
Samuel Spenser Published on May 11, 2026Unlock iOS3-min reading
Creating an Apple ID is the most important component of owning an Apple device. It enables users to access all Apple's services, like downloading apps from the App Store, subscribing to Apple Music, backing up data to iCloud, and much more. An Apple ID is the primary email address. If you no longer use the email, you have to change your Apple ID immediately. This guide shares the workflows on your iPhone, iPad, Mac, and Online.

In this article:
Part 1: What Happens After You Change Apple ID
Can I change my Apple ID without losing everything? Yes. Whether you keep or delete content on your device, some of your data will stay even after changing your Apple ID.
- 1.Contacts, photos, calendars, and app data will remain.
- 2.Apps, music, books, and podcast subscriptions will be kept.
- 3.You'd better sign out of all subscriptions that you use your Apple ID for, like iBooks, iMessage, FaceTime, and more.
- 4.Once you change your Apple ID on your iPhone, you need to update it on all your Apple devices.
Bear in mind that if you use an Apple email address as your Apple ID, such as @icloud.com, @me.com, or @mac.com, you cannot change it to a non-Apple email address.
Part 2: How to Change Apple ID on iPhone
The process to change Apple ID on your iPad or iPhone is far more than deleting the old email address. You need to sign out of the services on your device. We share the complete process below:
Open the Settings app from your home screen.
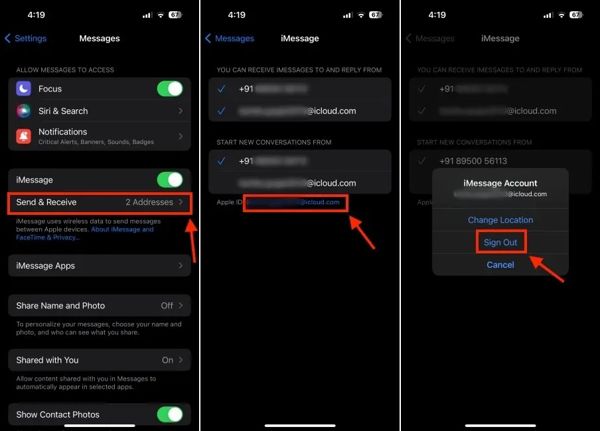
Choose Messages, tap Send & Receive under iMessage, and tap your Apple ID.
Choose Sign Out on the alert dialog.
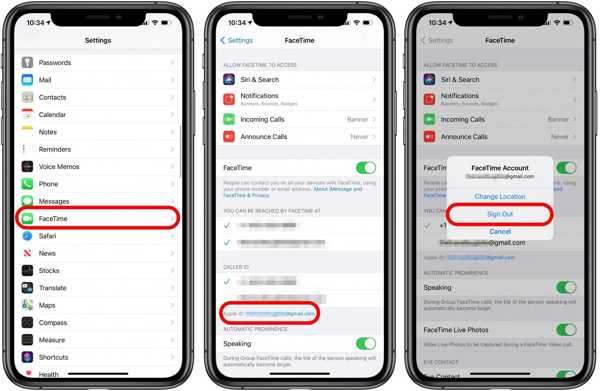
Back to the Settings app, and choose FaceTime.
Next, tap your Apple ID and choose Sign Out.
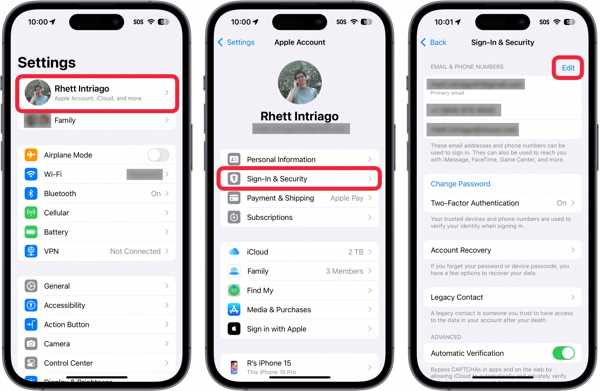
Tap on your profile at the top of the Settings app.
Choose Sign-In & Security.
Tap the Edit button in the Email & Phone Numbers section.
Press the Delete button with a minus icon next to the primary email.
Then, tap the Delete button.
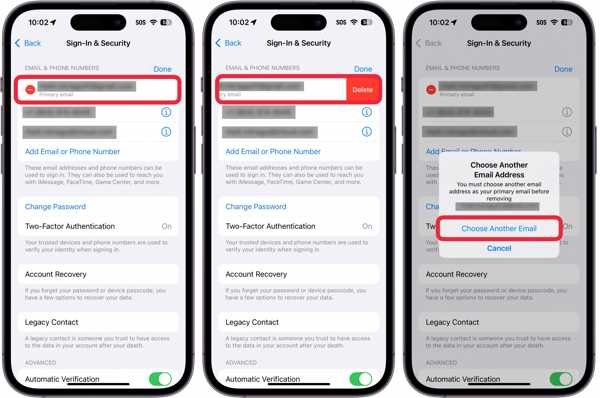
Pick Choose Another Email on the confirmation dialog.
Enter your iPhone passcode if prompted.
Input a new email address and tap Continue.
Access the email address and check the verification code.
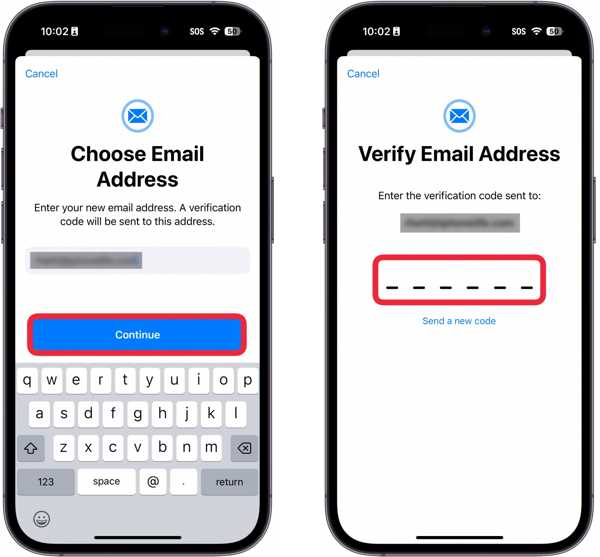
Input the code and complete changing the Apple ID account on your iPhone.
Part 3: How to Change Apple ID in App Store
According to Apple, you can change your Apple ID in the App Store without modifying the account on your iOS device. In other words, you can use a different Apple ID for your App Store and purchases.
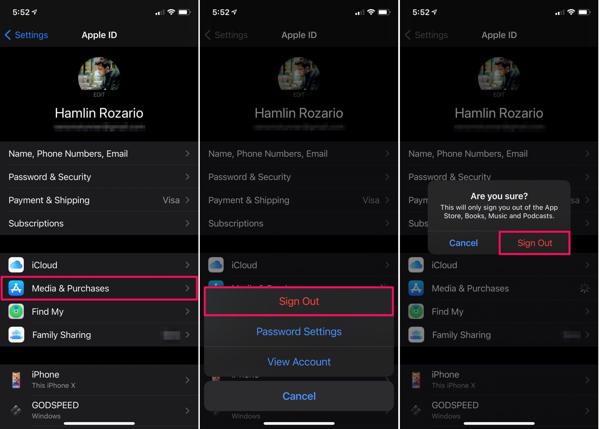
Run the Settings app and tap on your profile.
Choose Media & Purchases and tap the Sign Out button on the dialog.
Choose Sign Out on the confirmation dialog to confirm it.
Next, tap Media & Purchases again.
Choose Not [your name] on the pop-up.
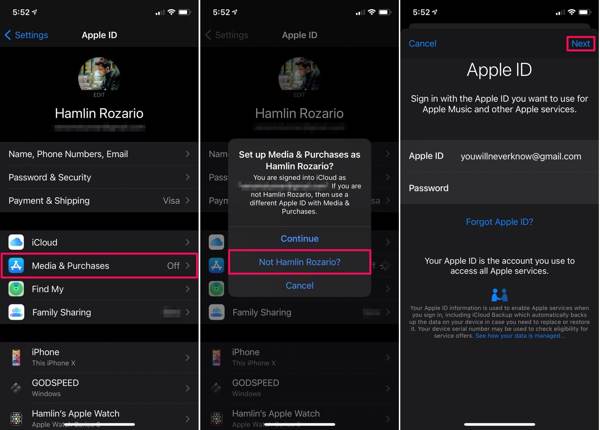
Now, input another Apple ID and password.
Finally, tap the Next button to change your Apple ID account.
Part 4: How to Change Apple ID on Mac/PC
If your iPhone or iPad is inaccessible or not in your hand, you can change your Apple ID in a web browser. This method requires your current Apple ID and password. Here are the steps to complete the job:
Visit https://account.apple.com/ in a browser.
Log in with your Apple ID and password.
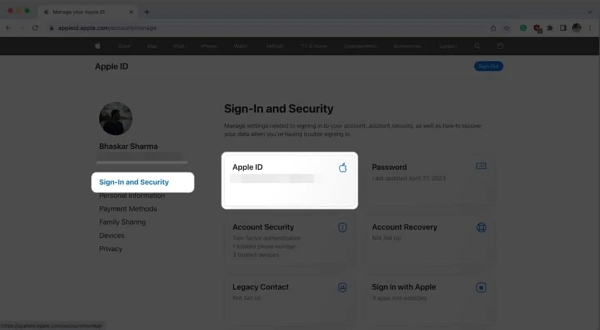
Go to the Sign-In and Security tab.
Click the Apple ID option.
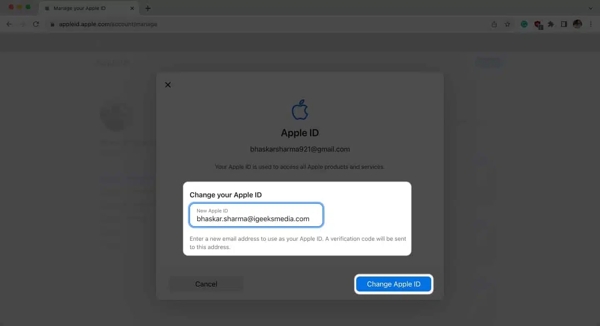
Enter a new email address and click Change Apple ID.
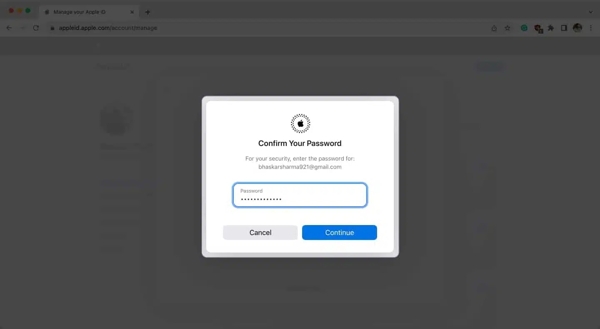
Next, input your current Apple ID password and click Continue.
Check the verification code in your email and enter it.
Finally, click the Continue button to confirm your action.
Part 5: What to Do If You Cannot Change Apple ID on iPhone
When changing your Apple ID on your iPad or iPhone, you may find that your account is greyed out and you cannot change it at all. That is very likely to happen after you set up Screen Time on your device. You can adjust the settings to resolve this problem.
Run your Settings app and choose Screen Time.
If prompted, enter your Screen Time passcode.
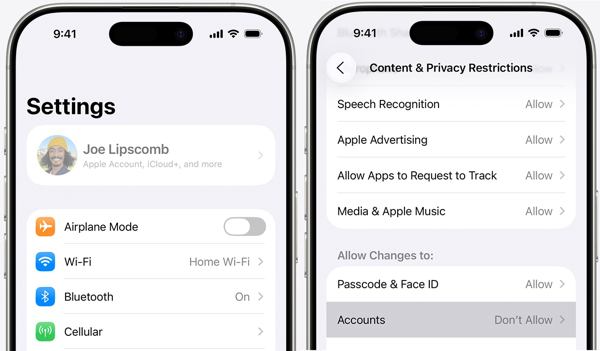
Choose Content & Privacy Restrictions.
If Content & Privacy Restrictions is enabled, locate the Allow Changes To section.
Tap Accounts, and set it to Allow.
Part 6: How to Change Apple ID Without the Password
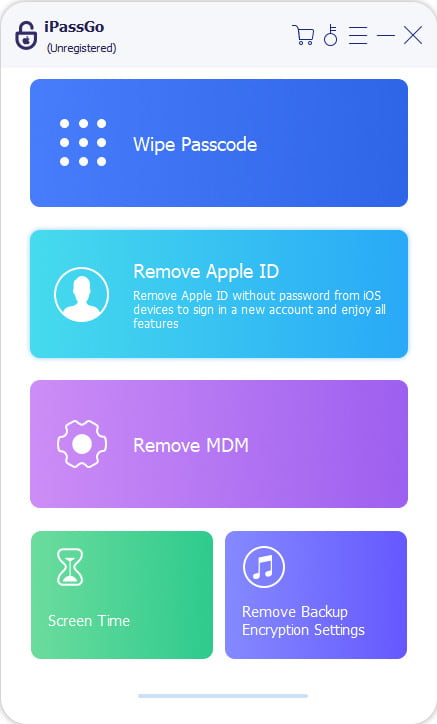
A more drastic solution to change your Apple ID on iPad or iPhone is to delete the old account. However, you must remember your Apple ID password. If you forget your password, you will need a powerful account removal software, like imyPass iPassGo. It is able to remove an old account from iOS without the password. The concise design makes it a good option for ordinary people.

4,000,000+ Downloads
Remove the old Apple ID from an iPhone in 3 steps.
Don't require your Apple ID password or iPhone passcode.
Perform a factory reset without restrictions.
Offer bonus features, like Screen Time bypass and MDM removal.
Support the latest versions of iOS and iPadOS.
How to Change Apple ID on Your iPhone Without a Password
Install Apple ID removal software
Start the Apple ID removal tool as long as you install it on your computer. It is available on Windows 11/10/8/7 and macOS 10.12 or above. Choose the Remove Apple ID mode to continue.
The process will erase all your data. To avoid data loss, you should back up your iPhone first.
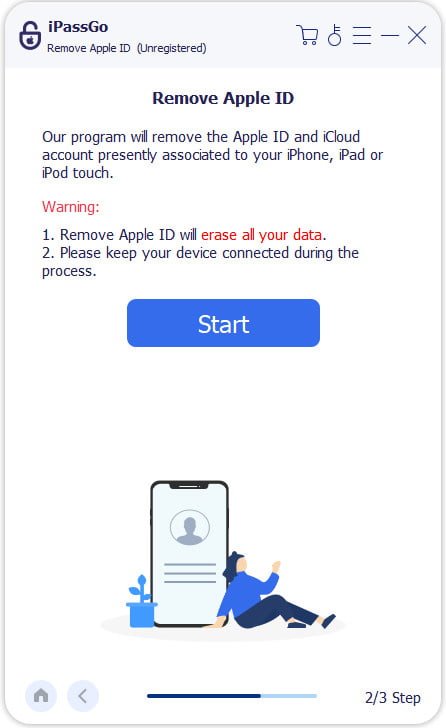
Connect to your iPhone
Plug your iPhone into your computer with a Lightning cable. If prompted, tap Trust on your screen to trust this PC. Then, the software will detect your device immediately. Click the Start button to proceed.
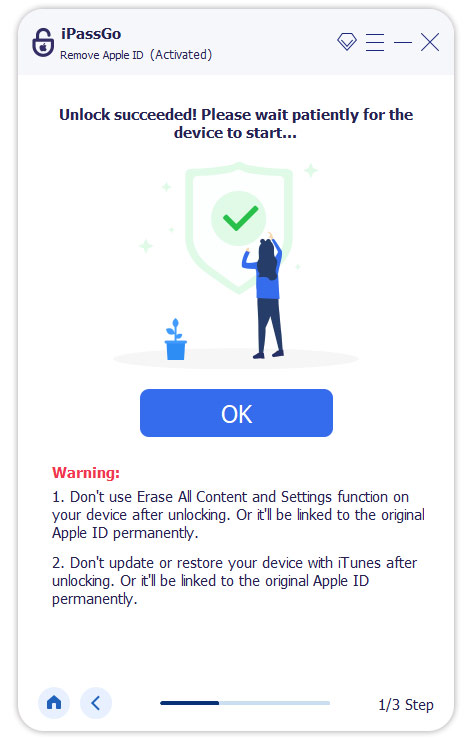
Remove old Apple ID
If Find My iPhone is disabled, the software will remove your Apple ID automatically. If Find My iPhone is enabled, follow the onscreen instructions to reset all settings on your device. Then, the software will start the removal process. When it is done, disconnect your iPhone.
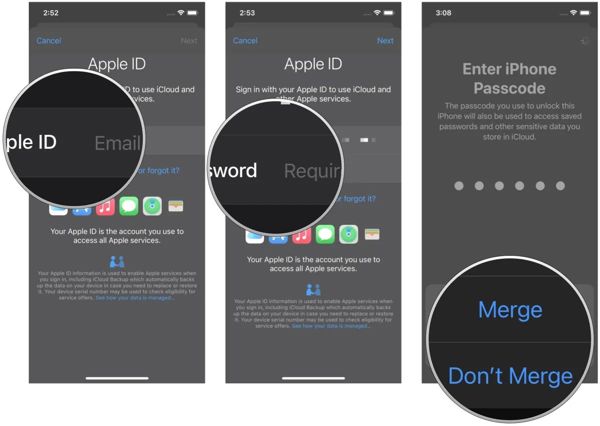
Change to a new Apple ID
Set up your iPhone as a new device following the initial instructions. Then, open the Settings app and tap Apple Account at the top. Choose the Sign in Manually option. Type in a new Apple ID and password. When prompted, enter your iPhone passcode. Then, decide to Merge or Don't Merge your data.
You May Also Like:
Conclusion
This guide explained how to change your Apple ID on iPhone, iPad, and online. Firstly, you'd better learn what will happen after you change your account. If you are sure, follow our steps to switch to another Apple ID on your device. If your iOS device is inaccessible, you can complete the job online. imyPass iPassGo is an easy way to remove the old Apple account without a password, so that you can sign in with a new Apple ID.

Samuel specializes in password security and digital privacy. He used to work as a cybersecurity consultant for small businesses to protect digital assets. With certifications in Cybersecurity and Ethical Hacking, he turns complex security topics into easy-to-follow advice. He also enjoys sharing password tips to help users protect their accounts more confidently.
Hot Solutions
-
Unlock iOS
-
iOS Tips
-
Unlock Android
-
Password Tips
