How to Create an Apple ID with 7 Effective Methods
![]() Samuel Spenser Published on May 27, 2026Unlock iOS3-min reading
Samuel Spenser Published on May 27, 2026Unlock iOS3-min reading
When you get an Apple device, you will be asked to create a new Apple ID. It plays the key role in the Apple ecosystem, like activating an Apple device, accessing Apple services, and purchasing content from the App Store. Luckily, it is not difficult to make a new account and sign in to your device. This article shares multiple ways to complete the job on your iPhone, iPad, MacBook, PC, and online.

In this article:
- Part 1. What Is an Apple ID
- Part 2. How to Create an Apple ID on iPhone/iPad
- Part 3. How to Create an Apple ID on a Mac
- Part 4. How to Create an Apple ID Online
- Part 5. How to Sign up New Apple ID on Windows
- Part 6. How to Secure a New Apple ID
- Part 7. Bonus Tip: How to Remove Apple ID Without Password
Part 1. What Is an Apple ID
An Apple ID account is a unique login for Apple products and services. It combines an email address or phone number and a password. Plus, you need to add your personal and payment information to your account.
You can think of your Apple ID as the digital passport to the Apple ecosystem. It is used to access various Apple services and devices, as well as sync your data across your devices. In short, it acts as your unique identifier across the Apple world.
Part 2. How to Create an Apple ID on iPhone/iPad
How to Create an Apple ID on a Used iPhone/iPad
If you have set up your iPhone or iPad, you can create an Apple ID for free. Bear in mind that you must sign out of the old account. This method requires an accessible iOS device and a stable internet connection.
Open the Settings app from your home screen.
If you have signed in to an account, tap on your profile, and tap Sign Out at the bottom. Enter your Apple ID password and sign out of the account following the onscreen instructions.

Tap the Apple Account option at the top of the screen
Next, choose Don't have an Apple Account.
Tap the Create a Free Apple Account option.
Choose your age range, and enter your name and birthday.
Tap the Continue button to proceed.
Type in your current email address and tap Continue.
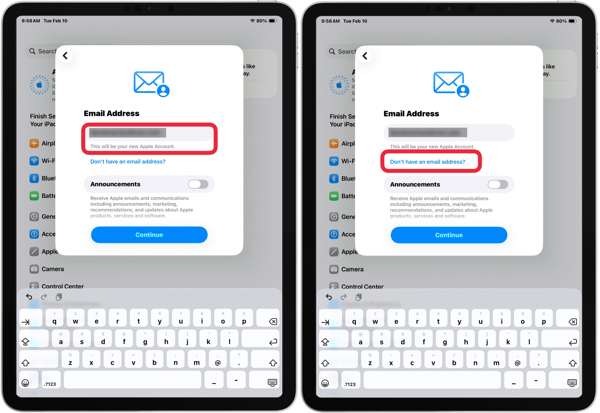
If you don't have an email address, tap Don't have an email address to make an iCloud email address.
Then, set an Apple account password, verify it, and tap Continue.
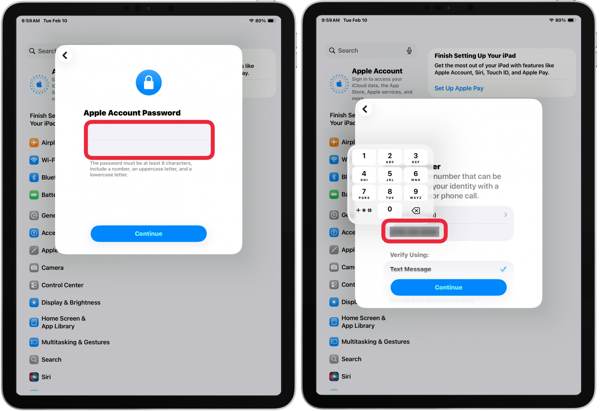
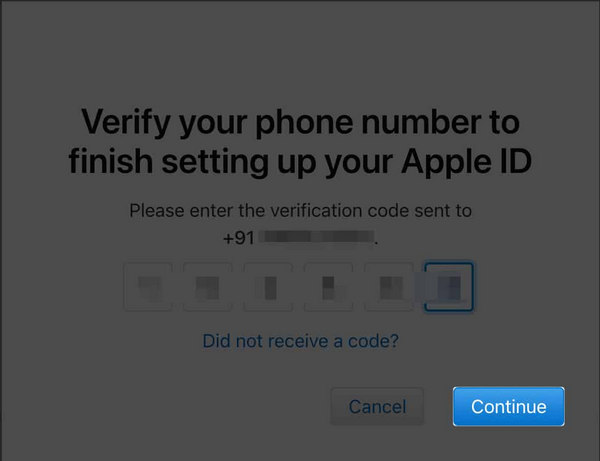
Input your phone number and tap Continue.
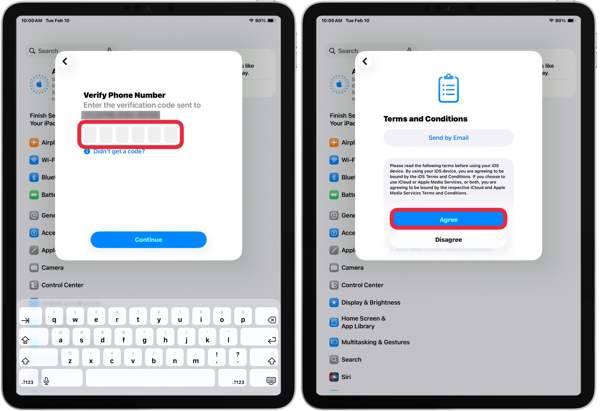
When you receive the verification code, enter it and tap Continue.
Read the terms and conditions, and tap Agree to accept them.
When prompted, enter your Apple Account password and verify it.
Unlock your device and go to the Settings app.
Tap on your profile and tap Verify Email Address.
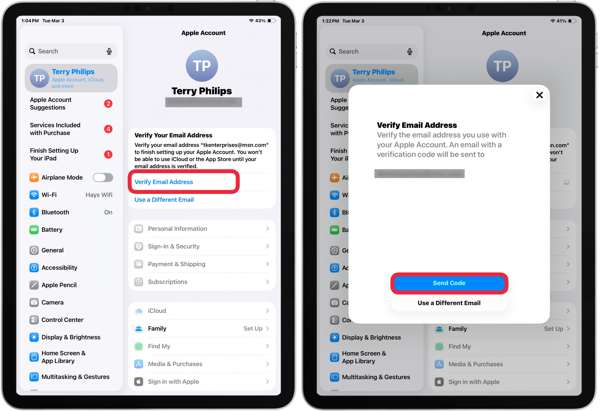
Check your Apple Account email and tap Send Code.
Access your email and check the 6-digit code.
Enter the code, and finish new Apple ID creation.
To use your account, go to the Apple Account screen and tap Apple Account Suggestions to set payment methods, set up Find My, and more.
How to Make an Apple ID on a New iPhone/iPad
When you get a new iPhone or iPad, you will see the Hello screen after turning it on. You can follow the assistant to set it up easily. During the process, you are asked to generate a new Apple ID.
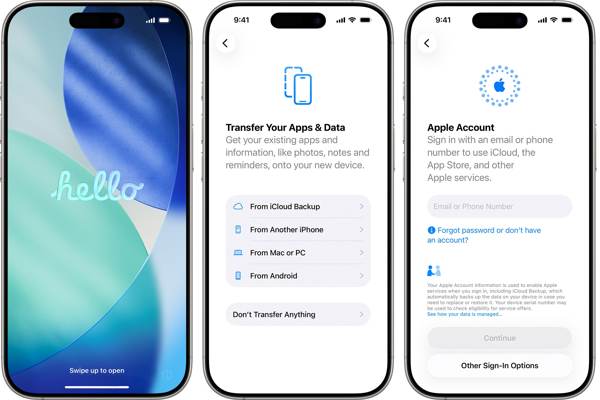
Power on your new iPhone.
Start setting it up following the onscreen instructions.
Make sure to connect your device to a Wi-Fi network or mobile network.
Choose your age range, set up Face ID or Touch ID, and create a lock screen passcode.
When you reach the Apple Account screen, tap Forgot password or don't have an account.
Choose Create a Free Apple ID.
Set your information and enter your email address.
Next, input an Apple Account password, verify it, and tap Continue.
Offer your phone number to receive the verification code.
Enter the code and continue.
Complete the setup.
How to Register an Apple ID in App Store
Some people prefer to use a different Apple Account for the App Store. It can let you change App Store country if you create an Apple ID from another country or region. In other words, you can register an Apple ID in your App Store on your iPhone or iPad. If you haven't added an account on your iOS device, the account made in the App Store will be added to your iPhone.
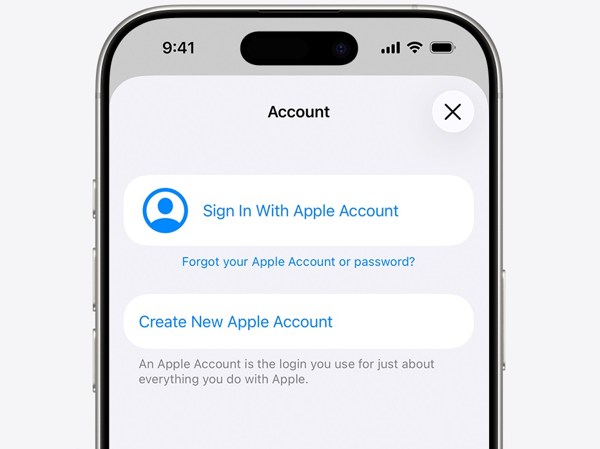
Run the App Store app on your iPhone.
Tap My Account.
Choose Create New Apple Account.
Input an email address.
Create a strong password, verify it, and continue.
Set your country or region following the onscreen prompts.
Provide your payment method and billing information, and tap Next.
Confirm your phone number and tap Next.
Finally, verify your email address associated with your Apple Account.
Part 3. How to Create an Apple ID on a Mac
With a MacBook, iMac, or other device, you can create an Apple ID, too. After setup, you can get the job done with the System Settings app. The steps outlined below can get you started quickly.
Click the Apple menu and choose System Settings.
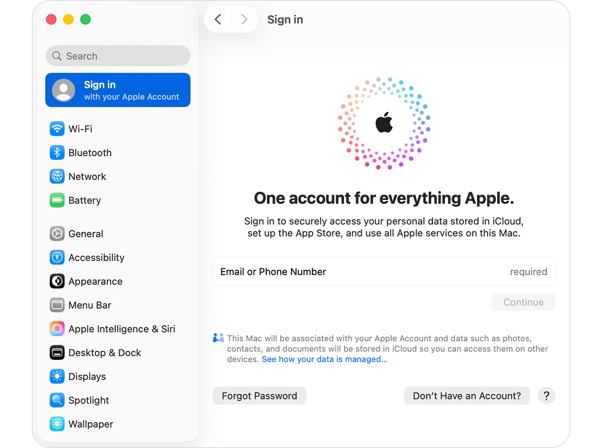
Click Sign In at the top left side and choose Don't Have an Account.
Enter your birthday and other information and click Next.
Input your email address for the new Apple Account.
Create a password and re-enter it.
Click the Next button to proceed.
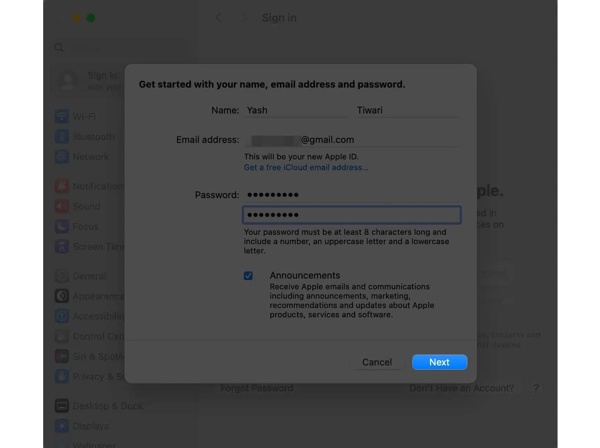
Enter your phone number, select the way to receive the verification code, and click Next.
As OTP verifies, you will be presented with the terms and conditions.
Check the box and click the Agree button.
If prompted, enter your Mac login password.
Extended Reading:
Part 4. How to Create an Apple ID Online
Without an Apple device, you can create an Apple ID online. The official Apple Account website allows you to make an Apple ID account with your email address and phone number. Then, you can log in to the account on your Apple devices.
Go to account.apple.com in a browser.
Click the Create your Apple Account option at the top of the website.
Enter your name, country, and birthday on the Create Your Apple ID page.
Type in your email address for the new Apple Account.
Create a password and confirm it.
Next, input your phone number and select the verification method.
Set the captcha and click the Continue button.
Enter the OTP sent to your email address and click Continue to conclude the process.
Part 5. How to Sign up New Apple ID on Windows
In the past, you could also sign up for a new Apple Account in iTunes on Windows. If you stop using iTunes, make a new account in Apple Music. The workflows are not complicated, and we share them below:
How to Create an Apple Account in iTunes
Open the latest version of iTunes on your desktop.
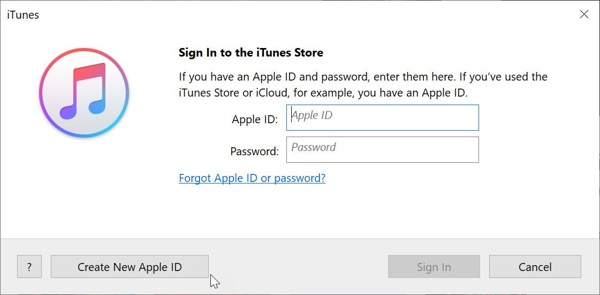
Go to the Account menu and choose Sign In.
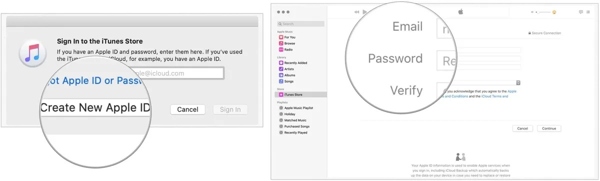
On the pop-up dialog, click the Create New Apple ID button.
Type in your email address, a password, and confirm it.
Click the Continue button to move on.
Next, fill out the form according to your personal information.
Click the Continue button, add your payment method, and hit Continue.
Then, verify your email address.
How to Create an Apple ID in Apple Music
Open the Apple Music application.
Go to the Account menu and choose Sign In.
Click the Create New Apple ID button.
Enter your email address and password, and verify the password.
Click the checkbox to agree to the terms and conditions.
Click the Continue button.
Add your personal information and hit Continue.
Offer your payment information following the prompts.
Click the Continue button.
Provide your phone number to verify your identity and click Continue.
Input the verification code and verify your email address.
Part 6. How to Secure a New Apple ID
Since the Apple Account is crucial in Apple's ecosystem, you'd better secure your account. Fortunately, Apple has introduced a few features to protect Apple IDs on your iPhone, iPad, and Mac.
How to Set up Two-factor Authentication
Precondition: iOS 13.4, iPadOS 13.4, or macOS 10.15.4 and later
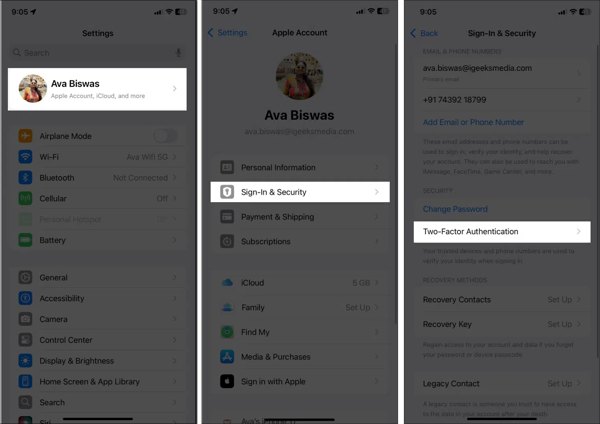
Open the Settings or System Settings app on your iPhone or Mac.
Tap on your profile or click Apple Account.
Go to Sign-In & Security.
Hit Turn On Two-Factor Authentication.
Choose Continue on the dialog.
Enter your phone number and select a security method to receive the verification code.
Finally, provide the code and complete the process.
Part 7. Bonus Tip: How to Remove Apple ID Without Password
To create a new Apple ID, you have to remove the old account from your iOS device. If you forgot your Apple ID password, imyPass iPassGo can help you resolve this problem. It is able to remove Apple ID from an iPhone or iPad without the password.

4,000,000+ Downloads
Remove an old Apple Account from an iPhone or iPad in three steps.
Won't ask your lock screen passcode or Apple ID password.
Offer bonus features, like MDM bypassing.
Support the latest editions of iPhone and iPad.
How to Remove Apple ID Without a Password
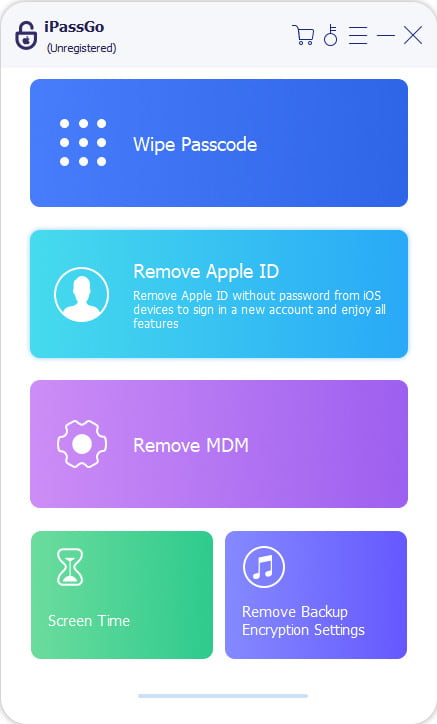
Install Apple ID remover
Launch the Apple ID removal software once you install it on your PC. There is another version for Mac. Choose the Remove Apple ID mode to proceed.
Connect to your iPhone
Plug your iPhone into your computer with a Lightning cable. Make sure to trust this PC. Then, the software will detect your device and load the device information.
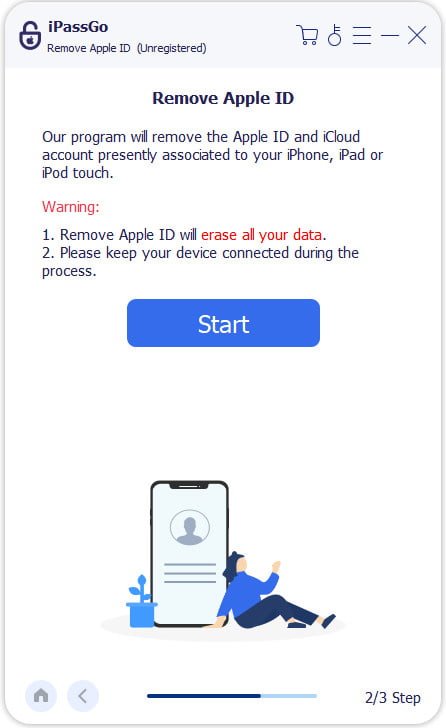
Remove Apple Account
Click the Start Now button to begin removing the Apple account if Find My iPhone is disabled. If Find My iPhone is enabled, follow the onscreen instructions to reset all settings on your device. When all has settled, click Confirm Again and initiate the process.
Note:
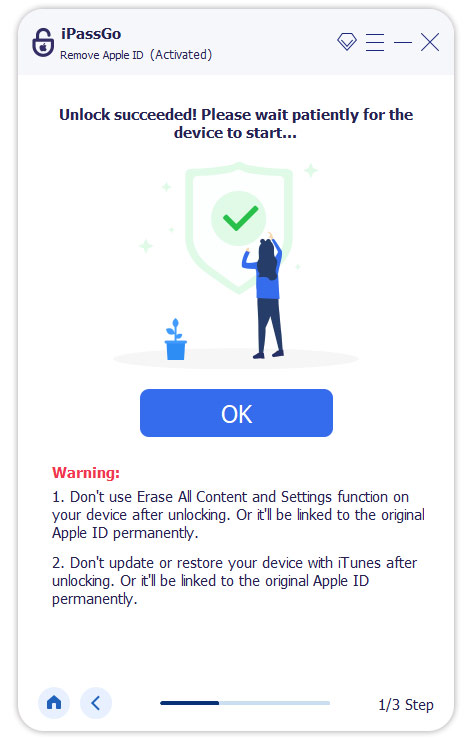
When it is done, set up your iPhone and create a new Apple ID.
Conclusion
This article shared multiple ways to create a new Apple ID on an iPhone, iPad, Mac, Windows, and online. If you just enter Apple's ecosystem, follow our steps to make a new account and use your device and Apple services. imyPass iPassGo is a great way to remove an old Apple ID from an iOS device without a password before making a new account.

Samuel specializes in password security and digital privacy. He used to work as a cybersecurity consultant for small businesses to protect digital assets. With certifications in Cybersecurity and Ethical Hacking, he turns complex security topics into easy-to-follow advice. He also enjoys sharing password tips to help users protect their accounts more confidently.
Hot Solutions
-
Unlock iOS
-
iOS Tips
-
Unlock Android
-
Password Tips
