


 Solution
 Support Center
 About Us
 Contact
How to Manage Apple ID on iPhone/iPad/Mac/PC/Online
 Samuel Spenser Published on October 14, 2026Unlock iOS5-min reading
It is well known that an Apple ID is the only key to activate an iOS device and access all Apple services, from FaceTime to iMessage, from iCloud to Find My. When creating an Apple Account, you need to provide your personal information, set up a payment method, and provide other information. Of course, you can change the information later. This concrete guide shares how to manage your Apple ID account on your iPhone, iPad, MacBook, PC, or online.

In this article:
Part 1: How to Manage Apple ID on iPhone/iPad
Once you create or add an Apple Account on your iOS device, the information will be loaded, from the demographic information to payment methods. Of course, you can manage your Apple ID on your iPhone easily.
Open the Settings app on your iPhone.
Tap on your profile.
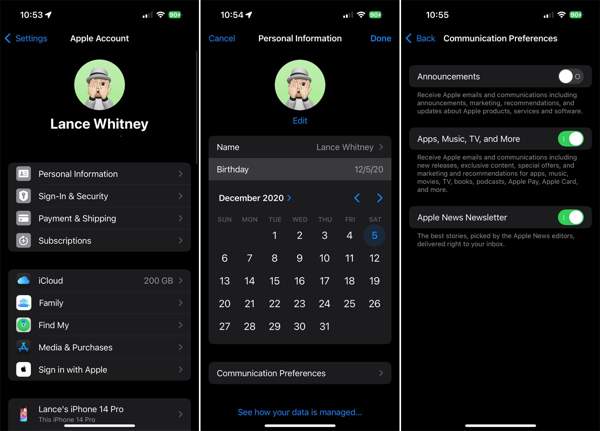
Now, you can manage your Apple ID account:
Manage personal information: Choose Personal Information, and change your name, birthday, and communication preferences.
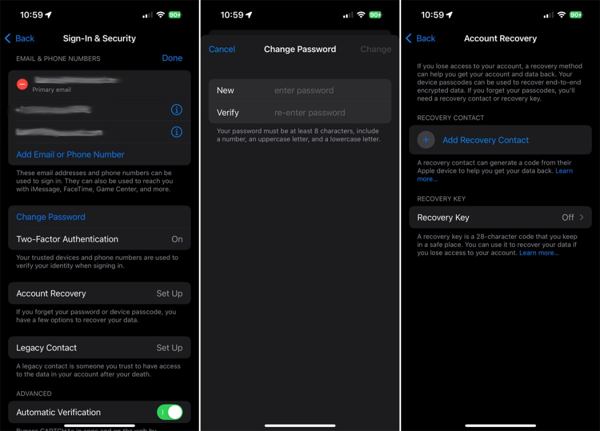
Manage Apple ID password: Choose Sign-In & Security. To enhance account security, tap Two-Factor Authentication and turn it on. If you want to change your Apple ID password, tap Change Password, and enter the new password. Here, you can also turn on Recovery Key or Add Recovery Contact.
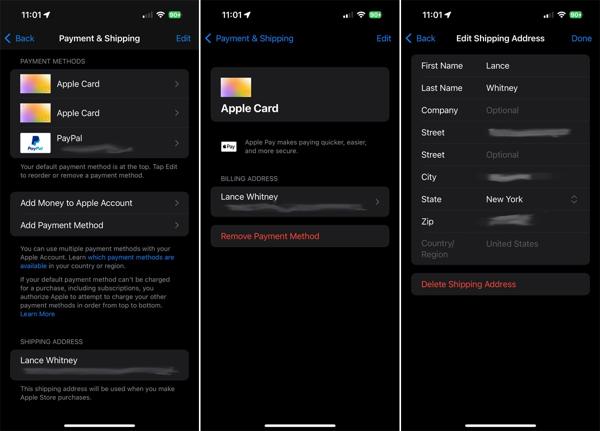
Manage payment methods: Choose Payment & Shipping. Tap Add Payment Method to add a new payment method or tap an outdated payment and delete it.
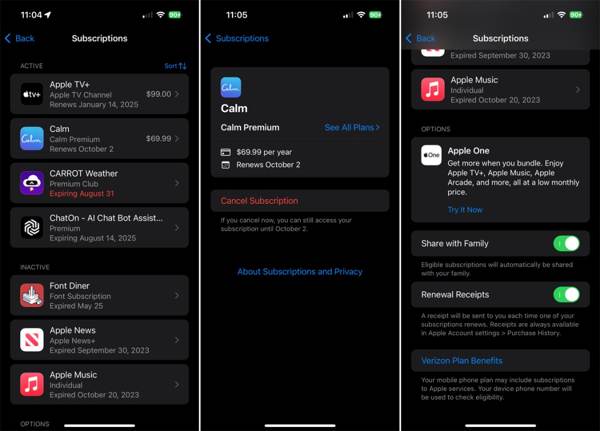
Manage subscriptions: Choose Subscriptions and see all subscriptions with your Apple ID. To cancel a subscription, select it and tap Cancel Subscription.
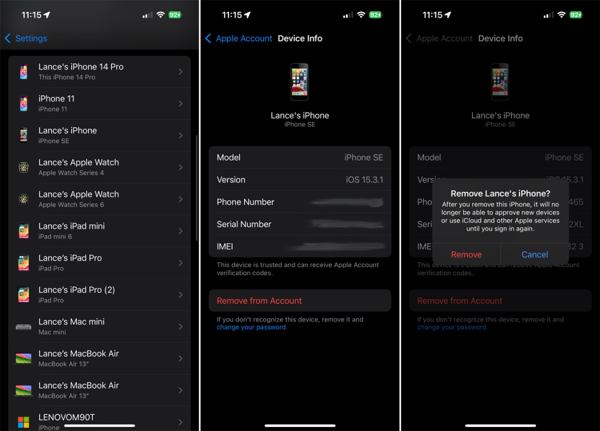
Manage devices linked to your Apple ID: Scroll down and look at all Apple devices linked to the same account. Select a device and check the device information. If you want to remove it from the account, tap Remove from Account.
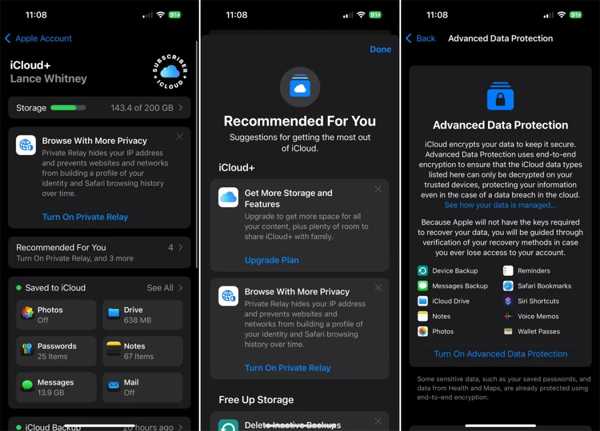
Manage iCloud: Choose iCloud and manage the data saved to iCloud.
Part 2: How to Manage Apple ID on Mac
If you have added your account to your MacBook, you can manage your Apple ID account on your Mac after logging in to your computer. The account management is very similar to the workflow on iOS devices.
Click the Apple menu and choose System Settings or System Preferences.
Click Apple Account or Apple ID.
Manage your Apple ID on Mac:
Manage personal information: Choose Personal Information and update your name, birthday, and more.
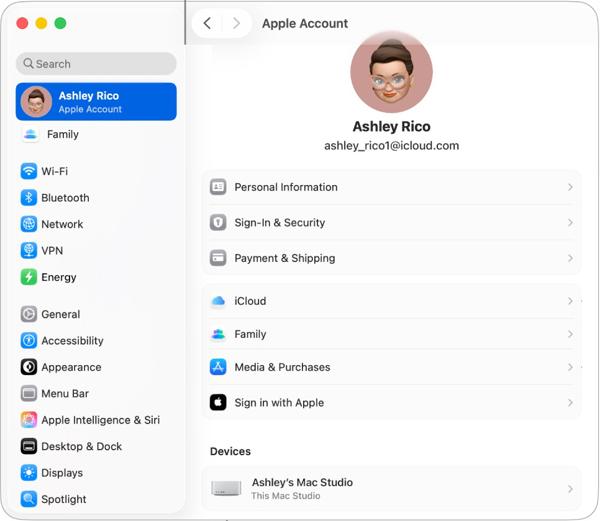
Manage your password: Choose Sign-In & Security and set the security for your password or change your Apple ID password.
Manage payment methods: Choose Payment & Shipping and delete a payment method or add a new one.
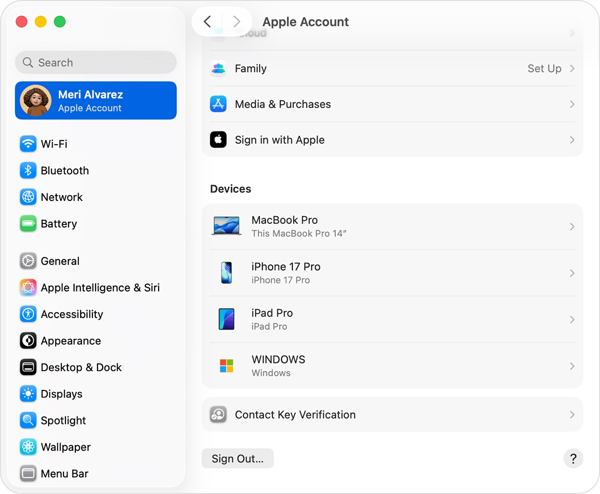
Manage devices linked to your account: Scroll down to the Devices section, choose a device, and see the device information or delete it from the account.
Part 3: How to Manage Apple ID on PC
While the Apple ID is crucial in the Apple ecosystem, you may use it on a PC, too. When setting up iTunes on your PC, for instance, you need to sign in to an Apple Account. Therefore, you can manage your Apple ID on your PC.
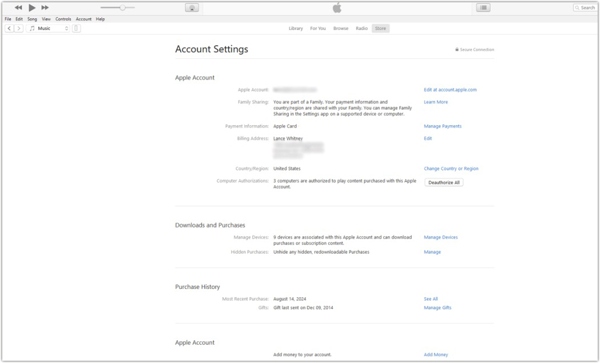
Open the latest version of iTunes on your PC or macOS Mojave and earlier.
Go to the Account menu and choose View My Account.
Locate the Apple Account section.
Then, manage your Apple ID:
Manage payment methods: Click the Manage Payments button, and remove an existing method or add a new payment.
Manage your country: Click the Change Country or Region and select a new country.
Manage devices: Click the Manage Devices button to manage the Apple devices associated with the same Apple Account.
Part 4: How to Manage Apple ID Online
Even if you don't have your Apple device currently, you can manage your Apple ID account on the Apple Account portal. The web page lets you manage personal information, passwords, payments, devices, and more.
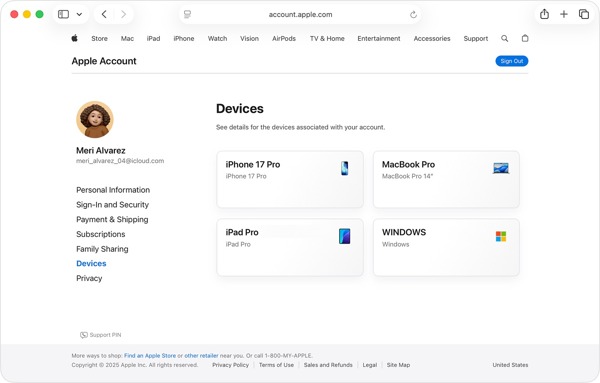
Go to https://account.apple.com/ in a browser.
Log in with your Apple Account and password.
Here you can manage your Apple ID online:
Manage personal information: Choose the Personal Information tab, and change name, birthday, location, and language.
Manage your password: Choose the Sign-In and Security tab and change your Apple ID password.
Manage payment methods: Choose the Payment & Shipping tab, remove old payment methods, and add a new one.
Manage your Apple devices: Choose the Devices tab and select a desired device. Then, check the device information or remove it from your account.
Extended Reading:
Part 5: Bonus Tip: How to Remove Old Apple ID from iPhone Without Password
If you forgot your Apple ID password, you cannot manage your Apple ID on your iPhone. Alternatively, you should remove the outdated Apple Account with imyPass iPassGo, and then create a new account on your iOS device.

4,000,000+ Downloads
Manage and remove an Apple ID without a password.
Easy to use and complete the process in three steps.
Include bonus features, like unlocking Screen Time.
Compatible with the latest editions of iOS and iPadOS.
How to Remove an Old Apple ID from Your iPhone Without the Password
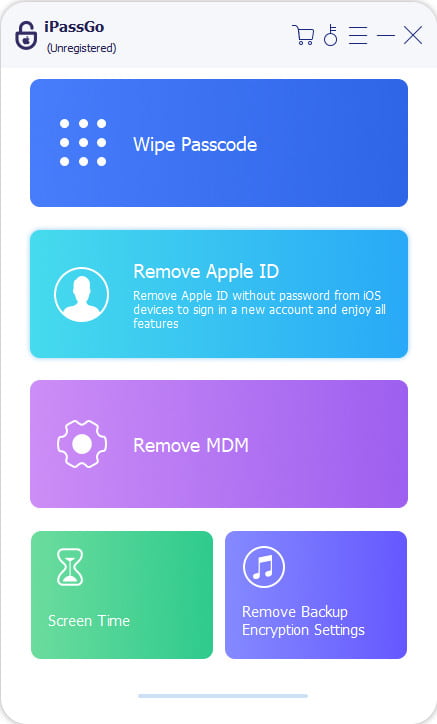
Step 1: Install Apple ID manager
Launch the Apple ID manager software once you install it on your computer. It is available on Windows 11/10/8/7 and macOS 10.12 or above. Choose the Remove Apple ID mode to continue.
Step 2: Connect to your iPhone
Link your iPhone to your computer with a Lightning cable and make sure to trust this computer. Next, click the Start Now button after your device is detected.
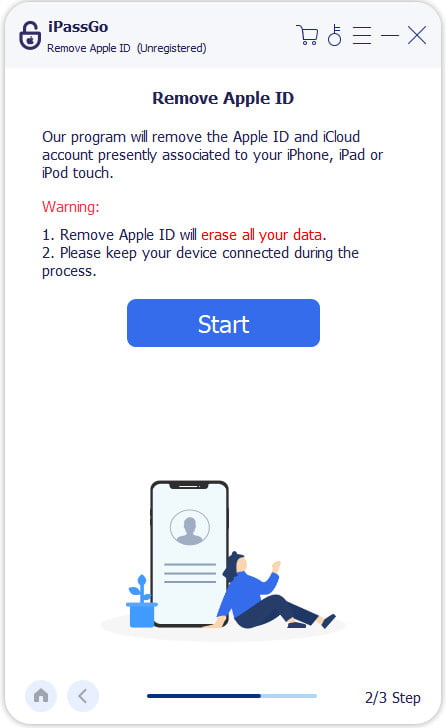
Step 3: Remove Apple ID
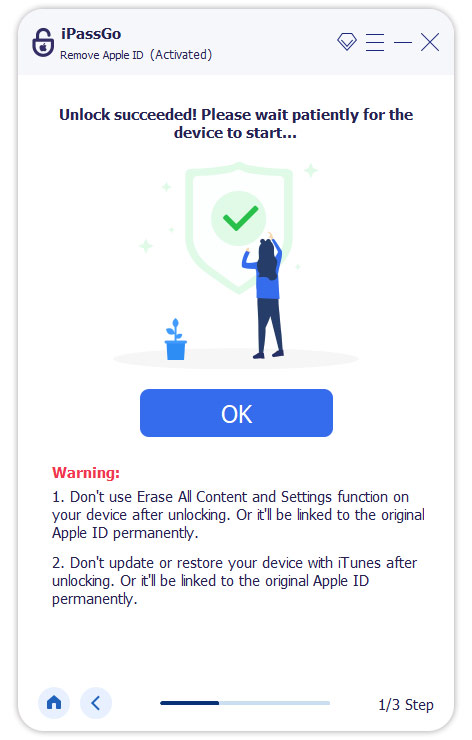
If Find My iPhone is enabled, follow the on-screen instructions to reset all settings on your device. Then, click the Confirm Again button and initiate the process. If Find My iPhone is disabled, the software will automatically remove the Apple ID.
Conclusion
This guide explained how to manage your Apple ID on your iPhone, iPad, Mac, PC, or online. Clearly, you can manage your account on an Apple device associated with the Apple ID. Without your Apple device, the Apple Account portal enables you to manage the information in a browser. imyPass iPassGo can remove an account from an iOS device without the password.
Samuel specializes in password security and digital privacy. He used to work as a cybersecurity consultant for small businesses to protect digital assets. With certifications in Cybersecurity and Ethical Hacking, he turns complex security topics into easy-to-follow advice. He also enjoys sharing password tips to help users protect their accounts more confidently.
Hot Solutions
-
Unlock iOS
-
iOS Tips
-
Unlock Android
-
Password Tips


